Showing posts with label 8x8. Show all posts

Thursday, June 19, 2014

8x8 Mini Album

Well I finally finished it.  I wasn't quite sure if I was just going to finish it or just leave some blank pages for Katie to finish.  The Album is an 8x8 album with the 8x8 pages and the 2x4 and 4x6 pages in between the 8x8 pages.


I used the last of the DCWV's Citrus Stack which I had included in my June Counterfeit Kit.  Then I found on sale the Citrus Stack's matching cardstock and picked that up.  I was going to just include cardstock but I really love how this turned out with the matching cardstock.


Each page is inked with Vintage Photo.  I did some samples of blue, red orange and yellow but decided on the Vintage Photo as not every page has the same colors in it.


I pulled out my punches to decorate each page with so not every page is exactly the same.  There is lots of room for her to journal.


So here is just a sampling of the 42 pages that are in this album. 

Thanks for stopping by.

Counterfeit Kit Challenge - June
5 - 12x12 Layout
2 - 8 1/2 x 11 Layout
2 - 6x8 - project life
1 - 8x8 Album - 22 - 8x8 pages and  20 - 2x6 and 4x6 pages
Recipe:
Paper: Counterfeit Kit - DCWV - Citrus Stack and Citrus Cardstock Stack: Added to Kit - Recollections white cardstock
Ink: Tim HOltz - Vintage Photo
Punches: Stampin' Up - Decorative Label, Tag, Scallop Trim Border, Eyelet Border, Designer label;
Martha Stewart - Scallop Circle, Cherish Border. and Eyelet Lace Border
Misc.: Adhesive, Scraps of Ribbon, Tiny attacher and Zots

Wednesday, January 2, 2013

8x8 Album

Hi Everyone! Today I want to share with you a few 8x8 Layouts - this is kind of a long post as I have 8 layouts to share. The Scrappers Challenge Yahoo group has a template for an 8x8 album template using 12x12 paper and cutting it down. Well I'm cleaning out my left over paper file to make these layouts.  I keep my paper from other projects in one of the plastic scrapbooking plastic totes that hold 12x12 paper and it's running over. 
 
First up is a simple page using squares it page 3 in the template.  I already had the scalloped paper and just cut it down to fit the rest of my squares.
 
 
With my 8x8 pages I try to do a 2x8 and two 4x6's to finish off that page.  I had enough that I was able to piece the 2x8 page together. 

 
Here is the second set of pages using the scallop paper.

 
I added a tag to the 2x8 page and put the scallop paper in the middle. 

 
I ran out of scallop paper so I used regular card stock and the corner punch.  I added a tag to this page with a couple of pieces of ribbon.  I left the bottom of the tag free so that a picture can slide behind the tag.
 
 
I added the jewelry punch to this set of pages along with an epoxy sticker I had left over.
 

OK I have 3 pages using the same template along with 3 pages using the 2x8 and two 4x6 layout done.

As I was cleaning up I found another piece of the dream paper.  It was large enough that I could use template #6.  I used a punch on the edge of this white cardstock.


I punched several pieces of white card stock to make the borders on this set of pages.  I normally keep my white scarps of card stock for stamping sentiments.  I think I can sacrifice a few pieces for this layout. 


I kept the embellishment's to a minimum as this is another set of gift layouts that they will add their own journaling to. Out of 8 pages I only cut one sheet of 8 1/2" x 11" paper, everything else was in my left over paper file. 

Thanks for stopping by.

Recipe:
Paper: Pattern Paper: Piggy Tales - Row Row Row Your Boat "Dream" "Life" and "Your"; DCWV - Pink and white card stock
Ink: Inkadinkadoo - Olive Green
Punches: Stampin' Up - Jewelry Tag, Large Tag; Martha Stewart - Cherish punch around the page, photo corner punch
Ribbon: Unknown Scraps
Epoxy Shapes - Piggy Tales - Row Row Row Your Boat collection
Misc.: adhesive, zots

Friday, June 15, 2012

It is a beautiful day

It's Unity Friends  with Flair day and I'm sharing a layout today.  I really like to use their stamps on layouts.  Today I've used the April 2012 Kit of the Month - Follow your own, sun journal spot and the "It is a beautiful day" sentiment.


I stamped the sun journal spot then cut it out.  I stamped the "It is a beautiful day" with olive green, punched it out and used pop up dots behind it.  I used the same punch for the blue accents and the border under the green mat. 


Since this is an 8x8 layout and I some scraps left over I made a corresponding page for the 4x6 photo mats.

Thanks for stopping by.

Disclosure: I am not affiliated with any of the products mentioned.


Cutting Instructions:
8x8 Page:
Background: 8x8 peach cardstock
Pattern Paper: 5 1/4 x 7 3/4
Green cardstock: 5 1/4 x 3 1/4
White Photo Mat: 3 1/4 x 4 1/4
Blue cardstock: Decorative Label punch - punch 5
Brown cardstock: 1/2 x 7 3/4 then punch.

4x6 Pages:
Background: Orange - Cut two 4x6 and one 2x6
Pattern Paper: cut one of each size: 1 1/8 x 5 7/8, 3 1/4 x 5 1/2, 1 1/2 x 2

Brown: 1/2 x 5 7/8, 1/2 x 5 1/2 and 1 x 8

Recipe:
Cardstock: brown, white, blue, green and peach; Pattern Paper - DCWV Nana's Nursery Baby Girl Collection
Stamps: Unity Kit of the Month - April 2012 {Follow your own}
Ink: Inkadinkadoo - navy blue, olive green
Punch: Stampin' Up - Decorative Label, Scallop Edge, scissors


Misc: adhesive, pop up dot

Tuesday, June 5, 2012

Falling Flowers Layout

I had a few of the punched flowers that I've turned into a couple of 8x8 layouts. My photo mat is 4 1/4 x 6 1/4 .


I again used a bunch of scraps to stamp and punch my flowers.  The flowers are on pop up dots and each center has a few of the My & My Big Ideas beads in them.


Thanks for stopping by.
Recipe:
Paper: Scraps of cardstock in pink, yellow and orange, green,white, browns, purple
Stamp: Stampin' Up - Punch Potpourri
Ink: Stampin' Up - Rose Red, Razzleberry, Riding Hood Red, Melon Mambo, Cherry Cobbler, Tangerine Tango, Poppy Parade, Pumpkin Pie, Dusty Durango; Versa Magic - Coffee Bean, Midnight Blue
Punch: Martha Stewart - Branch punch,; Stampin' Up - , Boho Blossoms
Misc: Glossy Accents, Me & My Big Ideas - beads, Pop up dots, adhesive

Friday, March 9, 2012

Lady Bug

The February Unity Kit of the Month has the cutest Lady Bug Frame in it.  I created this layout just so I could use this stamp.


Thanks for stopping by.

Click here for the cut file

Recipe:
Paper: Cardstock - green, black and red; Pattern paper - DCWV - The Stack 6
Stamp: Unity February KOTM {lucky to have you} - ladybug frame
Ink: Stampin' Up - Riding hood red, black
Punch: Stampin' Up
Cricut Cartridge: Doodlecharms and Elegant Edges

Monday, February 13, 2012

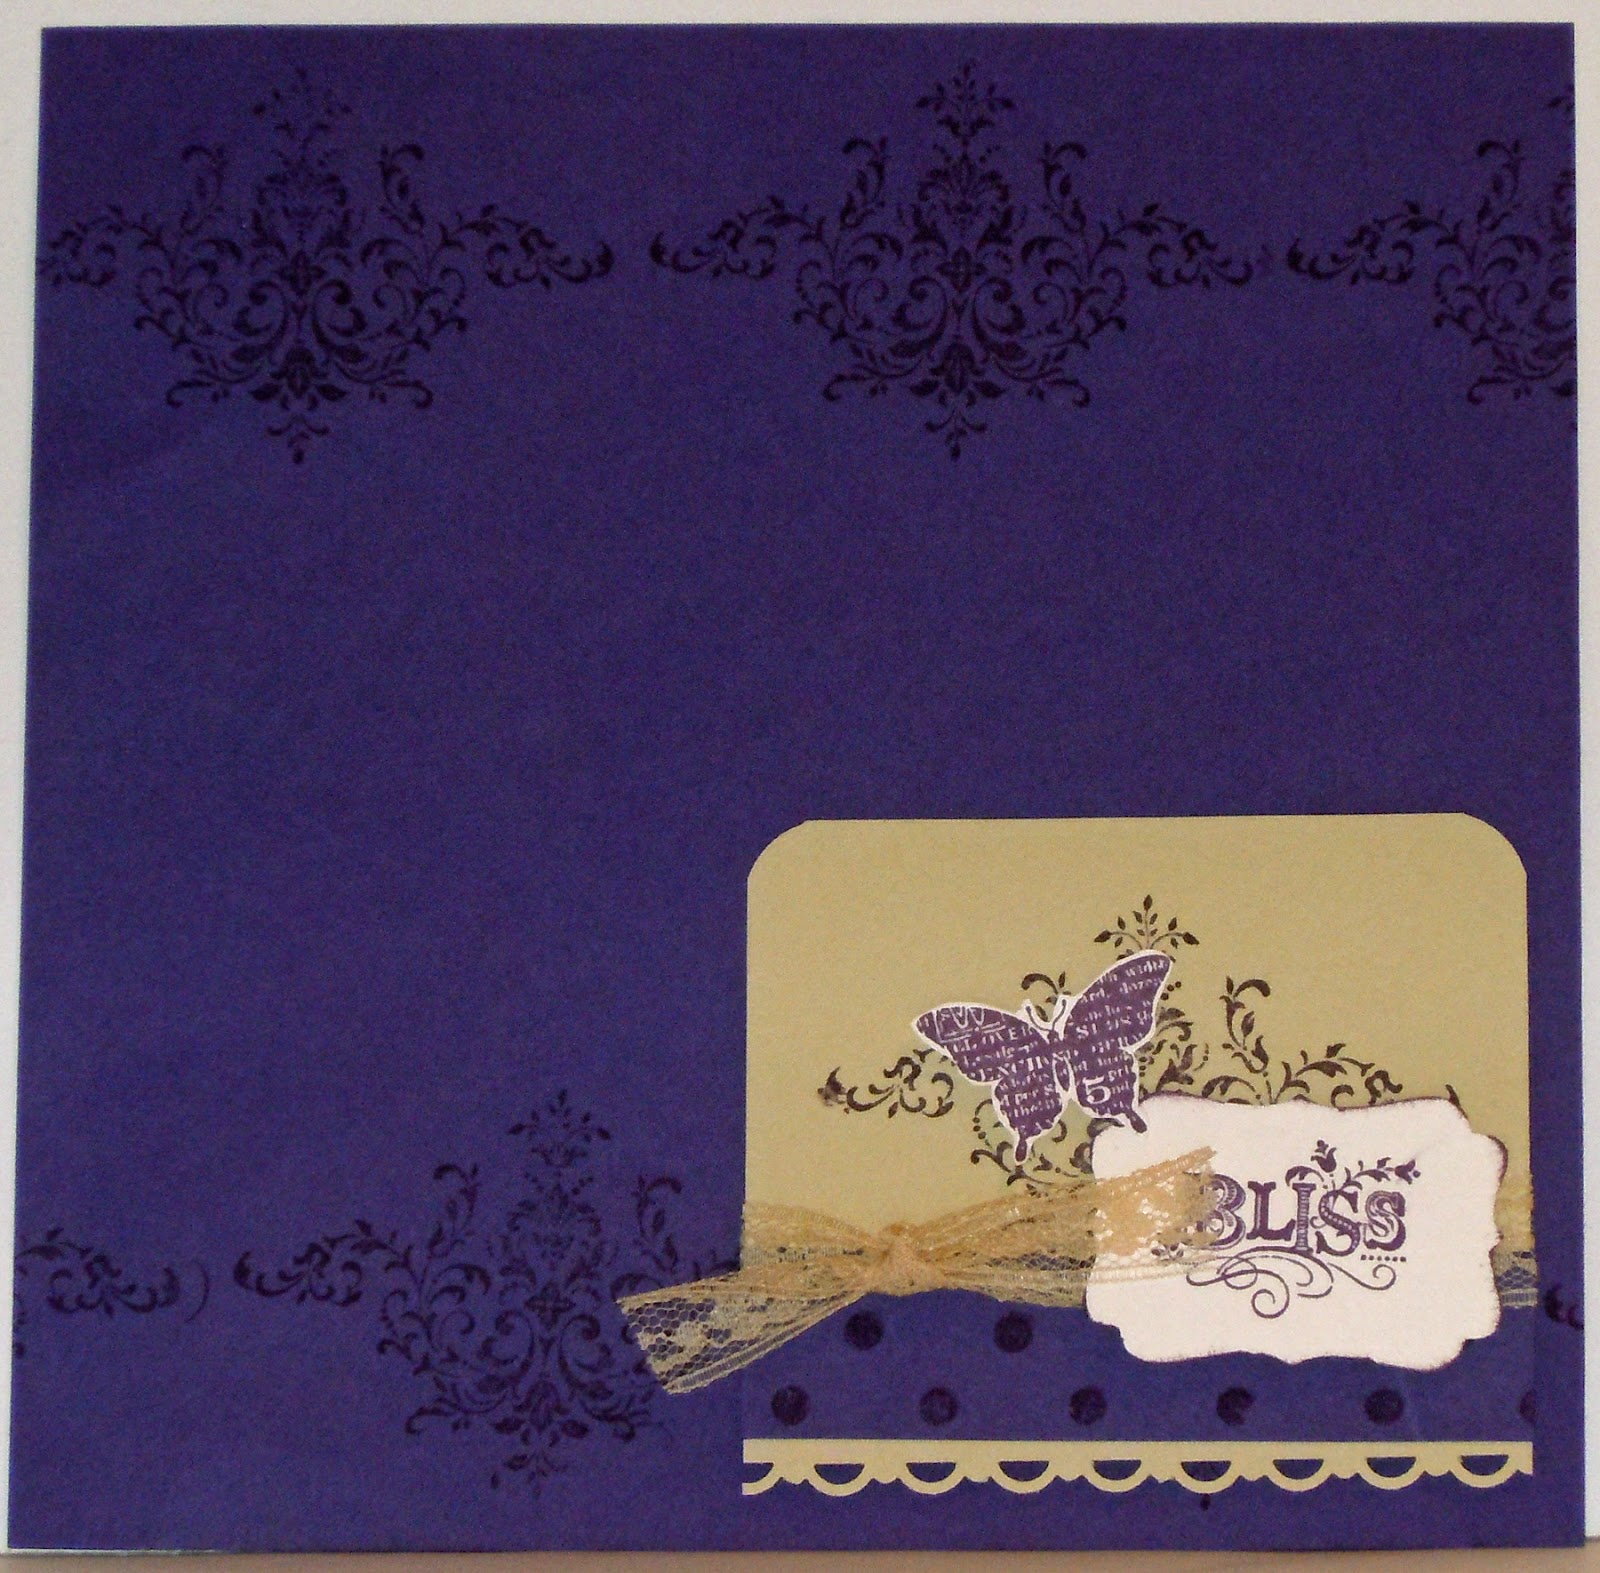
Bliss

I started with the Bliss stamp set and stamped my image across the top and bottom.  I do have the image offset on the bottom as I wanted more of it to show from behind my Bliss tag.  I used the same ink throught this project. 


I punched the bottom edge of the tan cardstock then stamped the image again in the center.  I made the Polka Dot strip from the same paper as I didn't have a purple pattern paper that would go .  "Bliss" is stamped and punched with the decorative label and there are pop up dots behind it and the butterfly.  I used foam tape on three two sides of the tan tag so that they could slide photo or journaling behind it.

With my 8x8 albums I like to include the two 4x6 inserts.  I kept them pretty simple by stamping my main image along the bottom then punching the tan cardstock again.  The 2x8 strip has a mini tag like the one on the main page. 

Thanks for stopping by.

Disclosure: I am not affiliated with any of the products mentioned.

Recipe:
Paper: Purple cardstock, Recollections - Tan and off white
Stamps: Stampin' Up - Bliss, Distressed Dots
Ink: Close to my Heart - Pansy Purple
Punch: Stampin' Up - Scallop Trim Border punch, Decorative label punch
Misc: pop up dots, adhesive, lace

Tuesday, January 3, 2012

Winter Woodland Skating Layout

The Bitten By the Bug 2 has a challenge going on that uses the Winter Woodland Cricut Cartridge.  Since I have that cartridge I thought I would do an 8x8 layout.  I have lots of fond memories of skating.  We didn't have rink, on the farm we used the overflow from the stock tanks or the stock tanks themselves. 


I stamped with clear embossing ink the polka dots and used clear embossing powder. I stamped the two smaller snowflakes from the Snow Swirled set on the pink cardstock then inked the edges of white cardstock.  The skates are cut out at 2" and layered.  I hand cut the bows off of them because I wanted to add my own.  I used some embroidery floss that is not separated for the laces and used glossy accents to glue them to the skate. 


I used the lined stamp from Notes and Details to make a journal spot and stamped with the small snowflake on the side.  Each page is similar in design I just changed the sizes a little bit. 

Thanks for stopping by. 

Challenges:
Bitten by the Bug 2 - Skate on Winter Woodland
Crimbo Crackers: Challenge 5 - Must use Snowflakes
Simon Says Stamp Challenge - Anything Goes

Click here for the Design Studio file.
Recipe:
Paper: Cardstock - green, white, pink, silver, red, black and white glitter paper - all are from my scrap box.
Stamps: Stampin' Up - Distressed Dots, Snow Swirled and Notes and Details
Ink: Stampin' Up  - Rose Red; Ranger -Clear Embossing Ink
Misc: rhinestones, adhesive, pop up dots, glossy accents, embroidery floss - I used Royal 109 - its really old, clear embossing powder and heat gun.

Monday, November 14, 2011

Summer Fun Layouts

Every once in a while I need to clean the top of my desk - to get those projects I've started and then have been unable to finish and these layouts were in that pile.

Here is the 12x12layout:

The paper is from the Thumbelina Collection from Piggy Tales.  I was getting down to the last of the collection but knew I could squeeze out a few more layouts if I used some cardstock from my stash. The white photo mats, off white journal spots and the punched background for the rubons are the only paper my stash.  "Summer fun" is from the sticker pack that was included in the kit.

Here is the 8 1/2 x 11 layout:


On each of the layouts the photo mats and journal spots are cardstock from my stash.  I used the spiral border punch on the top edge of the journal spot. 

Here is the 8x8  and 4x6 layout:


I added one of the rubons that was left in the kit to cardstock and then punched it with a decorative punch and used pop up dots when adding it to the layout so that the pictures can slide behind.


The Eyelet border punch is used thought the layouts. 

Thanks for stopping by.

Disclosure: I am not affiliated with any of the products mentioned.

Here's the detail about each layout:
12x12 layout:
Recipe: Piggy Tales April Kit of the Month - Thumbelina Collection
Background: Bird 12 x 12
Orange photo mat: Tiny - 8 1/2 x 6 1/2
White photo mat: My Stash - 7 1/2 x 5 1/2
Red: Bird - 5 1/2 x 1 3/4 border punched
off white: My Stash - 4 x 1 1/34
Green mat: Twelve Shillings - 8 1/2 x 2 1/2
Blue: Marsh - 2 strips - 8 1/4 x 1 1/4

8 1/2 x 11 layout:
Recipe: Piggy Tales April Kit of the Month - Thumbelina Collection

Background: Bird - 8 1/2 x11
Orange photo mat: Tiny - 5 1/2 x 7
White Photo mat:  My Stash - 6 1/2 x 4 1/2
Red: Bird - 4 1/2 x 1 3/4 border punched
off white: My Stash - 4 x 1 3/4
Blue: Marsh -5 1/2 x 1 1/2 border punched

8x8 layout:
Recipe: Piggy Tales April Kit of the Month - Thumbelina Collection

Background: Bird - 8x8
Orange photo mat:Tiny - 6 3/4 x 4 3/4
White photo mat: My Stash - 6 1/2 x 4 1/2
blue and white border:Little Fishes - 6 1/2x 2
Red: Bird - 4 1/2 x 2
Off White: My Stash - 3 3 /4 x 2

4x6
Backgrounds: 4x6
Recipe: Piggy Tales April Kit of the Month - Thumbelina Collection

Background: Bird 4x6;
Borders: 4x 1 1/2 - border punched

Recipe:
Piggy Tales April Kit of the Month - Thumbelina Collection; White and off white cardstock - unknown not included in the kit.
Punch: Stampin' Up -Eyelet Border, Decorative Label, Designer Label, Postage Stamp, Spiral Border Punch
Rub Ons and letter stickers: Piggy Tales April Kit of the Month
Misc.: adhesive, pop up dots

Tuesday, November 8, 2011

Gingerbread Recipe Page - Day 2

To continue the Christmas Food Theme I have an 8x8 Recipe page for Gingerbread Cookies for Day 2 

I used Design Studio on this layout to get the sizing right. I cut the gingerbread man out of brown cardstock and the face and zig zags out of white cardstock . I used a couple of red buttons on the front of him.  The gingerbread man snowflake is from When Its Cold Outside and I have the "cookies" on a clear button in the center of the snowflake. I have the sheer ribbon running behind the snowflake and a tab on the recipe instructions.

Thanks for stopping by.

Click here for the cut file.

From my Kitchen - Gingerbread Man - 3" and the shadow feature; Face - Layers features at 3"
Gingerbread Man Snowflake: When Its Cold Outside - 4"
Plantin Schoolbook - zig zag width 4.871 height .411

Recipe:
Paper: Cardstock: DCWV - Blue; Recollections - Brown and White; Pattern Paper - K&I Memories Scrapbook kit (it's a couple of years old)
Cricut Cartridges - George and Basic Shapes, From My Kitchen, When Its Cold Outside, Plantin Schoolbook
Ink: VersaMagic - Red Magic, Autumn Leaves - brown
Stamp: My Sentiments Exactly - Holiday Tags
Punch: Stampin' Up 1 3/8"
Misc: adhesive, pop up dots, buttons, Organdy Ribbon 7/8", buttons.

Monday, August 15, 2011

Film Strip Layouts

I made a set of Film Strip Layouts using The Stampin' Up Spiral Border Punch. I made my usual three sizes and will give a list of dimensions at the bottom of the post.

Each page consists of a large photo mat and a film strip with 2 to 3 white mats.


I inked all the edges even the black which is hard to see in the pictures.


I only made two photo mats on the 8.5 x 11 pages.


The ladies can use the photo mats on the film strip for pictures or to journal on


I made three little pictures on the film strip for the 8x8 page.


I kept both 4x6 mats the same and just turned one of them when placing in the sheet protectors. I used foam dots on the side of the film strip so that a picture can slide behind.


Now for the Dimensions of Each layout.

12x12 Layout:

Pink or Blue Background: 12x12

Newsprint: 11x11


Photo Mat layers:

Black: 5 3/4 x 7 3/4

Pink or Blue: 5 1/2 x 7 1/2

White: 5 1/4 x 7 1/4


Film Strip layers:

Black: 3 1/4 x 12 then punch the edges

White: 2 1/4 x 3 1/4 - you will need 3 of them


8 1/2 x 11 Layout:

Pink or Blue background: 8 1/2 x 11

Newsprint: 8x10 1/2


Photo Mat layers:

Black: 5 3/4 x 7 3/4

Pink or blue: 5 1/2 x 7 1/2

White: 5 1/4 x 7 1/4


Film Strip layers:

Black: 7 3/4 x 3 - then punch the edges

White: 2 1/4 x 3 1/4 - you will need 2 of them


8x8 Layout:

Pink Background: 8x8

Newsprint: 7x7


Photo Mat layers:

Black: 4 3/4 x 6 3/4

Pink: 4 1/2 x 6 1/2

White: 4 1/4 x 6 1/4


Film Strip layers:

Black: 2 1/4 x 7 3/4 - then punch the edges.

White: 2 3/4 x 1 1/2 - you will need 2 of them and 2 1/2 x 1 1/2 - you will need one this size.


4x6 Mat:

Pink: 4x6

White: 3 3/4 x 5 3/4

Black: 1/2 x 4 - then punch only one edge.


Recipe:

Paper: DCWV card stock - Blue, pink, white and black; Stampin' Up - Newsprint pattern paper

Ink: ColorBox - rosebud on the girl pages and turquoise on the boy pages

Punch: Stampin' Up - Spiral Border Punch

Monday, June 27, 2011

Notably Ornate - 8x8 Layout

I just love the journal stamp in the Notably Ornate stamp set and how easy it stamps. I stamped the journal stamp in Pear Pizzaz and fussy cut it out.


I used the D'vine Swirl Embossing folder to emboss the pink photo mat, (it's hard to see the embossing in the picture). I tucked the stamped journal spot and the tab behind the photo mat.

On page four I embossed the strip instead of the photo mat, (I put my 4x6 page in between my 8x8 pages).


On this set I kept the 4x6 photo mats the same and just alternated them in the album. I punched the border of the white mats and layered it onto pink card stock. They can use this to journal or as a photo mat.


I used a double scallop trim on the second set of 4x6 photo mats, which is on pop up dots so they can slide a photo behind.


Thanks for stopping by.


Recipe:
Paper: Pattern Paper - Nana's Nursery; DCWV card stock - white, pink green
Stamp: Stampin' Up - Notably Ornate
Ink: Peat Pizzaz
Punch: Stampin' Up - Scallop Border,2"x 1 3/8" Oval, Corner Rounder; Martha Stewart - Swirling Lace Corner Punch
Embossing Folder: Cuttlebug - D'vine Swirl
Misc: adhesive, scissors, pop up dots

Thursday, February 7, 2008

February's 8x8 Calendar Page

I was unable to post last night so here it is. The background paper is once again the Deluxe Luxury Stack. The stamp set is from Making Memories and was on sale at Archivers in their clearance section - I only paid $2 for it and there was 24 stamps in it.

Recipe: Paper: Black, Delux Luxury Stack Stamps: Love Foam Stamps from Making Memories Paint: Apricot Other: transparancy, corkboard letters.

Tuesday, January 1, 2008

Brrr - January

I have changed the size of the monthly calendar for my DH. He wanted a smaller size so I am now going to do an 8x8 each month. I had purchased the 8x8 scrapbook page protectors just for this reason. My oldest son had given me The Rockstar Stack paper and I just had to use it for this layout. There is some really nice paper in that pack. The scroll work on this paper is only in one corner so I cut the paper to accommodate the scroll work. I wanted to cut around it and open it up so the picture would show through and to help hold the picture in place. The picture is one I had taken in December when we had a really heavy frost and is 4"x6".


Recipe: Paper: The Rockstar Stack, scraps of green and blue Stamps: Close to my Heart - Doodle Alphabet Cricut: Fabulous Finds Ink: blue, moonlight white Other: brads, glue 8x8 page protector, glue, calendar from Publisher