Showing posts with label Card. Show all posts

Friday, January 21, 2022

Surprise Challenge at Counterfeit Kit Challenge Blog

 I have a surprise challenge on the Counterfeit Kit Challenge Blog today. Since it is my birth month I'm throwing out a challenge to make a card and tag, for any occasion. I don't know about you, but I never have enough ready ahead of time. I am always making them when I need them. 


In my CKC January 20222 - The Journey kit I added in a couple of 6x6 paper pads.  I found a 6x6 One Sheet Wonder from  Patricia Dominicci at Jumping into Stamping.com (tutorial here https://jumpingintostamping.com/2021/02/11/6-x-6-one-sheet-wonder-with-berry-blessings/amp/). It used a combination of paper and stamping, the stamping can easily be replaced with die cuts which is what I did along with the fussy cut butterflies.


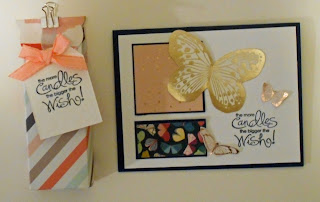
As I went down the rabbit hole of 6x6 paper pads I found a tutorial for a mini bag from Chic N Scratch that used a 6x6 piece of paper (her blog post is here: Tag Topper Treat Box - Chic n Scratch). I found a similar paper in one of the 6x6 paper pad and made this cut little bag. It's big enough to hold nail polish and lip balm along with a couple of mini-Reese's 


Here is three more of the cards I made. I will be making little tags and bags to go along with them, that way I will be ready.  


Thank you for stopping by.

Thursday, November 5, 2020

Hello Sunflower card

 In my previous post I made this sunflower frame using the stamp I included in my CKC Novembers 2020 - Autumn Blessing kit. 


The frame measures 3x4 and is 1/2 wide. I stamped and colored in the sunflower, fussy cut it out and inked the edges with vintage photo ink.  A little bit of embroidery floss and a word sticker finish off the frame.


I also inked the edges of the frame and patter paper and assembled the card front. One card done and sent in the mail. 

Thanks for stopping by. 

CKC November 2020 -Autumn Blessings
1 - cards

Recipe:
Counterfeit Kit Challenge - CKC November 2020 - Autumn Blessings
Paper: White, Orange, and Kraft cardstock, Recollections 6x6 paper pad - Home Basics - plaid paper.
Stamp: Unity , Stamps KOTM August 2020 {count your blessings}
Misc.: Adhesive, Embroidery floss, Markers, Gold embossing powder, Jen Hadfield - foil phrase stickers (2016) and zots 

Tuesday, September 8, 2020

Cards

 I have a few cards I made from the images I stamped from my Counterfeit Kit Summertime Cheers. In with my forgeries I included these images.


Card #1: Hello Sweet friend -I used the image from the June 2017 Kit of the Month {time to enjoy life} and stamped the ice cream sundae’s and colored them in with markers. I just used some scrap paper for the front of the card. I stamped the sentiment on the inside of the card. There are stickles on the white parts of the ice cream to add a little bling.


Card #2: Sending a BIG Hug – I stamped the larges fern leaf I had three times onto a piece of 5 ½ “x 4 ¼ “piece of cardstock.  Matted it onto green cardstock and added a sentiment. I used one the small fern leaf for the inside of the card.


Card #3: Heart Banner- This was stamped onto whitecardstock and die cut using a stitched rectangle die. The image is colored with markers to match the background paper.  I layered this onto black cardstock and pattern paper from Crate paper – good vibes and Pink fresh Everyday Musings 6x6 paper pads.


Card #4: This is a total copy of a card that Heather Hoffman made. Hers is a shaker card, click her to see it, mine is just a regular card. I just love the way it turned out and it’s my favorite so far. I used a scrap piece of cardstock behind the bird and a piece of vellum. I used distress ink for the splatters


Card #5: Miss You – I’m using the  mushroom stamp that I colored in with color pencils. I added a simple sentiment to the front of the card and the twine I included in my kit.


Card #6 I stamped the mushroom in a cup and colored in it in with colored pencils. I used a nesting oval die to cut the image and brown cardstock out. 


Thanks for stopping by. Be sure to check out the Counterfeit Kit Challenge Blog and Facebook group to get inspiration.


Recipe:

Black, Brown and White cardstock, Scrap paper; 6x6 paper pads – Amy Tangerine – Rise and Shine and On a Whim, Pink Fresh – Everyday Musings, Pink Paislee -Pick Me Up and Crate Paper – Good Vibes; The Paper House – Into the Wild
Stickles – Crystal Ice
Ink: Gina K – Amalgam; Stampin’ Up – Old Olive, Pear Pizzazz and Wild Wasabi, Distress Ink: milled Lavender and Crushed Pistachio
Stamps; Unity Stamp Company Kit of the Month: June 2017 {time to enjoy life}, May 207 {free your dreams), August 2016 {open your soul}, April 2020 {hope in uncertainty}, June 2020 {change the world}

https://blog.unitystampco.com/2020/06/simply-birdie-shaker-card/ - Heather’s card link

Forgeries on the Fourth https://cindyscreations-cinmfoster.blogspot.com/2020/09/forgeries-on-fourth.html


Saturday, December 28, 2019

Die Cutting Counterfeit Kit Challenge - Celebrate Card

Hi everyone! Today I'm up on the Counterfeit Kit Challenge Blog with another card. What do you do when you have a card front you started and a stamped image left over from another project. Die cut the card front. I'm using a die to cut the front of my card and my image will be on the inside of the card.


I started by stamping my image onto white cardstock with Versa Mark Ink and embossing with a Recollections blue embossing power. The image is stamped in the center of a  5 1/2 x 4 1/4 piece of white cardstock. I trimmed the snowflake paper a smidgen so that I could have a white border around the card front. I added washi tape to the wrong side of the die.


Using the Misti I centered the die onto the snowflake image  then pressed the top down so that the washi take sticks to the top of the Misti.


Using a small metal ruler I slide more washi tape onto the die so that it will stick to the card front.


The card front is now ready to run through my Cuttlebug. Be sure to open the card up so that it only the front layer you are die cutting.


The next step is to align the image inside the card.


I stamped the sentiment onto vellum and embossed with white embossing powder. The sentiment is going to fit on the inside of the card front behind the die.


I add a piece of pattern paper to the inside bottom of the card to finish it off. Now it's time to stamp my envelope. I pulled out a couple of snowflakes and stamped and embossed with silver embossing powder.


My Celebrate card is ready for a note on the side and to be given out at New Year's Day Brunch.


Thanks for stopping by today. Don't forget that we have something up everyday on the Counterfeit Kit Challenge Blog everyday this month.

Recipe:
Paper: White Cardstock, Blue Snowflake paper, scrap of vellum and an Envelope
Stamps: Unity Stamp Company KOTM -October 2017 {conspiracy of love}
Die: Stitched Hexagon
Misc.: Adhesive, Cuttlebug, Embossing Powder, white, blue and silver, Heat gun, Versa Mark Ink and Zots

Saturday, December 21, 2019

Stamped Image Stacked Die Cutting Card for Counterfeit Kit Challenge

Hi everyone! Today I'm up on the Counterfeit Kit Challenge Blog with another Christmas Card. This time the technique is -Stamped Image with Stacked Die Cutting. This technique adds some bulk to my card as I am also using fun foam behind my layers and it's a card that I would hand deliver.


To start I stamped my card onto white cardstock - I didn't know I was going to use the Watercolor Pencils otherwise I would have stamped onto watercolor paper. I tend to stamp a lot of images onto white cardstock then go back and make some cards. I don't always know what technique or how I'm going to color the card when I'm stamping.


I have a small set of 12 Prismacolor Watercolor Pencils that I used to color my card. I colored all of them to start with then used a paint brush to spread the color out over the image. I did use the heat gun between the colors so they would not become muddy.


I layered three of the stitched dies onto image. I started with the smallest die then the biggest and finally the middle size. I used washi tape to hold the dies in place, just be sure to stick it to your clothing first to loose a bit of the stickiness.


Now it's time for my card base. Today I'm using white cardstock with a light green snowflake pattern paper. I ran my pieces through my Xyron, then starting with the largest image piece I added it my card front. The next piece is the middle piece which I added one layer of fun foam to the backside. I use my trimmer to cut the fun foam straight. It doesn't cut all the way through, but you can fold and tear it nicely. For the smallest image I used two layers of fun foam.


Now that the layer of fun foam are built I attach the middle piece and then the smallest piece to the card front. Here is a side view of the layers on the card .


I like to add a writing mat on the inside of the card with a piece of the pattern paper from the front of the card. 


I used a couple of snowflake stamps, Versa Mark ink, and gold embossing power to finish off my envelope. I like to finish off the envelope at the same time. If I don't have a use for the card immediately then my card and envelope are to go when I need them.


Thanks for stopping by today. Don't forget the we have something up everyday on the Counterfeit Kit Challenge Blog every day this month and Lisa up tomorrow.

Recipe:
Paper: White Cardstock, Green Snowflake Paper  and an envelope
Stamps: Unity Stamp Company KOTM September {all kinds of holiday love}
Ink: Ranger Archival Ink - jet black and Versa Mark Ink
Dies: Lawn Fawn Stitched Rectangles Large and Small sets
Misc.; Adhesive, Anti Static pad, Cuttlebug, Embossing Powder - Recollections Gold, Fun Foam, Heat Gun, Paint brush, Prismacolor Watercolor pencils, Washi tape and  Xyron
Monday, March 4, 2019

Forgeries on the Fourth

Today is Forgeries on the Fourth at the Counterfeit Kit Challenge Blog. I kept my forgeries pretty simple this time around.  I recreated the glittery frame from the inspiration kit, Blue Skies and Butterflies.
I pulled a piece of glittery cardstock, traced a chipboard frame on the back side of the paper and trimmed it down to size. the frames are included in my Page Set 8.


I dusted off my Martha Stewart butterfly punch and punched a couple of mini butterflies. I punched several of them in the same color, layered a couple of them, glues some beads to the body and layer them on top of each other so that I had two layers.


I had pulled a stamp and die set I had picked up from Tuesday Mornings called Butterfly. It made the beautiful die cut butterflies that I have included in a couple of my page set for March.

Again I have a card I made right away with my forgery. I used the gray die cut butterfly for the front of my card.


Just some pattern paper and my die cut and my card is done.

Thank you for stopping by and don't forget to stop by the Counterfeit Kit Challenge to check out the other forgeries as there are some awesome ones.

Friday, January 4, 2019

CKC Forgeries on the Fouth

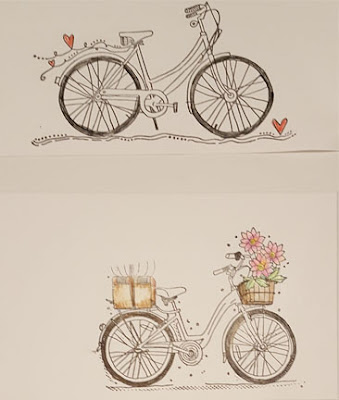
It's time for some Forgeries using the Hannah October Kit from Felicity Jane. I added to my kit a couple of bicycle stamps (one is another bicycle stamp I found cleaning) and several different flower stamps. I really like the bicycle die cut in their embellishment pack.

and the Tulle Bows


I also added some Tulle - mine is 9" circles and some craft foam that has to be at least 10 years old, embroidery floss and yarn.

I started by cutting the tulle into 4" wide strips (I did not square it up) and foam into 3" lengths as it is about 2 1/2" wide.I then wrapped either embroidery floss or yarn around it and tied a knot. I left the tails as I am not sure if I'm going to add a button or cut them off.


I stamped a couple of the roses and both of the bicycles on scrap white cardstock.

I colored in most of the bicycles then stopped as I'm not sure if I want to use them as a die cut or a pocket page card and what color I want the bicycles to be and then I can match them to my layout.


I did color in one of the roses for a card that I need to send out.


I used the Fancy Pants 6x6 Paper pad I included in my kit I also tore apart on the tulle and foam bows to attach to the side of the card with a paperclip.

We love seeing your work, so be sure to share your kits and projects with us. You can do this by using the Link-Up page on the blog, posting the Counterfeit Kit challenge Facebook Community Group or on Instagram(you can find us @counterfeitkitchallenge and share with the #counterfeitkitchallenge).


I had also included a couple of the acetate frames I made for the February 2017 CKC Kit. I have the link here.

January 2019 CKC Kit - Make It Good
1 - Card

Thanks for stopping by.

Recipe:
Paper: Recollections - black, light blue, and white cardstock; Fancy Pants 6x6 paper pad - Office Suite
Stamps: Unity Stamps KOTM - May 2015 {Spread Your Wings} rose stamp and sentiment; April 2017 {be my bird} - top bicycle; September 2017 {flowers, foliage and fall} bicycle with baskets
Misc.: Adhesive,  Colored Pencils, DIY Tulle and foam bows, paperclip, embroidery floss


Monday, November 12, 2018

Counterfeit Kit Challenge 1 - Sprinkle and Sparkle

Our first challenge this month is Sprinkle and Sparkle. November is Lisa's Birthday month and there's always a sprinkle of shimmer, confetti, sequins or glitter to be seen. Make your own project shine this celebratory month by adding some extra sparkle!

So I made two layouts and a card.

My first layout is a picture of my youngest taken at the aquarium in Texas. I started with the scallop paper as it reminded me of the water in the tanks at the aquarium. I then had to add this sunglass paper and the orange stripe paper. I added in the polka dot paper to hold all my layers together.


I die cut glitter paper in two colors orange to mat behind the 6x6 paper.


I snapped a picture of each of them when they were not looking. That is one good thing about cell phones. Here's my eldest's layout. the only difference between the two pages is the color of the glitter paper and the 6x6 paper. 


For the embellishment spot I added a tag I had in my kit and a few of the die cut leaves, along with a tag to place them all on. The hearts are ones from my forgeries, one is stamped and cut out and the other is white glitter paper and die cut.


For my card, I pulled out some scraps and cut them into 1" squares. I loved the way my Forged paper turned out so much that I wanted to make a card.


I trimmed it down and used a die to cut the bottom. I had to cut my wavy line twice as I did not have my black mat trimmed and behind my pattern paper to cut..  I little bit of black and white twine to finish it off.

Be sure to stop by the Counterfeit Kit Challenge blog to see what everyone else's Sprinkle and Sparkle.

We love seeing your work, so be sure to share your kits and projects with us.

Thanks for stopping by.

Recipe:
Paper: Colorbok - Delilah, Simple Stories - Hello Summer 6x8 paper, Amy Tangerine - In a Whim 6x6; glitter cardstock, black cardstock

Misc.: Adhesive, DIY leaves and heartsZots and Zyron

Wednesday, May 2, 2018

Heartfelt Sympathy - Sympathy Card

I needed another Sympathy card, this time for Sandy as she lost her mom.  I needed lots of room for everyone to write a note so I pulled out a premade deckled edge card and envelope. I pulled out my May Counterfeit kit - Find the Happy in everyday, using the April 2018 {eyes of the beholder} Kit of the Month stamps for my background.


I used the Broken China and Stormy Sky ink using the smooching technique, I dried it with the heat gun, then stamped my image with black soot ink. I added a little bit of shading with colored pencils.  This one turned out just a bit darker than I wanted so I started over.


I used Broken china and evergreen bough for the smooching technique and again used black soot for stamping the image. After drying with the heat gun I shaded in again with some colored pencils. . I stamped the sentiment on watercolor paper and shaped one edge. A few enamel dot in the bottom finish off the card.

Thanks for stopping by. Be sure to stop by the Counterfeit Kit Challenge blog

 - 12x12 Layouts
 -  8 1/2x11 Layouts
 -  12x12 Project Life
  -   8 1/2x 11 Project Life
    - Planner Pages
  1- Cards
   - Tags

 
Thanks for stopping by.

 May
Counterfeit Kit - Find the Happy in Every Day
Recipe:
Paper: Watercolor paper, Premade deckled edge card base and envelope
Distress ink: black soot,  broken china, evergreen bough  and stormy sky
Stamps: My Sentiments Exactly stamp; Unity Stamp Company - April 2018 {eyes of the beholder} Kit of the Month
Misc.: Adhesive, colored pencils and enamel dots

Tuesday, January 2, 2018

may the Joys of the season be your


Master Forger Julene on the Counterfeit Kit Challenge sent link for a red and green challenge from Incy Wincy Designs. I combined this with the sketch challenge from  Hand Stamped Sentiments to make a quick card. Just something small to get back into the swing of things.


I trimmed down the red glimmer cardstock so that I had a white border. Mounted the red and green pattern paper from the 8x8 Pressed Petals assorted pack onto green cardstock. I embossed the vellum then cut it into a banner. I stamped the sentiment and used green cardstock for the border.

Card #2 is using the same supplies except for the vellum.


I switched it up a bit by embossing the green cardstock and using the pattern paper as the vellum. The sentiment is matted on the red glimmer cardstock only using the backside.

Entered into: Incy  Wincy Designs
                      Hanks Stamped Sentiments Challenge #280

Thanks for stopping by.

January Counterfeit Kit - Holiday Joy

2 - Cards

Recipe:
January Counterfeit Kit - Holiday Joy
Paper: Pressed Petals assorted pack; Recollections cardstock: black, green and white and red glimmer (front and back); Vellum
Stamp: Unity Stamp Company KOTM - October 2017 {conspiracy of love}
Embossing Folder: Darice - Snowflake Swirl
Ink: Ranger - Jet Black
Misc.: Adhesive, Cuttlebug and scissors

Thursday, August 10, 2017

Card

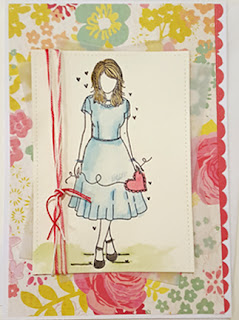
I needed a card to go with my mini album so I pulled some paper from my August Counterfeit Kit - For the Guys. I knew I would be make a few cards with this kit and that is why I added the flower paper.


I stamped and clear embossed my image onto water color paper. I colored her in with Gelatos and Distress Crayons then die cut her out. I also die cut two pieces of vellum to layer behind.


I wrapped a little bit of red, pink and white twine on the side then layered this onto the piece of Colorbok Delilah with a piece of red punched border.

Thanks for stopping by.

August Counterfeit Kit - For the Guys

12x12 Layouts
8 1/2x11 Layouts
1 - Mini Albums
1 - Cards

Recipe:
Paper: Colorbok Delilah, White cardstock, scrap of red cardstock, Vellum and  Watercolor paper.
Gelatos: Cotton Candy, Green Tea, Red Cherry
Tim Holts Distress Crayons: Vintage Photo and Black Soot
Ranger Archival Ink - Jet Black
Die: Lawn Fawn - Small stitched rectangle stack
Punch: Stampin' Up - Scallop
Stamps: Unity Stamp Co KOTM - June 2017 {time to enjoy life}
Adhesive,  Clear Embossing Powder, and Twine.

Monday, July 24, 2017

Cards from April Counterfeit Kit - Glorious Garden

I used my April Counterfeit Kit Glorious Garden and the April 2017 Unity Stamp Company {be my bird} to make a few cards. All but one of the card have no sentiments as I will add them when I know what I'm using them for. I like to keep a supply of cards I can just add the sentiment to. I used the Misty to stamp them.

Card #1:

I stamped using gray ink and clear embossed.  I used gelatos to color the flowers and leaves, then cut a stitched die to cut it out.


Card #2:
The bike is stamped and embossed and colored in with colored pencils.


Card #3:
I used the Unity Girl for this card. She is stamped and clear embossed colored with pencil colors.  The Wink of Stella pen was used on her beads and feathers. The embossed piece is from another project.

Card #4:
I stamped the floral bouquet on two of the corners of the pink cardstock. I used glossy accents on a couple of the flowers and the Wink of Stella pen on the lily's. (if you click on the picture you can see the Wink of Stella better)


Card #5:
The butterfly was stamped and embossed after using the smooching technique with plastic wrap.  I wrapped a twine around the top and cut the butterfly into a tag shape.


Card #6:
I stamped the floral bouquet onto white cardstock and used the Stampin' Up markers on a acrylic block with water to color them in. I used the Wink of Stella pen on the white lilies. A little bit of ribbon finishes off the card. I have to remember to use the Wink of Stella more as it gives a really nice shine.


Card #7:
I stamped and colored my bird first then stamped the sentiment for the card. I had to fiddle a little bit to get the sentiment where I wanted it. I only used part of the sentiment for this card.


Paper: Recollections cardstock - kraft, white, grey and pink; Partial Sheet of NRN - Glorious Garden and ColorBox Collections - Mint Julep and Deliliah; Water color paper
Ink: Stazon Ink - Dove Gray; Ranger Archival Ink - Jet Black; Distress Ink - brushed corduroy, rusty hinge
Stampin' Up Markers, Gelatos and colored pencils.
Misc.: Adhesive, Clear Embossing powder, Foam Tape, Glitter, Glossy Accents,  Misty, Ribbon, Sizzix stitched dies, Twine and Wink of Stella

April Counterfeit Kit - Glorious Garden

12x12 Layouts
8 1/2 x 11 Layouts
7 - Cards