Showing posts with label Thanksgiving. Show all posts

Thursday, November 7, 2013

hearts home holidays Mini Album

Here's a little mini album finishing off the paper from my Thanksgiving Blessing album. I followed the tutorial  from the "Give Thanks" mini album that Patti Milazzo did.   First off this is a really long post. You may click the pictures to see them in more detail.  The album height is 5 1/2".  I punched my holes for the rings at 1 1/2" off of center.  All of my edges are inked with Vintage Photo distress ink.

The cover is 5 1/2" x about 2 3/4" wide.  I started with a a rectangle of 5 1/2" x 3" and traced a shaped page onto the rectangle then cut it out.  I added a punched shape to the center with my sentiment stamped and matted across the center. A few silk flowers and leaves tucked behind completes my cover.
 
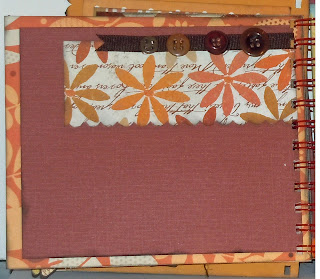
On the back of cover I punched the same shape to cover the one on the front.  The banner is cut at 5 1/2" x 2" wide.  I attached a silk flower with a pearl to the corner.


On the back of the banner I stapled a bit of ribbon in the corner.  For the "Chilly Days" page, I cut 4" x 3 1/2" then punched on the 3 1/2" side.  I added a small piece of pattern paper and a silk flower at the bottom of the page. 


On the back of the "Chilly Days" page the tag is gut to 3 1/2" x 2 1/2" wide with a small stamped image in the corner and a piece of ribbon stapled to the tag.  The tag is cut at 4 1/2" x 3" wide with a piece of ribbon stapled to the top.


On the back of the tag I have two prima flowers with a button and crochet yarn at the top of the tag.  The "Joy" page is cut to 5 1/2" x 4" wide.  I used my 1 3/8" circle punch to make the label and stapled it onto the paper.  I added a small piece of punched blue paper then adhered the "joy" letters to the page. 

 On the back I stamped "together" and matted it and used foam tape to adhere it to the top of the page.  I added a small banner for journaling at the bottom of the page. The tag is 3 1/2" x 2 1/2" wide. I've used the Stampin' Up Large tag with "imagine" stamped, a heart and a small bit of ribbon stapled to the top.

The back of the tag has a couple of silk flowers and a button with crochet thread on the bottom corner.  The next page is a pocket with a tag inside. I use an alphabet stickers "photos"  and added a mat in the center.  The pocket is 5 1/2" x 3 3/4" wide.  I added a bit of the ribbon to one side of the tag and a silk flower to the other side of the tag.


On the back I have a piece of pattern paper as a mat, I stamped "the love is all that matters" and mounted it on foam tape at the top with a rub on which is punched out with the  3/4" and 1" circle punches. For the Pennant journaling spot I cut it to 2" x 3 3/4" wide then punched the heart in blue paper and glued it to the the top.  I reversed my paper and punched another blue heart for the back of the pennant (picture below).


For the "home" page I cut the paper to 5 1/2" x 4 1/4" then added a rub onto a punched piece of orange pattern paper. 

On the back I cut a piece of tan card stock then added a punched strip of pattern paper with "celebrate" stamped and punched out.  The tag is cut to 4 1/2" x 3" wide with a bit of ribbon stapled to the top.  I just love this scrap piece of paper and decided I need to use it.


I used the same paper on the back of the tag but added a flower, button and crochet thread to the top of the tag.  The "gratitude" page is 5 1/2" x 4 1/2" wide. 


On the back I added a pocket page spelling out traditions and added a rhinestone brad to the flower and a couple of silk leaves.  I have two mats tucked inside the pocket ready to go.  I have a banner journaling spot measuring 2 1/2" x 4 " wide.


  The "Life is Good" page is 5 1/2" x 4 1/4" wide.


On the back is a pocket page.  I stamped "with a grateful heart" and mounted it onto a piece of pattern paper with foam tape.  I adhered a small bunch of silk flower behind it.  The pattern scallop paper was part of a border that I used to decorate the pocket.  I added a flower with a pearl on one side of the tag and ribbon to the other side of the tag in the pocket. The tag is 5" x 3" wide with a couple of the Prima Hydrangeas and a button in the center.


I stapled ribbon to the top of the to leave plenty of room to journal.  The next page is 5 1/2" x 4 3/4" wide.  I just added a flower with a pearl to the top corner of this page. 


On the back side I stapled the ribbon in the top corner and added a silk flower and maple leave in the bottom left corner.  I stamped "treasure" and adhered it to a punched shape with foam tape.For the last page I made a side pocket with a couple of mats already to go.  I have a piece of ribbon stapled to the corner of one and a flower with a pearl to the other.  I made a journaling spot by punching out the heart shape and adhering it to the top of the pocket then I used Glossy Accents in the heart shape.


Thanks for stopping by.

Recipe:
Paper: All of the paper in this Mini is from other projects. 
Stamps: Stampin' Up - Tiny Tags; Impression Obsession - Express yourself Word Play  (imagine, celebrate, treasure); Unity: July 2011 Kit of the Month {...better together} together; May 2012 Kit of the Month {Love in an Instant} - the love is all that matters,
Markers: Stampin' Up - Stampin' Write - Rich Razzleberry, Poppy Parade and Soft Suede;  Bic -
Ink: Distress Ink - Vintage Photo; VersaMagic - Coffee Bean, Midnight Black
Punch: Stampin' Up - Scallop Edge Border, Decorative label, Large Tag, 1 3/8" circle punch, Word Window; Paper Shapers - Folk Heart; Marvy - 3/4" and 1" circle punches.
Flowers:  Prima - Hydrangea No. 5, Unknown - silk and paper flowers
Alphabets: Pink Paislee - Whimsies - Chocolate(home); Piggy Tales - Georgie Porgie Collections (joy); Kaiser Craft - Mini Alpha Stickers Black & White, Unknown orange (photos)
Rub ons; Cherry Arte - I Love You (flowers on orange tag); 7 gypsies - elements
Ribbon: Sheer Creations 7/8"
Misc.: Adhesive, foam tape, hot glue gun, tiny staples, crochet thread, Stampin' Up - Pretties kit, Glossy Accents, Score Tape, buttons

Saturday, October 26, 2013

American Thanksgiving

Hi everyone, thanks for joining me from the Card A Day Blog. I'm finishing off the week for American Thanksgiving cards. 

I've started this card by cutting out a door frame with my Cricut.  I then measured the white cardstock to fit behind the door and stamped the tree image. I added blue to the sky and green for the grass.  I used a make up sponge for this part.  Since my screen is another layer I wasn't too worried about dark places. 


After attaching these two pieces together I layered them on top of my embossed brick paper with a piece of scroll work cut from the Cricut that I had left over from another project.


I stamped, hand cut the pumpkins and layered them by the door.  All of this is layered onto another piece of tan paper, the brown cardstock and the card base.  I did ink around the embossed brick layer.

Thanks for stopping by.  Don't forget we start a new challenge Tomorrow.

Recipe:
Cardstock: Recollections - orange, brown, kraft and white; Provo Craft - The Slab III - tan paper;
Stamps: Unity Kit of the Month: August 2012 {Color of the Seasons} small pumpkins, August 2013 {cozy moments} large pumpkin, September 2012 {happiness has no limit} tree
Ink: Stazon - brown; Stampin' Up - Pumpkin Spice, Soft Suede; Distress Ink: Vintage photo, china blue, peeled paint
Embossing Folder: Tim Holtz - bricked
Misc.: Brad, mesh, adhesive


Friday, October 18, 2013

Give Thanks

Hi everyone, I've got another Thanksgiving card for you, well actually two, I've just used different stamps for the focal point.


 I layered a scallop border under the bottom pattern paper and the top. I stamped my image once then moved it down and to the left a little bit and stamped again. 

 
I didn't have a punch the correct size for the "give Thanks" so I used the Designer Label punch.  After the first punch I used a post it not to hold the shape and lined up the circle to finish it.

 
I used a different image for this card.  I just adjusted the size of my papers to fit my stamp.


Thanks for stopping by.

1 card for OWH

Cutting Instructions:
Base: 8 1/2 x 5 1/2", scored at 4 1/4"
top and bottom pattern paper - 4" x 3"
stamped image (brown) 2 3/8" x 3 1/4" ( adjust this according to the size of the stamp)
stamped image (white) 2 1/4" x 3"  ( adjust this according to the size of the stamp)


Recipe:
Cardstock: Recollections - Brown and white; Unknown pattern papers
Ink: Stampin' Up - Dusty Durango, Soft Suede
Punch: Stampin' Up - Scallop Border and Designer Label
Stamps: Unity Kit of the Month - August 2013 {cozy moments} - give thanks; August 2011 {what I know} - branch with buds; July 2011 {. . . better together} - flower
Ribbon: American Crafts
Misc: Adhesive,

Monday, September 23, 2013

Pumpkin Girl

Hi everyone, thanks for stopping by.  I've got another fall/Thanksgiving card to share today.  I've used another Digital Image instead of a stamp today.

 
I added the blue paper on the left to tie into her shirt color, then punched a border to help highlight it a little more. I had just that little bit of red punched paper so I cut it into and added it to the bottom of the card.


Thanks for stopping by.

1 card for OWH

Recipe:
Cardstock: Recollections - orange, brown, red and white; Unknown Scrap of pattern paper
Punch: Stampin' Up - Scallop Trim and Eyelet Border
Digital Image: Mary Ellen's Dearie Dolls Digi Stamps.
Misc.: water color pencils, adhesive

Saturday, September 14, 2013

Happy Thanksgiving

This week at the Card A Day Blog we are celebrating Canadian Thanksgiving.  When I think of Thanksgiving I think of going home, pulling up to the ranch house with the lights on inside and the vehicles parked in front, the meals and family and friends waiting inside.  Hopefully this card will have you thinking about the same things.

 
I used my Cricut to cut out the window, border and one of the branches.  I know there are dies out there that have similar cuts if you don't have a Cricut.  I then used the distress inks to color my window and the heat tool to dry it - I was impatient.


I made the flowers out of the punches, layered them together and added pearls centers.  I added pearls to the inside of the border section and a few around the outside of the flowers.  Tied a bow to the corner and a cluster of flowers to finish it off.

 
I kept the inside pretty plain as I my note will take up the page.  Thanks so much for stopping by.
 
 
Cutting Instructions:
Card Base: 8 1/2" x 5 1/2", scored at 4 1/4"
Front: 5 3/8" x 4 1/8"
Window Frame: Christmas Noel - Button 41 cut at 3 7/8"
Window (glass): Christmas Noel -Blackout Feature and Button 41 cut at 3 7/8"
Border: Paper Lace: Lace 2 - Button 23 at 1 1/2"
Martha Stewart Seasonal: Base and Button 7 at 1 1/8"

Paper: Recollections - white and purple; Provo Craft - Slab III, Stampin' Up - vellum, DCWV - The Luxury Stack
Ink: Distress Ink: Wild Honey, Scattered Straw, Broken China
Punches: Stampin' Up - Itty Bitty Punches (flowers), Boho Blossoms
Cricut Cartridges: Christmas Noel, Martha Stewart Seasonal, Paper Lace
Die:Tim Holtz - Tattered Floral
Ribbon: Stampin' Up - 1/2" Crumb Cake seam binding
Pearls: Recollections - brown
Misc.: Adhesive,

Thursday, November 22, 2012

Happy Thanksgiving

I have a Thanksgiving Blessings Mini Album.  I based it on this tutorial so I will not be putting the step by step here.  I do have listed below the general supplies I used and the papers per page below that. This is a long post.  Remember you can click on a photo and see a larger picture. 

Front Cover: I'm going to stamp the year on the tag.

 Pages 1 and 2:
 Page 3:

Page 4: I did use foam tape behind the bird and trim on page 3 and 4.  Just to let you know, I had to fiddle with it to get it to cut all the layers in my bind it all.

Page 5:

Page 6: I do have hearts I will be putting on these  birds - they are just drying.

 Page 7:


Page 8: If you are following the tutorial, you will note that I put this page up side down while I was binding it.  It will still work so I'm not worried about it and if I was giving it away how would anyone know. 

 Page 9:

Page 10:

Page 11:

Page 12:

Page 13:

 
 Page 14:The envelope on page 7 and 14 is one that I hand cut out of scraps of paper.  I do this when I finish a project so I know the name of the paper.  I have a mini binder clip to hold the envelope to the page.

Back Cover:

Now I just need to puct some pictures into it.

Thanks for stopping by.

Recipe:
Card stock: Recollections - tan, brown;
DCWV – Cardstock – Red, Orange, brown, green, rust  
Little Yellow Bicycle - Autumn Bliss Collections - Bronze Tonal, Autumn Argyle, Blue Linen
7 Gypsies Reef - Surf
Crate Paper: Lillian Collection - Gathering - both sides the brown and the birds
Sassafrass Lass - Life is Beautiful Woodland Whimsey Collection - Golden Love, Rose Thicket,
Scenic Route – Harvest Silly, Harvest Daisies
Bella Blvd - Family Tree – Leaves of Ancestry
My Minds Eye Green Bird "Love" Desire
Unknown scraps – Blue, red, yellow, green, the green envelope and tag, and flower envelope
Ink: VersaMagic - Black, Pearlescent Olive;
Punch: Stampin' Up - Word Window
Ribbon: Ikandee twine
Cricut Cartridge: Winter Woodland Cut at 2 3/4"
Misc.: Adhesive, foam tape Xmas Red Stickles, Bind It All, 3/4" Red Wires, safety pin, hot glue gun


Front Page:
Little Yellow Bicycle - Autumn Bliss Collections - Bronze Tonal for base unknown scraps for bird and green on front
Ribbon: Stampin' Up Very Vanilla 1/2" seam binding; American Crafts - brown, unknown red

Page 1 and 2:
DCWV - red card stock; Recollections - tan; 7 Gypsies Reef - Surf

Page 3 and 4
Page 3: Base - Crate Paper: Lillian Collection - Gathering; Yellow Mat - Sassafrass Lass- Life is Beautiful Woodland Whimsey Collection - Golden Love; Unknown scraps of red (at bottom of page), red and yellow backing stamped image.

Page 4 : Base - Crate Paper: Lillian Collection - Gathering; Mat - Back side of Crate Paper: Lillian Collection - Gathering; Unknown scraps of red (at bottom of page), red and yellow backing stamped image.

Pages: 5 and 6:
Page 5 : Base - DCWV – Orange card stock; Scenic Route – Harvest Silly Polka Dot and Stripe paper ( backside); DCWV - gold card stock; Rose scallop - Sassafrass Lass - Life is Beautiful Collection - Rose Thicket

Page 6: Base - DCWV - card stock; Photo Mat - Sassafrass Lass - Life is Beautiful Collection - Rose Thicket (backside); Bottom Edge -Crate Paper: Lillian Collection - Gathering

Bird - DCWV- brown Card stock; Little Yellow Bicycle - Autumn Bliss Collection - Bronze Leaves (back of paper);7 Gypsies Reef - Surf

Pages 7 and 8:
Page 7 and 8: Base - Little Yellow Bicycle - Autumn bliss Collection - Autumn Argyle; bottom of page - Bella Blvd - Family Tree; scallop strip - Little Yellow Bicycle - Autumn bliss Collection - Blue Linen,

Bird: DCWV - brown and green card stock; unknown scrap of blue,

Pages 9 and 10:
Page 9 Base: Bella Blvd - Family Tree Collection "Leaves of Ancestry; Photo Mat: DCWV - rust card stock; Scallop Trim: Scenic Route "Harvest Daisies Small White

Page 10 Base: DCWV - rust card stock: Photo Mat: Scenic Route "Harvest Daisies Small White; Trim:Bella Blvd - Family Tree Collection "Leaves of Ancestry

Pages 11 and 12:
Page 11 Base:DCWV - rust card stock: Photo Mat: Scenic Route "Harvest Daisies Small White; Trim:Bella Blvd - Family Tree Collection "Leaves of Ancestry

Page 12 Base: Bella Blvd - Family Tree Collection "Leaves of Ancestry; Photo Mat: DCWV - rust card stock; Scallop Trim: Scenic Route "Harvest Daisies Small White

Pages 13 and 14: Base- DCWV card stock: My Minds Eye Green Bird "Love" Desire; Yellow Mat - Sassafrass Lass Life is Beautiful Woodland Whimsey Collection - Golden Love; Photo Mats on page 14 - DCWV cardstock.


Tuesday, October 23, 2012

Happy Thanksgiving

Hi everyone today is my day at Card A Day Blog and the theme is Thanksgiving cards.   I just love the milk can stamp Christine at Creative Genie-ous used yesterday on her card yesterday. I have the cutting sizes listed at the bottom of my post.


For my card I started with a piece of cream cardstock and embossed with the Designer Frames then cut around it.  I used some post it notes to cover the sides of the frame where I did not want the ink to show up and stamped the wheat inside the frame.  I then stamped the pheasant onto white cardstock and cut around him. I used pop up dots behind the pheasant when I put him onto the frame.


The Happy Thanksgiving is one long wood stamp and I wanted break it into two pieces.  I cut my paper at 1/2" wide, stamped "Happy", cleaned my stamp then stamped "Thanksgiving". I use the same purple paper with the scallop punch and added it to the inside of the card ( it looks more blue in the picture but it is the same paper).


Tomorrow Terri Wright is the designer of the day at Card A Day Blog, so stop by and see what she had created for you. Don't forget to enter the challenges at Card A Day Blog.
 
Thanks for stopping by.

Cutting Instructions:
Card Base:  Brown cardstock - 8 1/2" x 5 1/2", scored at 4 1/2"
Cream Layer: 5 1/4" x 4"
Purple Layer: 5" x 3 3/4", then embossed

Inside Card: Cream Layer - 5 1/4" x 4"
Purple:  1" x 4", then punched, and glued with just a hint of brown showing at the bottom of the card.
Recipe:
Paper: Recollections - Brown, cream and white; DCWV - purple
Stamp: Stampin' Up - Autumn Days; Hero Arts - Thanksgiving Message
Ink: Stampin' Up - Early Espresso, Inkadinkadoo - Terra Cotta
Embossing Folder: Stampin' Up - Square Lattice and Designer Frames (the rectangle)
Punch: Stampin' Up - Scallops
Misc: ribbon, adhesive, pop up dots, scissors

Sunday, September 11, 2011

Giving Thanks - Card A Day Blog


This is my first card as a designer for Card A Day Blog which launched September 1. We will be giving you lots of inspiration for your own card making, so please stop by often. The 1st of October is the start of the Christmas Card Blog Hop.

This week’s theme is Giving Thanks. I always have a couple of cards that I hand deliver at this time of the year, so I can make them bulky and this is one of those cards. I used Design Studio to weld the leaves together to create my card base.


The card front is from white cardstock and glimmer misted until I got the look I wanted. I used a silk leaf as my flower base then started adding silk and Prima flowers until I got the look I wanted.


Add Image

I used the glue gun to attach the silk flowers to my card front.  I find that it will keep them where I want them better than regular adhesive.


I stamped "Happy Thanksgiving" on white cardstock, punched it out and tied it with gold thread.  I have pop up dots behind the tag and the gold thread is running through the flowers.  The ribbon is actually in two parts.  The bow is glued at the top with the ends tucked behind the flowers.  The tail is the second part and it is tucked behind the leaf on the bottom of the card.


I have some bulk to this card, but you can use some flat flowers and embellishments if you are planning on sending this through the mail.


I inked the edges of the white cardstock with ochre to give it a little bit of definition and added a couple of flowers with pearls for the center.  I'll write my message later.


Thanks for stopping by.


Recipe:
Cardstock:
Cricut Cartridges: George and Speaking of Fall
Stamp: Impression Obsession - Sentiments II
Ink: Inkadinkadoo - Coffee Bean, Ochre
Glimmer Mist: Peach Delight, Yellow Daisy, Antique Brass
Flowers:  Prima and Silk Flowers
Pearls: Recollections brown and off white
Ribbon: Stampin' Up - 1/2" Very Vanilla Seam binding.
Misc.: adhesive, pop up dots, glue gun,  gold thread
Punch: Stampin' Up - Modern Label; Fiskars - 1/8: circle punch