Showing posts with label Camp Out. Show all posts

Wednesday, September 4, 2019

Forgeries on the Fourth

Let's take a look at the Counterfeit Kit  Inspiration Kit from The Secret Not Secret Kit Club that Khristina Sorge made for us.


You can check out the individual pieces by clicking here.
Besides the Viewfinder, airplanes, camera, Karate people and Nintendo Controller I made a few more forgeries.


I love the Heidi Swapp Wolf  Pack Woodsy paper that was included in our Inspiration Kit this month.
I don't have a tree stamp that is large enough for the trees and I was to impatient to wait for paint/watercolor to dry, so I started looking through my Cricut Cartridges for pine trees and settled on the Camp Out Cartridge

I cut a bunch of trees, 24 per color, out of tan, off white, and two different colors of green. I did cut two sheets of the dark green pine trees as I make three pages of this one.  I was not particular on making sure all the little inner pieces of the tree were removed when I pulled it off the mat.

I figured out my layout across the page then used my Zyron to add the glue base and started making my paper. I did not mix it up like in the inspiration paper.

The light green paper has a bit of shimmer to it, it's an old DCWV but I do not know which paper pad. 

Paper Number two is the Vicki Boutin Kaleidoscope Say Cheese paper. 


I used a stamp that has three camera in a row to make my paper.  Using the Kraft cardstock, embossing ink and white embossing powder I stamped away, one row at a time, then heated that row and went onto the next row.


My cameras are larger than the inspiration piece and I have a couple of boo boo's on the right side. My embossing ink was really juicy, but I can easily cover it with embellishments.

In the Inspiration Kit we had Circle Words Epoxy Flair
and the Boys Will Be Boys Stamp Set
So I pulled out a couple of dies - Button dies  for the round element and arrow dies for the crossed arrows in the stamp set.  I just cut them out of the leftover papers from the trees. I will keep them out so that I can cut more to match my layouts as I scrap book and need other colors.


I know there were not leaves butterflies and hearts in the kit but they will work well on my pages.


Thanks for stopping by.

We always love to see your work, so please share your kits and projects with us.
You can use our Monthly Link-up page, post them in our Facebook Community, or share them on Instagram (we are @counterfeitkitchallenge or tag us using #counterfeitkitchallenge and #ckcseptember2019).


Recipe:
Counterfeit Kit - CKC Fun Times
Kraft, white, green, light tan off white cardstock
Cricut cartridge: Camp Out
white embossing powder and Embossing Ink
Stamp: Unity Kit of the month May 2017 {free your dreams}
Dies: Stampin' Up Embosslits - Beautiful Wings, Sweet Buttons; Becky Higgins Project Life Nest Dies - mini banner; Monstera Leaf and Leaf Sample dies; Paper Smooches - tiny hearts; Unknow flower center; Art C stamp and die - Southwestern
Zyron

Sunday, December 13, 2015

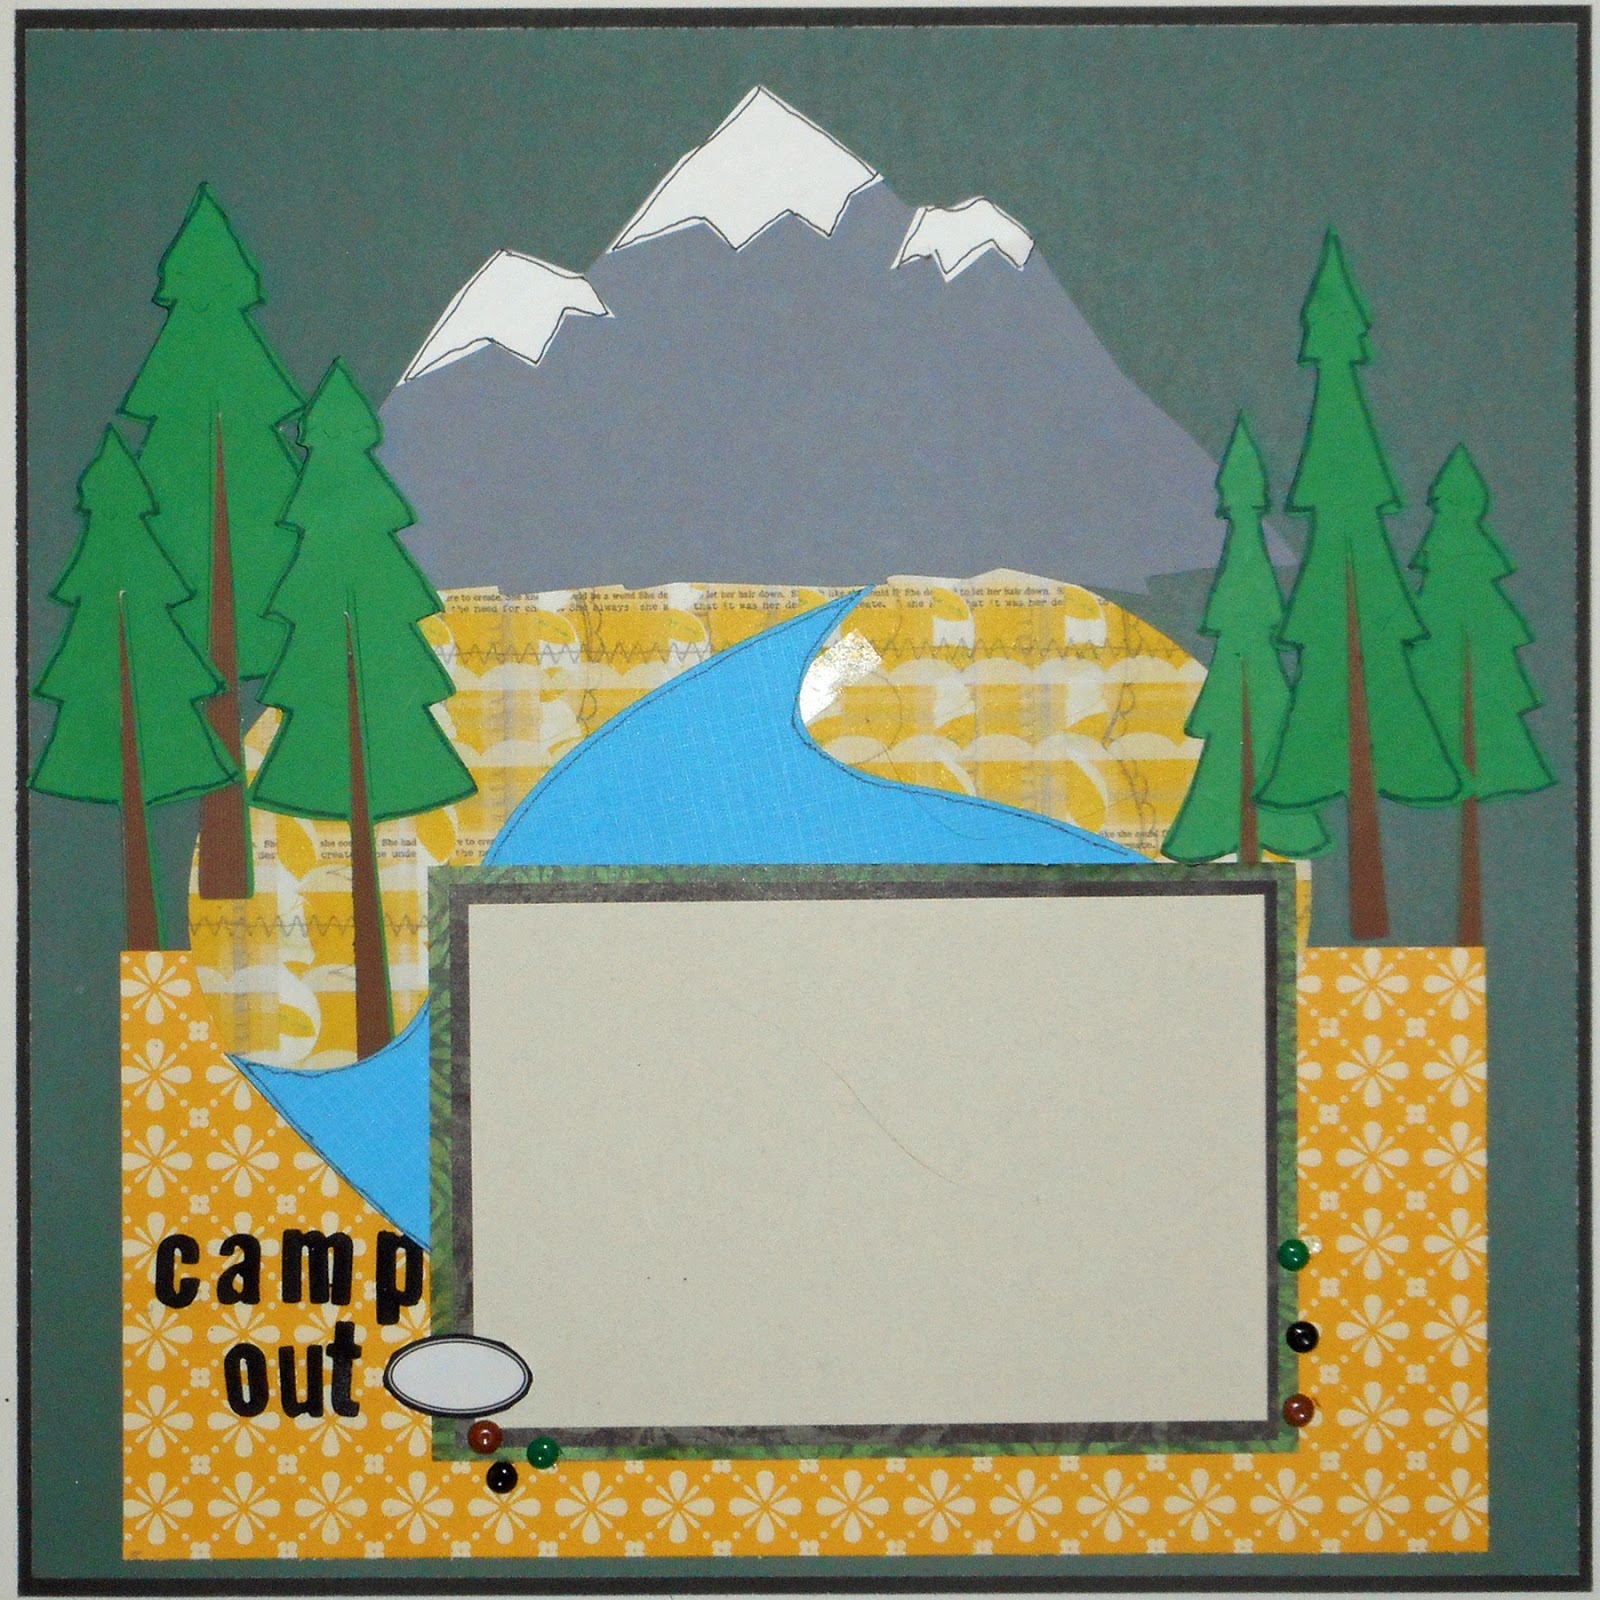
Camp Out

I'm playing catch up with some layouts I did not get posted during the year. This layout is for my oldest son they had gone camping at Afton State Park


I used the image from the Graphically Speaking Cartridge for the path - I cut it in half for the trail and layered it behind the photo mat.  The "camp out" is cut using the craft foam and my Xyron sticker maker. I have a couple of trees pop up with Zots. The mountains were cut twice one in gray then again in white for the now . I know there are not mountains in Afton but I really liked the way they looked on the page.

I used the mini heart punch on the tent, then used a piece of the netting I patched his tent with. Even though I patched the tent after they went camping it's just a nice touch and a small reminder. 


Thanks for stopping by.

October 2015 Counterfeit Kit - Autumn Leaves
2- 12x12 Layouts
- 8 1/2 x 11 Layouts
- Cards

Recipe:
October  Counterfeit Kit:
Paper:
Pink Paislee - She Art "Leap"; DCWV - Green, white, grey, brown and blue cardstock, Chalkboard Stack - Green and Black; The Paper Studio - Tattered & Worn Stack;  Unknown Tan; October Afternoon - Fly a Kite "Dandelions"
Sharpie: Green and black
Cricut Cartridges: Camp Out, George and the Basic Shapes, Graphically Speaking, Winter Woodland
Die: Die-namics Little Lowercase Letters
Punch: EK Success - mini heart
Die:Misc.: Adhesive,  Craft Foam, DIY Enamel Dots, Labels, Netting and Zots

Wednesday, December 19, 2012

West Yellowstone - Layout

I used two different DCWV paper pad to create this layout.  The Lodge stack has this great lake scenery which reminds me of West Yellowstone.  The Photo Real Stack has the water background kind of like a lake or river.  I combined the two with a piece of black card stock to separate my backgrounds. 
 
 
Thanks for stopping by.

Recipe:
Paper: Recollections - black; Stampin' Up - Vellum; DCWV - Black and green; DCWV - The Lodge (rock and lake scenery paper), The Photo Real Stack 3 (water paper); DCWV- tan and brown
Ink: VersaMagic - Midnight Black
Cricut Cartridge: Camp Out
Alphabet Stickers: Basic Grey - Wander
Punch: Martha Stewart - Photo Corners; Stampin' Up - Word Window
Die: Tim Holtz Alterations - Baroque
Misc.: adhesive, pop up dots,

Thursday, October 14, 2010

Altered Art

One of October's Challenges at Scrapbook Heaven is an OTP "Off The Paper". How about a Post it Note Holder made from an Acrylic frame? I chose a free standing 5x7 Acrylic frame for this project. The come in all shapes and sizes so pick one that works for you.

The hardest part of this whole project is trying to figure out what I wanted on the inside. I also chose to use the 3x3 post it notes.

Thanks for stopping by.
Click here for the cut file.
Recipe:
Paper: Seasons Paper Pack - Pattern Paper DCWV - brown, white, two colors of orange and white.
Cricut Cartridges: Camp Out, George, Paper Doll Dress Up
Ink: Black and Brown
Misc: glue, Acrylic Frame, post it notes.

Wednesday, June 16, 2010

Father's Day Card

I haven't had a chance to use the Wild Card Cartridge the guys got me for Mother's Day so I thought I would check it out and see what it had for Father's Day on it. Well I found the circle card shape and decided that I wanted to use that as my card base. Then I added the pine trees from Camp Out to the front of my card. I cut the trunk of the trees off of the green card stock so the brown trunks would show, and used pop up dots between the layers.


I used the Cut out Circle from Wild Card to highlight "Happy Father's Day", I'm also going to write my message to dad on this circle. I also cut a base circle for the inside of the card from the Sports Mania cartridge, I used one sided card stock and didn't want the white inside to show.


Then I went back to the Camp Out cartridge and cut the deer and another set of trees. I didn't use the shadow feature on any of the trees but if you want to I cut them all out at 4". I inked around the deer to give him a little bit of shading. I used pop up dots between the base and black out layers on the deer and trees.


I did not cut an envelope for this card, as it is going into the package I'm sending Dad. The card base will fit on the 6x12 mat and took up the whole mat. I did this all in Design Studio and used the 12x12 mat but this can easily convert to the 12x6 mat.

Click here for the cut file.

Recipe: Paper: Card base - Old World Stack, Trees - green and brown, Deer - I used three different colors of brown, Patterned paper for the inside, white and blue card stock.

Thursday, March 25, 2010

Spring Mini Tag Album

Here's a little mini tag album. I used toilet paper rolls to hold the tags. All of the tags were cut with Tags, Bags, Boxes and More. For the most part I alternated the toilet paper rolls with card stock pages. On the cover I used a piece of acetate stamped my border then embossed it. "Tristen" was cut using Jasmine and I welded the pieces together with Design Studio.


The front of page two I left blank, but the backside has a mat cut from Accent Essential with a piece of punched paper.


Pages 3 is the first toilet paper roll with only one side decorated with a scallop frame cut from Accent Essential. Page 4 is card stock with a caterpillar cut from Walk in My Garden on one side and a mat on the other side.


Page 5 is another piece of acetate with a border stamp embossed in blue an My Boy glued to the back side. My is cut using the Jasmine Cartridge and Boy is from Graphically Speaking.
Page 6 is another toilet paper roll with a tag inside.


The next page is this cute little turtle on a photo mat. The turtle was cut from Walk in My Garden. Then another toilet paper roll with a photo mat.


The next two pages are of card stock with a couple of photo mats, the scallop frame from Accent Essential and then Tree from Walk in My Garden.


The last two pages are another piece of acetate, stamped and embossed. Boy is cut from Graphically speaking.

I used eyelets on each page as this little album will get lots of use. I used pop up dots behind the scallop frames, tree, caterpillar and turtle.


Here's a list of the cartridges I used along with what I cut from them.
Accent Essentials - Scallop Frame and Label
Camp Out - Tree
Grapchically Speaking - Boy
Jasmine - My - I welded them together
Tags Bags Boxes and More - Tags
Walk In My Garden - Caterpillar Turtle

Recipe: Paper DCWV The Stack 6, solid colors of card stock, Cricut Cartridges: Accent Essential, Camp Out, Graphically Speaking, Jasmine, Tags Bags Boxes and More Misc: border stamp, embossing powder, eyelets glue and pop up dots, Martha Stewart Arch Lace Punch.