Showing posts with label Altered Art. Show all posts

Thursday, February 8, 2018

Snowflake Candle Holder

I'm use the last full sheet of pattern paper from my January CKC Kit - Holiday Joy. I trimmed it down and backed it with white cardstock. I have a piece of scrap paper behind my photos. I kept this layout pretty simple with a  large die cut snowflake and the glittered clip as my embellishments. The glittered clip holds my journaling.


The glittered clip holds my journaling. I needed to make a quick gift and pulled out a couple of salsa jars. Painted then white and then stamped them with my favorite snowflake stamp.

Thanks for stopping by.

Operation Christmas Card - 10
Christy's Beautiful Life: #30DSCBL2

Sketch #1: Christmas Ornaments
Sketch #2: Oh Christmas Tree
Sketch #3 - Merry Christmas Tree
Sketch #4: Iron Monuments
Sketch #6: Snowflake Layout

 100 Pattern Paper Challenge: 5 sheets

January Counterfeit Kit - Holiday Joy
15 - 12x12 Layouts
 5 -  8 1/2x11 Layouts
 2 -  12x12 Project Life
       8 1/2x 11 Project Life
  1 - Planner Pages
18 - Cards
  8 - Tags

Recipe:
January Counterfeit Kit - Holiday Joy
Paper - Unknown snowflake paper and white cardstock
Stamp: Unity Stamps KOTM November 2015 {best year yet}

Thursday, September 19, 2013

Ballerina Altered Frame

I picked up a wooden frame to make this Ballerina Dress frame for a little girl.  I started by painting the frame front and back. 
  

While it was drying I punched from vellum 6 large and 6 small petals using the Build a Blossom Punch. I inked them then started gluing them together to get the bottom of the dress. I used the tab punch for the bodice and inked the edges.


I added a row of pearls around the neckline, rhinestones on the large petals and a ribbon around the waist.


To finish I added a scrap of lace and a row of pearls to top it off. 

Thanks for stopping by.


Recipe:
Card stock: Vellum
Ink: Martha Stewart - Sea Lavender, Ocean
Paint:Acyclic Paint - Razzle Berry
Ribbon and Lace:  scrap of lace for frame
Punch: Stampin' Up -  Build a Blossom Punch, Tab Punch,
Pearls and Rhinestones - Recollection; unknown string of pearls
Misc:  Adhesive, foam tape, Zots, pop up dots, Blue painters tape,  foam paint brush

Saturday, March 30, 2013

Glass Block

I made a glass block night light. I taped the inside where the image is going and painted it with gesso.  After it was dry I sprayed with spray enamel.  I cut my image using the Cricut and attaching the vinyl on top. 
 
 
After adding my lights I wrapped a pink and gold wired ribbon around the outside of the block. 
 
 
She is so sweet when the lights are on.

Thanks for stopping by.

Recipe:
Glass Block and lights
Vinyl: Black
Ribbon and Lace: Craft Essentials 1 1/2" Sheer wired ribbon for outside of glass block
Cricut Cartridge: Kate's ABC's
Misc:  Blue painters tape, Gesso, foam paint brush, Spray Enamel

Saturday, October 13, 2012

Altered Picture Frame

Miss Sophie is turning three this year and I decided to alter a picture frame for her.  I picked this one up from Michael's. I left the easel on the back that way they can decide to have it hanging or standing.


I started off by trimming the paper to fit each 4 x 6 window.

 
I used a chipboard tree that I covered with green cardstock on both sides and inked the edges.  The chipboard truck is also covered on both sides and inked.   The pink cardstock inside the frame is embossed .

 
I cut a the butterfly out of the pink cardstock and a piece of vellum.  The pink card stock is inked around the edges and the vellum is embossed.  I added a layer of rhinestone for the body of the butterfly. The ribbon is wrapped around the glass and the butterfly is attached to side of frame.


I covered both sides of the Chipboard letter "S" and inked the edges in green.  I made the ribbon rose  and glued it to the center of the "S".  The rhinestones were added from the center of the "S" out to the edges.


I added a bunch of flowers and buttons to the side of this frame.  I tucked in a couple of blue pom poms left over from a piece of trim.  Then I added the chipboard blue butterfly on top of a couple of buttons to make it a little bit higher.   To finish it off I add a couple of rhinestone swirls.


Thanks for stopping by.

Recipe:
Paper: Cardstock - Stampin' Up -Vellum; Prima - Fairy Flora Collection "Garden Party"; DCWV - pink and green.
Embossing Folder: Stampin' Up - Elegant Line
Die: Stampin' Up - Beautiful Butterflies
Ribbon: 5/8" offray Ribbon, Orange ribbon for flower
Misc.: {Most of the embellishments are left overs from a Scrapbook Heaven Kit} Chipboard letter S, adhesive, pop up dots, hot glue, rhinestones, buttons, flowers, chipboard tree

Monday, November 7, 2011

Gingerbread Man Treat Jar - Day 1


The Card A Day Blog's theme this week is Christmas Food.   The first thing I thought of was Gingerbread Cookies and my card inspiration this week is on Saturday so I thought I would have a week of Gingerbread Man ideas.  For today I have a Gingerbread Man Treat Jar. 


The red cardstock is 2 1/4" with the punched border and the pattern paper is 1 5/8".  Over that I wrapped a sheer 7/8' ribbon.  I stamped my sentiment in red and then layered them onto another punched cardstock.   


I used the From my Kitchen cartridge to cut the gingerbread man out of felt and sewed on a couple of button's with light weight yarn and a couple of beads for his eyes.


Thanks for stopping by.

From My Kitchen - gingerbread man cut out at 3" with the shadow feature selected.

Recipe:
Paper: Cardstock -Unknown Scraps - red, brown, blue, white; Pattern Paper - K&I Memories scrapbook kit ( it is several years old)
Cricut Cartridge: From my Kitchen
Ink: Stampin' Up - Real Red
Stamps: Stampin' Up: Snow Swirled - "May the true spirit...", Hodgepodge Happiness - "just 4 you"
Punch: Stampin' Up - Decorative Label, Modern Label, Word Window; Unknown: -Christmas Ornament Border Punch.
Misc: felt, buttons, yarn, beads, thread, adhesive

Tuesday, October 11, 2011

Halloween Treat Jars - Day 6

For Day 6 of the 12 days of Halloween I am altering a Frappuccino bottle.  I need a few to drop off for the ladies at work. Since my son loves these there is always a supply for me to recycle. Be sure to wash it out really well.  I peeled off the label before running it through the dishwasher.  I wasn't worried about the glue residue as I am covering that up.  If you want to remove the glue you will have to use a product like Goof Off or Goo Gone. 

 The scrapbook paper is cut 2 1/2" inches wide.  I then wrap it around the bottle to see where I can cut the extra off at. I then punched the spider web on a 5" piece of black cardstock and glued this to the inside of the designer paper.


Using the Decorative label I punched another designer paper for the background. On top of this is the white cardstock with a sticker from the Achievers Halloween kit. I then punched a the bird out of the black and glittered cardstock. I have a pop up dot behind the bird.


I used the Martha Stewart bat punch for this set of bottles.  You can make your own mix or buy a pre-mixed one.  I have a friend who is allergic to nuts so I always make my own concoction for her.

If you missed any of the other days click here.

Thanks for stopping by.

Recipe:
Paper: Designer Paper - scraps from the Achievers Halloween Kit, cardstock - scraps of black and white, Best Creations Glittered cardstock - Champagne gem
Ink: Inkadinkado - terra cotta
Punches: Martha Stewart - Spiderweb border punch, Bat punch; Stampin' Up - Bird Builder, Decorative Label and Designer Label
Misc: pop up dots and adhesive.

Friday, August 19, 2011

Three Altered Mini Books

When I was at the Food and Wine show in Minneapolis we were given mini notebooks to keep track of our taste testing.

I turned mine into a mini scrapbook. I use the Stampin' Up Just Believe stamp for the cover along with a scrap of ribbon an a few pearls.


I traced the pattern from above and made a couple more using the bind it all to put them together.


Thanks for stopping. by.


<

Tuesday, May 24, 2011

Altered Notebook

I just finished this altered notebook for my Sister. I'm meeting her in June in Wyoming for a Quilting Camp and this will be a surprise for her.

The Prima paper and chipboard flower branch and butterfly came in my Scrapbook Heaven kit. I used a couple of different glimmer mists on the flower branch and the Rock candy distress Crackle paint which doesn't show up in the picture. For the small butterfly under the saying I used the Stamp and Write marker and Ultra Thick embossing powder.

I stamped my butterflies twice onto cream colored cardstock with distress ink. A trick to keep the distress ink from smearing is to use clear embossing ink on your stamp then use the distress ink. I used pop up dots to raise the butterflies up.
A few left over rhinestones accent the leaves on the pattern paper.

Thanks for stopping by.

Recipe:
Paper: Prima - Annalee Collection "Avondale" and Chipboard pieces are from a Scrapbook Heaven Kit
Ink: Versa mark embossing ink; Distress Ink - Victorian Velvet, Rusty Hinge, Bundled Sage;
Stampin' Up - Stamp and Write Markers - Rich Razzleberry, Blushing Bride
Stamps: Unity Kit of the Month - Just you (March 2011); Stampin' Up - Bliss
Glimmer Mist: Antique Brass, Kiwi, Jazz Blue
Misc: Distress Crackle Paint - Clear Rock Candy, Ultra Thick Embossing Powder, ribbon, rhinestones,

Sunday, February 6, 2011

Valentine Subway Art

I keep seeing around the Internet a lot of Valentine Subway or Word Art. I haven't made anything lately with Adobe Photoshop and thought that this is the perfect file to start off with.


My frame is a 4x6 and I sized the word art down to give me a white border all around the words when I placed it in the frame. I also printed mine on picture glossy photo paper but you could use any paper.

Thanks for stopping by.


Click here for the file.

Recipe:
Frame, glossy photo paper.

Thursday, February 3, 2011

Love Birds

My guys had given me a 12x24 mat for my Cricut last year and I have not used it. While I was out picking up a new heat gun I also picked up the red and black vinyl to do this project.


The hardest part was getting my Cricut to cut. I had not changed the setting to 12x24 on the Cricut itself and kept getting an error. The inside of my frame measures 13 1/2" x 10 1/2". I used George to make this size of a rectangle and placed my shapes inside it to get the right size. I cut the birds separately and did not weld them to the branch. I just a piece of batting for the background as I don't have paper this size and couldn't find a piece of material I wanted to use.

Thanks for stopping by.

Click here for the cut file.

Recipe:
Cricut Vinyl: Red and Black
Cricut Cartridges: A Child's Year and Winter Woodland
Misc: Frame and batting

Monday, December 27, 2010

Joyful . . .

Joyful is the word for December.

I glitter misted the file folder with a red and blue mist that I made to give the background a bit of shimmer. I didn't want the folders to be as dark as the Thanksgiving one I did earlier. I had purchased these flower silk flowers for my wreath and candle project and had some left over, so I used them here.

The left hand side of the folder show cased this large flower if from a Scrapbook Heaven Kit. As soon as I got this flower I knew I wanted to use it for the folder for December.

I cut a couple of the from chipboard, recycled, to glue behind my glitter paper.

Recipe:
Paper: File Folder, Pattern Paper - left over from a Scrapbook Heaven Kit, White Glitter Paper - DCWV
Ink: Distress Ink - Fired Brick, Tattered Rose, Walnut Stain, Faded Jean, Antique Linen
Alteration Die - Baroque
Misc: Cosmo Cricket Redline Chipboard Letters, hot glue, pop up dots, silk flowers

Sunday, December 26, 2010

Merry Christmas . . .

The candles I made for the dinning room table. I hot glued the ribbon on then the poinsettia's and leafs. Oh yea, I got the white plate from the dollar store.

I re-purposed this wreath. The grape vine is one I had made years ago when we were in Washington State. I spray painted it white, twisted the bulbs in together in sets of three and added the greenery.

Thursday, November 25, 2010

Blessings

Happy Thanksgiving.

I know I have a lot to be thankful for this year and this project by Pinkscrapper99 was perfect for Autumn or Thanksgiving so I thought I would give it a try. I know some stores were open today but everything on this was made from what I already had on hand.


The hardest part was finding the music I wanted to put on the book, I used Google, then downloaded it and printed onto white paper, I did not use cardstock. I trimmed the sides of the file folder to make them straight and my folder size is larger than the one she trimmed it down to.


Here's a close up of the flowers on the left hand side. I haven't added ribbon to the tags yet and the back of them are plain for journaling.


I painted the chipboard letters white and the baroque die is painted black.

Thanks for stopping by.

Click here for the tag cut file.

Recipe:
Paper: File Folder, Pattern Paper - left overs from a Scrapbook Heaven Kit
Ink: For the Tags -Stampin' Up - Poppy Parade, Pear Pizzaz; Distress Ink - Dried Marigold, Vintage Photo, Peeled Paint, Scattered Straw, Walnut Stain, Tea Dye
Alterations Die - Baroque
Misc: Glue, hot glue, pop up dots, silk flowers, paint, shipboard letters, ribbon

Thursday, October 14, 2010

Altered Art

One of October's Challenges at Scrapbook Heaven is an OTP "Off The Paper". How about a Post it Note Holder made from an Acrylic frame? I chose a free standing 5x7 Acrylic frame for this project. The come in all shapes and sizes so pick one that works for you.

The hardest part of this whole project is trying to figure out what I wanted on the inside. I also chose to use the 3x3 post it notes.

Thanks for stopping by.
Click here for the cut file.
Recipe:
Paper: Seasons Paper Pack - Pattern Paper DCWV - brown, white, two colors of orange and white.
Cricut Cartridges: Camp Out, George, Paper Doll Dress Up
Ink: Black and Brown
Misc: glue, Acrylic Frame, post it notes.

Wednesday, October 13, 2010

Halloween Treats and tag

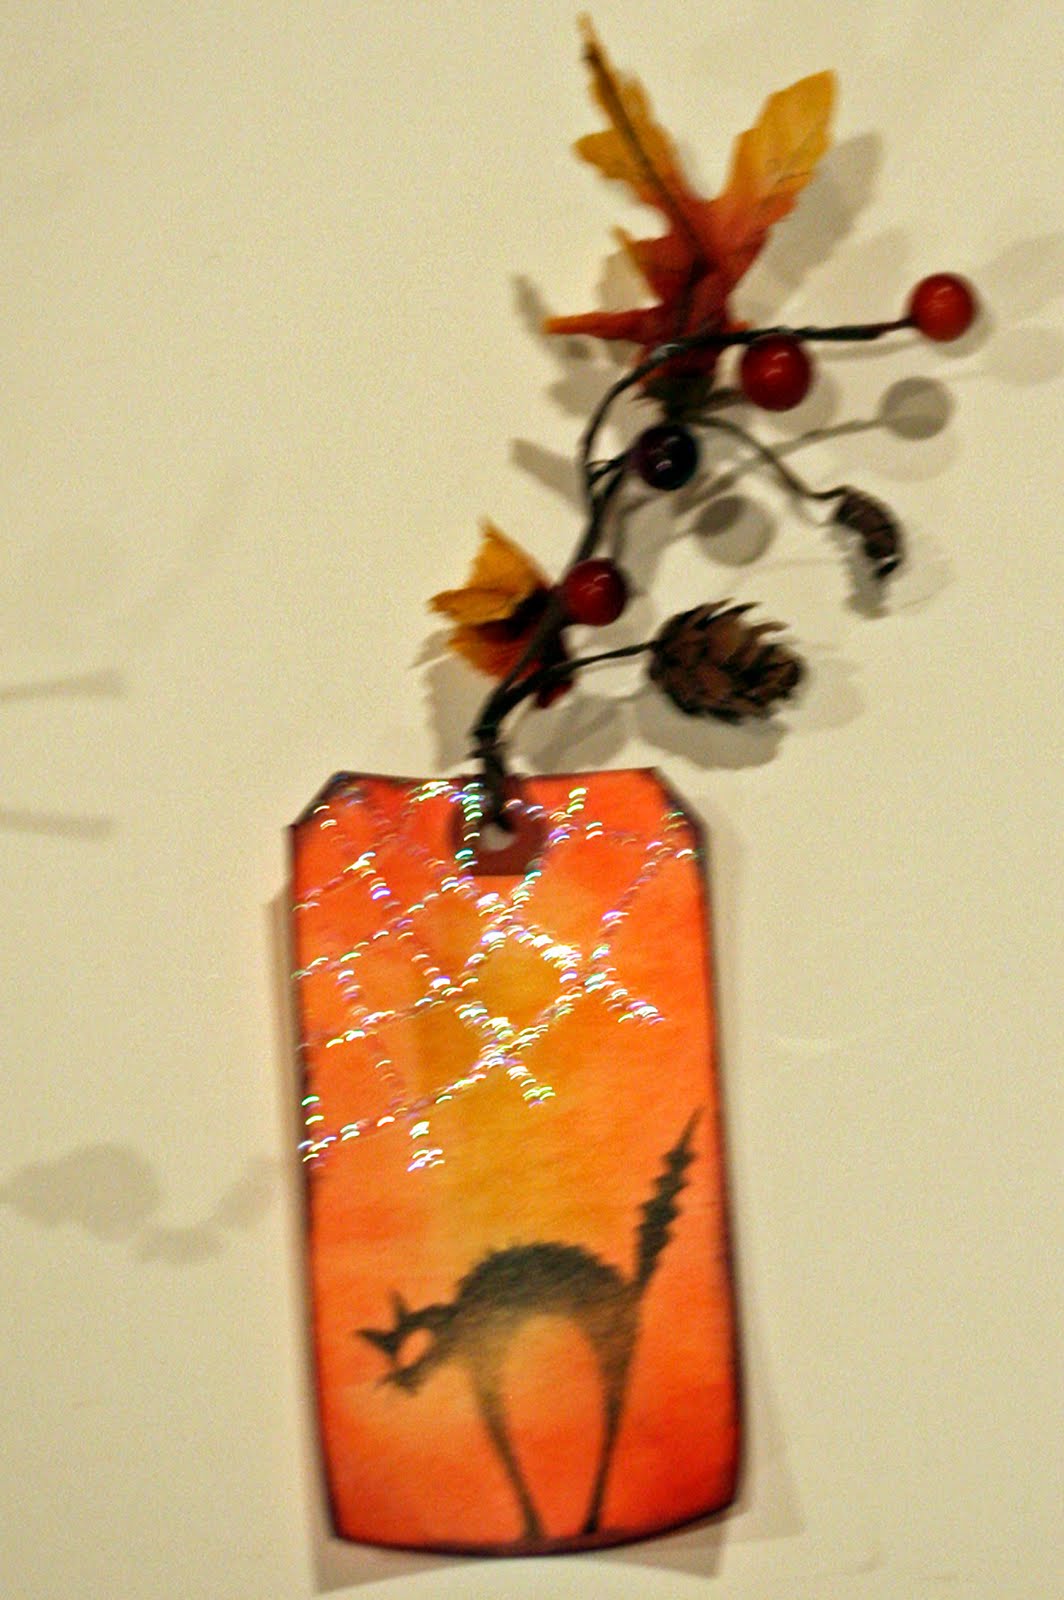
This month's project for the stamping club is "Anything Goes". I decided to make a Halloween treat cup and tag. The bat and "Spooky" are foam stamps from Making Memories. The leaves, berries and pumpkins are from a Wreath from Michael's that I cut apart to glue onto the the clay pot and wrapped through the tag.
The tag and "Spooky" are both distressed. I clear embossed the spider web then used the stickles to follow the pattern of the web. Be sure to distress the back of the tag for a finished look.
Thanks for stopping by

Recipe:

Ink: Distress Ink: Dusty Concord, Aged Mahogany, Dried Marigold, Scattered Straw, Peeled Paint; Color Box Pigment Ink - Canary and Orange; Stampin Up - Black
Paper: Scraps of white for the "Spooky"
Stamps: Making Memories foam stamps - Halloween 2
Punch: 1 3/8 Circle punch
Misc: tags, raffia, wired ribbon Ice Stickles - Crystal Ice Fall Wreath from Mitchael's, wire-for handles, clay pot, hot glue gun

Monday, June 29, 2009

Floral Stick Pins

I like the look of the stick pin you see in various projects on the Internet. I have not bought any as the only ones I can find come in the color of pink and are shaped hearts. If you have been following my blog you can see that I don't use pink a lot. I have guys so I need guy colors. Here is what I came up with. I went to JoAnn's and looked in the floral department and bought the floral pins.

I dipped them into acrylic paint and let dry. Then applied a coat of varnish. After they were dry I cleaned them up with my fingernail to get the excess paint and varnish off.


This is what they look like with the varnish, nice and shiny,


I used the Ranger distressing ink, stamp pad ink, and alcohol ink on them. I just twirled the stick pin while adding the alcohol ink, or rubbed them across my stamp pad. A Styrofoam plate works well to hold the stick pins up while drying. Once they were dry I dipped them in varnish. The ones I rubbed in stamp pad ink were still a bit damp after leaving them over night, but I dipped them in varnish anyway. They dried very nicely.


With a few buttons, beads, or ribbon you now have a custom made stick pin. This is what mine looks like. I glued a seed bead to the bottom of the pin so no one would poked them self.

Thursday, June 25, 2009

Paper Mache Boxes

I've collected a few of the Cricut Cartridges and I've been trying to figure out how I want to store them. I love the boxes they come but, I have a few of them and want to condense the stack of boxes. I started putting them in a plastic tote but I have since grown out of that and didn't want to go to a larger size tote.


I picked up a couple sets of three Paper Mache Boxes from JoAnn's. I'll store in the small box the cartridges, the middle size is the perfect size for the Cricut Cartridges and Keypad Cover and the largest box I am going to use to sort my chipboard letters.


I have no secret for painting the boxes, just that it takes awhile for all the layers of paint to dry. I dug out my acrylic paints and painted the boxes, stamped, added a layer of crackle paint, painted again and stamped a simple design on the outside and lid of each box, then a light coat of varnish. I sponged the inside of the boxes and sealed with a light coat of varnish. I'm undecided if I want to add feet to the boxes.

Using Design Studio I made the dividers on the inside and cut out of Cardstock.. Pulled out my P-touch and labeled all of the dividers for the boxes. I have two medium size boxes for Cricut Cartridges which gives me a little bit of room to grow.


Tuesday, June 23, 2009

Mini Notebooks

I'm trying to downsize what I carry and these Mini Notebooks will fit perfectly in my purse. I covered the outside with scrapbooking paper that was left over from a pregnancy journal and stamped on the inside of some of the pages inside.


Sunday, March 15, 2009

Altered Notebook


After picking out the paper and the notebook, this is the final product. My DS was asked to be a godfather to so I made a pregnancy journal.

This is the greatest paper - it is fuzzy in spots.
I used my cricut to cut the tabs for months 1 through 9 and stickers for the numbers. There are two blank tabs one in the font and one after 9 months.


I used the same stickers to decorate the first page on the tab sections. I had a hard time trying to find pregnancy stickers. there are lots of stickers for baby.


Recipe: Paper: Heidi Grace Paper, Luxury Stack, scraps of white, Cricut: Misc: glue, stickers, pen, micro beads, red line tape, flower rhinestones by kaiser, ribbon