Showing posts with label Halloween. Show all posts

Wednesday, September 25, 2013

Dark Night Bat Wings

Hi everyone and thanks for joining me from the Card A Day Blog. This week’s theme is all about Halloween. I had this new stamp "Spooky dark night bat wings" from Unity Stamps that I wanted to use as a label on my jar, but I just couldn't get it to work.  So I used it as a tag instead and the bats inside my jar.  


 I started by stamping my jar onto white cardstock and cutting it out.  I then placed my bats inside my jar to get the placement, took my acrylic block and pressed them onto it, then inked my stamps.  While they were drying I punched the spider web in black cardstock (for the front of the card) and in the Frist Edition pattern paper (for the inside). I added my polka dot band to the spider web border and placed it on the card.  I then put the jar on the paper and once again placed the bats, pressed my acrylic block to them then inked them.  After I stamped all the bats I then started attaching everything to the card front.  


 For the inside of my card I use white cardstock for the memo section then added the First edition paper that I punched earlier to the back.  I also stamped another set of bats in the corner.


I was going to call it quits there but the jar looked like it need something to I added the neon ribbon around the top of it.  That neon ribbon is so old; my guys used it to make stuff out of pony beads, so I have no idea who made it. I also added stickles to the eyes of the bats.

Thanks for stopping by.

Cutting Instructions:
Card Base: 8 1/2" x 5 1/2", scored at 4 1/4"
Word Paper: 4" x 5 1/4"
Polka Dot Paper: 4" x 1 1/4"
Inside Card:  4 1/2" x 4"

Recipe:
Cardstock: Recollections - Black and white; DCWV - white; My Minds Eye - Day Dream Bugglegum Girl; Stampin' Up - Frist Edition
Stamps: Clear Stamps - Halloween Boogie (small and medium bats); Unity Stamps - Unity Kit of the Month - August 2012 {Colors of the Seasons}, August 2013 {cozy moments}
Ink: Stampin' Up - Basic Black and Basic Gray
Punch: Martha Stewart - Spider Web border
Ribbon: Stampin' Up - Cherry Cobber and Pear Pizzazz;
Stickles: Fruit Punch
Misc.: Adhesive, pop up dots, scissors, button, scrap of jute 

Monday, October 29, 2012

Witche's Shoes

I made the ladies at work a couple of Witches Shoes in non-Halloween colors. 


Thanks for stopping by.

Disclosure: I am not affiliated with any of the products mentioned.

Entered in the Bitten by The Bug 2 Challenge

Recipe:
Paper: Recollections - White;
Outside Shoe - October Afternoon - Cherry Hill "Recipe Box"
Inside Shoe - My Mind's Eye - Deena's Penny Lane

Outside Shoe Green Argyle -Basic Grey - Lemonade "Tee Time"
Inside Shoe - Fancy Pants - Wishful Thinking "Corsage"

Ribbon: Stampin' Up - 1/2" Rose Red seam binging; Unknown - mini pearls on a string
Glitter: Martha Stewart - tourmaline and rubelite
Cricut: A Child's Year cut at 2 7/8"
Punch: Martha Stewart - Spider Web Border Punch
Misc.: adhesive and hot glue

Friday, September 28, 2012

Happy Halloween

Happy Halloween!  This weeks challenge at the Card A Day Blog is Halloween.


My card base is a piece of black cardstock cut to 11" x 4 1/4" scored at 5 1/2".  The purple is 5 1/4 x 4 and the green cardstock is 5"x 3 3/4".  I used the distress dots background stamp on the green cardstock.  I used my Cricut to cut the frame from Elegant Edges.  I then covered it black glitter.  The witch is stamped on orange cardstock then cut to fit my frame.  I used foam tape behind the witch for added dimension.  I tied black seam binding around the bottom of the card. 


For the inside of the card I stamped the green cardstock again with the distress dots background stamp and used a white cardstock for the mat.  All of the edges were inked with black ink.

Thanks so much for stopping by.  Don't forget to come back tomorrow to see what Kelly George has for you.


Recipe:
Paper: Cardstock - DCWV - purple and green; Recollections - black and white; Unknown - Orange
Stamp: CTMH - Wicked; Stampin' Up - Distressed Dots
Ink: VersaMagic - Midnight Black and Pearlescent Ivy; Stazon - Black
Glitter: Recollections - Ebony
Cricut: Elegant Edges
Misc.: adhesive, seam binding, foam tape

Saturday, September 22, 2012

Witch's Shoe - Challenge #34

Gina's weekly challenge at My Scrap Room is to make a witch's shoe using a paper shoe pattern from Skip To My Lou.org along with a few other requirements. 

 We were only required to make one, but these are going to be for the girls at the office so I made a few. 
 
The witches are cut with my Cricut at 2 7/8" from A Child's Year cartridge.  I used two per shoe, glittered the outside and hot glued them to the top of the spider web.


I can only get one outside shoe template on a piece of 12 x 12 paper, but I can get two inside shoe templates on a piece of 12x12 paper
 
 
Thanks for looking and stopping by.
 
Recipe:
Template from Skip To My Lou.org
 
Paper: Recollections - Black; Doodlebug Designs, Inc. - Beetle black dot-grid;  Kaiser Scrapbook  To Have & To Hold - Everlasting.
Cricut:  A Child's Year
Punch:  Martha Stewart - Spider Web
Misc.: adhesive, glue gun, pearls on a string, lace, seam binding, buttons, glitter, scissors


Monday, October 24, 2011

Halloween Treat - Day 11

If you missed any of the other 12 Days of Halloween click here. Today I have a couple of treat cards to share with you. These treat cards are super quick to make and I have them in two sizes. The small one will hold a smarties and the larger one will hold a roll of lifesavers. 

I kept decorations simple as I wanted the bat fence to be the focal point.  My black bat is embossed with black embossing power. 

The bow is pop doted on the side of the candy holder with a bit of embroidery thread running through it.


Thanks for stopping by.

Large Treat Holder:
Cardstock Base - 4 x 5 scored at 1/2", 1 1/4" and at 2" on the 5" side. Turn and measure down 3/4" and 3 1/4" this is where you will cut your line from the first score line to the third score line. 

Small Treat Holder:
Cardstock Base - 2 3/4" x 4 scored at 1/4", 3/4' and 1 1/4" on the 4" side.  Turn and measure down 1/2" and 3 3/4" this is where you will cut your line from the first score line to the third score line.

Recipe:
Paper: DCWV cardstock - black, white and purple, Unknown pattern paper
Stamp: Stampin' Up -  Tiny Tags, From the Crypt
Ink: Stampin' Up - Basic Black,; Versamark Ink
Punch: Stampin' Up Decorative Label,  Jewelry Tag; Martha Stewart - Wrought Iron Fence Punch
Misc: black embossing powder, adhesive, embroidery thread, pop up dots. 

Wednesday, October 19, 2011

Halloween Subway Art Day 10

Day 10 of the 12 Days of Halloween is some Subway Art.  I made my file 12x12 but sized it down in Photoshop to fit my picture frame.  I punched the spiderweb border to fit the inside of the frame.


I punched my spider web then cut at 1 1/2" then glued on top of the subway art.

Click here for the file.
If you have missed any of the previous 12 Days of Halloween click here.

Thanks for stopping by.

Recipe:
8 1/2x 11 photo paper, black cardstock, Martha Stewart Spider Web Punch, frame.

Tuesday, October 18, 2011

Halloween Trees - Day 9

I have seen these trees every where and when I do I keep saying I can make that.  Here is how I did.  I went shopping at the dollar store and picked up cone shapes and a set of the round balls.  The round balls come in a pack of two. 


I spray painted my terra cotta pots and bottoms and used acrylic paint on the skewers.  While they were drying I made a pattern by rolling my cone onto a scrap piece of paper, cutting it out, and tweaking it until I got the look I wanted.  I then cut it out of my pattern paper.  It did take a sheet of 12x12 paper per tree.


I added my lace and sheer ribbon to the inside of my tree shape then added the ribbon to the outside of my paper and finally glued it all together.  For the Flocked tree I had to use the glue gun to keep it together.  My finishing touch was to add a large button to the top of the trees.


I glued the styrafoam ball into the pots, added the trees and topped with some glass marbles I already had

Thanks for stopping by.

If you missed any of the 12 Days of Halloween click here.


Recipe:
Paper:
Halloween Words: Pink Paislee - Twlight Collection "Dusk" 
Striped Patter: Pink Paislee - Twlight Collections " Sunset"
Orange flocked - Archivers Halloween Kit - Doodlebug Design Inc - Tangerine Chenille Cardstock
Ribbon and Lace: Scrapbook Heaven Kit - Orange Lace, Celebrate It - Sheer 1 1/2" ribbon, Black Fring trim from my stash.
Misc: Skewers, Black Acrylic Paint, Spray Paint, Terra Cotta Pots, Buttons, hot glue, adhesive, styrafoam cones 2 7/8 x 7 7/8, buttons, stryafoam ball.

Monday, October 17, 2011

Glitter Bats - Day 8

For Day 8 of the 12 Days of Halloween I have a pretty quick project.  I have a couple of small black frames that I haven't used yet.  My Glitter Bats were perfect for this project.  If you have missed any of the previous 12 Days of Halloween please click here.

I first printed them out on glossy 4x6 photo paper as I was going to leave them nice and shinny. I hand cut around them then decided to dress up a little bit and the glitter was just the thing. 


I then printed the bat out again on the 4x6 background paper.  I wanted my bats to be off the paper so I used pop up dots behind them with a little bit of orange cardstock for the eyes.  The glass for the frame is behind my pattern paper as I didn't use it in this project.


Thanks for stopping by.

Click here if you missed any of the previous 12 Days of Halloween.
Click here for the Glitter Bats file. 

Disclosure: I am not affiliated with any of the products mentioned here.

Recipe:
Paper: Stampin' Up Newsprint, 4x6 photo paper, scrap of orange for the eyes
Glitter: Martha Stewart Onyx
Misc: 4x6 photo frame, glue, pop up dots,

Wednesday, October 12, 2011

Halloween Wine Glass Shades - Day 7

I made a couple of Wine Glass Shades for my dining room table for Day 7 of the 12 Days of Halloween.
If you missed any of the other 12 Days of Halloween click here.

This was super simple to make.


I added my lace and ribbon before I shaped the lamp shade. 


Thanks for stopping by and if you want to check out Days 1 through 6 of my 12 Days of Halloween click here.

Click here if you would like my template.  Print it out on a sheet of 8 1/2" x 11".
Recipe:
Paper: Seasons Paper Pad
Ribbon: Seam binding lace and velvet ribbon
Misc: Adhesive
Wine Glasses and flameless tea votives from the Dollar Store

Tuesday, October 11, 2011

Halloween Treat Jars - Day 6

For Day 6 of the 12 days of Halloween I am altering a Frappuccino bottle.  I need a few to drop off for the ladies at work. Since my son loves these there is always a supply for me to recycle. Be sure to wash it out really well.  I peeled off the label before running it through the dishwasher.  I wasn't worried about the glue residue as I am covering that up.  If you want to remove the glue you will have to use a product like Goof Off or Goo Gone. 

 The scrapbook paper is cut 2 1/2" inches wide.  I then wrap it around the bottle to see where I can cut the extra off at. I then punched the spider web on a 5" piece of black cardstock and glued this to the inside of the designer paper.


Using the Decorative label I punched another designer paper for the background. On top of this is the white cardstock with a sticker from the Achievers Halloween kit. I then punched a the bird out of the black and glittered cardstock. I have a pop up dot behind the bird.


I used the Martha Stewart bat punch for this set of bottles.  You can make your own mix or buy a pre-mixed one.  I have a friend who is allergic to nuts so I always make my own concoction for her.

If you missed any of the other days click here.

Thanks for stopping by.

Recipe:
Paper: Designer Paper - scraps from the Achievers Halloween Kit, cardstock - scraps of black and white, Best Creations Glittered cardstock - Champagne gem
Ink: Inkadinkado - terra cotta
Punches: Martha Stewart - Spiderweb border punch, Bat punch; Stampin' Up - Bird Builder, Decorative Label and Designer Label
Misc: pop up dots and adhesive.

Monday, October 10, 2011

Halloween Mini Album - Day 5

I used a Scrapbook kit from Archiver's to make these adorable 6x6 mini albums for the kids. This is going to be a long post as I did 4 of these albums in one evening after work.   Everything except the chipboard and black cardstock came in the kit.  I used a couple of punches to add some detail to the inside  pages. 

Here is the first "girl" album.


I used the Baroque die as the main photo mat on the left hand side of the album and the Styled Label dies on the front of the albums


Here is my second "girl" album.


I just love the Halloween ribbon that was included in the kit.  There was enough ribbon to wrap all four of the photo mats on the left side and all of the binding.

For the "boy" album I used the skull and cross bones paper that was included in the kit. 


Here is the pictures of the second "boy" album. 


Recipe:
Paper: Archiver's Halloween Scrapbook kit in a bag, DCWV cardstock - black
Punch: Martha Stewart - Spiderweb punch,  Halloween Iron Fence Deep Edge Punch
Misc: pop up dots, adhesive.
Dies: Tim Holtz Baroque die and Styled Labels die.
Misc: adhesive, pop up dots, VersaMagic - black ink

Sunday, October 9, 2011

Pumpkin Button Box - Day 4

I made a "button box" from Mirkwood Designs using Pink Paislee Hocus Pocus Haunting paper  for the box.  The frame is from the Lacy Label cartridge button number 4 on the keypad.

I have a piece of the bat fence behind everything with the pom pom trim along the bottom of the box.   The pumpkins are stacked on the Designer Label punch with the ribbon attached behind them. I cut a green silk flower for the leaves on the pumpkins.  I added a couple of my stickpins and one of them is altered with ink.  I cut two wreaths , adhered them together then used pop up dots behind them so that a picture can fit inside.  I lightly inked all the edges of the box. 


For the back I used more of the bat fence and a flower with an orange jewel for the center.  To keep my box closed I have a magnet behind the flower and fence.


Click here for my the stick pin tutorial.

I am entering this in the Fantabulous Cricut "Pumpkin Time" Challenge
If you missed any of the other 12 Days of Halloween click here.
Disclosure:  I'm not affiliated with any of the products mentioned here.

Thanks for stopping by.

Recipe:
Papers: Box - Pink Paislee "Haunting"  Hocus Pocus Collection, Stash unknown- black, orange, brown and green.
Punch: Martha Stewart Bat Fence, Stampin' Up - Designer Label
Ink: Inkadinkadoo - terra cotta
Cricut Cartridges: Lacy Labels and MS Seasonal
Misc: adhesive, pop up dots, Celebrations - sheer ribbon, Jewlel tangerine -Doodlebug Design Inc, pom pom trim, stick pins, flower, sil fower,  magnet,  

Wednesday, October 5, 2011

Boo - Day 3

Welcome to Day 2 of the 12 Days of Halloween. I came across Two Paper Divas blog where they had a tutorial for the Twisted Easel card. Here is my version of the card.

If you missed the Flying Witch card on Day 1 click here.
If you missed the Tag Treat holder on Day 2 click here.


The spider is from the Indi Art cartridge with a pop up dot between the black layers.


I added a spider border from the Doodlecharms cartridge.

Thanks for stopping by.
Click here for the cut file.

Recipe:
Paper: DCWV cardstock - Black; Stash unknown - orange, purple and white; Pattern Paper - Archivers Halloween Mega Kit
Cricut Cartridges: George, Indi Art, Lacy Labels, Wild Card
Punch: Stampin' Up - Scalloped Edge
Misc: adhesive, pop up dots

Saturday, September 24, 2011

Going Batty

Today I'm the guest Designer at the Card A Day Blog and the theme this week is Cats and Bats.For my card today I am using this Pagemaps sketch.


I used Design Studio to design my card and instead of using tags I used the bat from Paper Dolls Dress Up.

I used mini pearls for all the bat eyes and inked all the bats and the card base. The kraft paper was embossed with the Argyle folder.


I used a strip of karft paper and one of pattern papers for the inside of my card. Thanks so much for stopping by and head on over the Card A Day blog for some great inspiration.

Recipe: Paper: DCWV Retro Prints mat stack: Cardstock: Recollections - brown and white; Kraft Cricut Cartridges: George and Paper Doll Dress Up Ink: Inkadinkadoo - Coffee bean Embossing Folder: Cuttlebug – Argyle Misc: adhesive, pearls - Recollections, Cuttlebug

Wednesday, October 13, 2010

Halloween Treats and tag

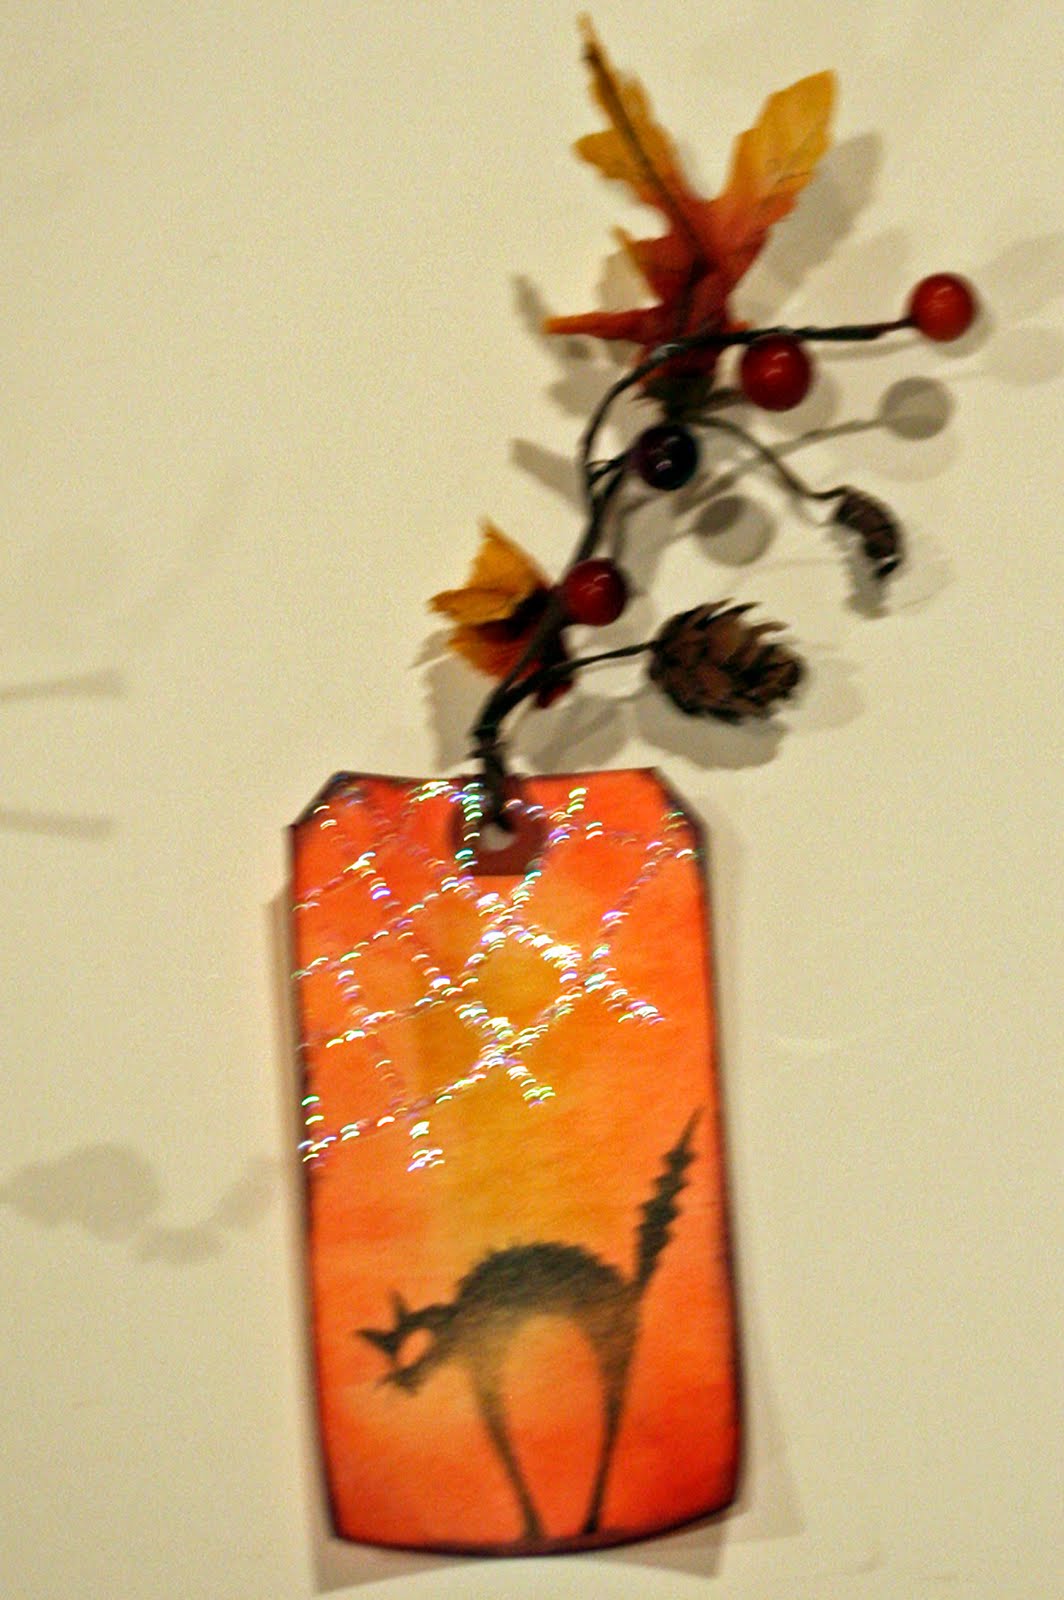
This month's project for the stamping club is "Anything Goes". I decided to make a Halloween treat cup and tag. The bat and "Spooky" are foam stamps from Making Memories. The leaves, berries and pumpkins are from a Wreath from Michael's that I cut apart to glue onto the the clay pot and wrapped through the tag.
The tag and "Spooky" are both distressed. I clear embossed the spider web then used the stickles to follow the pattern of the web. Be sure to distress the back of the tag for a finished look.
Thanks for stopping by

Recipe:

Ink: Distress Ink: Dusty Concord, Aged Mahogany, Dried Marigold, Scattered Straw, Peeled Paint; Color Box Pigment Ink - Canary and Orange; Stampin Up - Black
Paper: Scraps of white for the "Spooky"
Stamps: Making Memories foam stamps - Halloween 2
Punch: 1 3/8 Circle punch
Misc: tags, raffia, wired ribbon Ice Stickles - Crystal Ice Fall Wreath from Mitchael's, wire-for handles, clay pot, hot glue gun