Today I'm the Designer over at the Card A Day Blog and we are celebrating Valentine's Day. (I do have cutting instructions at the bottom)
I've stamped my image onto a piece of green pattern paper then used clear embossing powder. I colored it in with some markers and matted it onto black cardstock. I used a piece of lace on the left hand side of the card instead of a piece of pattern paper. I wrapped a piece of embroidery yarn around the image and added the sentiment to the front of the card.
To finish off the inside I added a piece of the pattern paper to the bottom of the mat.
Thanks for stopping by.
Cutting Instructions:
White card base: 5 1/2" x 8 1/2", scored at 4 1/4"
Black: 4 1/8" x 5 3/8"
Blue: 4" x 5"
Pattern Paper: 3" x 4"
Recipe:
Paper: DCWV - Summer Dreams Stack, blue, white and black cardstock
Stamp: Unity Stamp's December 2013 Kit of the Month {Happy love Day}
Ink: Stazon Ink - Jet Black
Markers: Stampin' Up Stamp and Write - Melon Mamba and Zig Brushables - Cool Cucumber
Misc.: scrap of lace, blue embroidery thread, pop up dots, adhesive
Showing posts with label Valentine's Day. Show all posts
Thursday, January 16, 2014
Saturday, February 2, 2013
Heart Box Mini Album
I created this mini album to fit into the small box of chocolates that come in a heart shape. This is going to be a long post. Remember that you can click on a picture to enlarge it if you want a closer view.
I used a sheer red ribbon tied in a bow on the top and glued the same ribbon wrapped around the side of the box. The bow was tied separately then attached to the box.
Because of the size of my box I was limited by the number of pages and the amount of embellishing I could do. I used George and Design Studio to cut my hearts out and I have a total of 5 pages. Each page has a Stampin' Up Grommet in the corner and I used a bunch of left over shades of red yarn to tie the album together.
For the cover I added another stick pin, silk and Prima flower a few rhinestones. I stamped the image punched it out and then covered it with glossy accents. Everything is attached on the right side so that a photo can slide behind the embellishments.
I alternated the side that the embellishments were to help keep the bulk down. The flower is one that I crocheted for a swap, I just added a white Flower behind it. The little heart sequin was in a kit from Scrapbook Heaven.
For page two I used the "love" rhinestone sticker's on the decorative label punch with a couple more flowers.
I used glossy accents to glue the button, wish ticket, and heart paper clip together. I then added a little bit of beaded trim. This was from another project and I had it on my desk so I used it here.
The back of page 4 and page 5 are withouth embelishments.
The back of page 5 has another stamped, glossed accents and punched image, a couple of flowers and a couple of die cut pieces.
Thanks for stopping by.
Recipe:
Paper: Recollections Cardstock - Cream, DCWV - The Immortal Love Stack - red cardstock and the top of the box; Stampin' Up - Designer Series Paper - Love Letters
Stamps: Inkadinkadoo - Flourishes, Heartful of Love
Punches: Stampin' Up - Decorative Label, Tag Punch, Postage Stamp, Designer Label Punch
Die: Sizzlits - Medium Label Set #4
Rhinestones: Gartners Studios - "love"; unknown Swirl
Pins: The pins on the front are from a swap I did last year. I think they look beautiful on this layout.
Ribbon: Offray Sheer Ribbon
Misc.: 4" round doily, flowers - Prima and Silk, beads for pins, Pearls on a string; Heart Paper clip, buttons, half pearls for flower centers, Tim Holtz - wish ticket, sequins, glossy accents, pop up dots, adhesive
Crochet Flowers - are some I made for prior swaps or other projects.
I used a variety of silk flowers and Prima flowers throughout this mini album. The key, rose and black pearl were pickup from Michael's on their clearance rack last year. I had planned to use in on a different project and didn't. I even have a few berries left over from a Christmas Album that I tuck in on the side.
I used a sheer red ribbon tied in a bow on the top and glued the same ribbon wrapped around the side of the box. The bow was tied separately then attached to the box.
For the cover I added another stick pin, silk and Prima flower a few rhinestones. I stamped the image punched it out and then covered it with glossy accents. Everything is attached on the right side so that a photo can slide behind the embellishments.
I alternated the side that the embellishments were to help keep the bulk down. The flower is one that I crocheted for a swap, I just added a white Flower behind it. The little heart sequin was in a kit from Scrapbook Heaven.
For page two I used the "love" rhinestone sticker's on the decorative label punch with a couple more flowers.
I added a red heart paperclip to the side of page 3 which is decorated on the other side and then just slid onto this page.
I used glossy accents to glue the button, wish ticket, and heart paper clip together. I then added a little bit of beaded trim. This was from another project and I had it on my desk so I used it here.
Page four has another stamped, glossed accents and punched image along with a a flower, punched tag and pearls on a string.
The back of page 4 and page 5 are withouth embelishments.
The back of page 5 has another stamped, glossed accents and punched image, a couple of flowers and a couple of die cut pieces.
Page 5 is my last page for this album. I added a couple more flowers, a rhinestone and a die cut. The back of this page is the same paper as the front of the album and I did not take a picture of it.
Recipe:
Paper: Recollections Cardstock - Cream, DCWV - The Immortal Love Stack - red cardstock and the top of the box; Stampin' Up - Designer Series Paper - Love Letters
Stamps: Inkadinkadoo - Flourishes, Heartful of Love
Punches: Stampin' Up - Decorative Label, Tag Punch, Postage Stamp, Designer Label Punch
Die: Sizzlits - Medium Label Set #4
Rhinestones: Gartners Studios - "love"; unknown Swirl
Pins: The pins on the front are from a swap I did last year. I think they look beautiful on this layout.
Ribbon: Offray Sheer Ribbon
Misc.: 4" round doily, flowers - Prima and Silk, beads for pins, Pearls on a string; Heart Paper clip, buttons, half pearls for flower centers, Tim Holtz - wish ticket, sequins, glossy accents, pop up dots, adhesive
Crochet Flowers - are some I made for prior swaps or other projects.
Labels:
Cricut Design Studio,
George,
Mini Album,
Valentine's Day
Thursday, January 10, 2013
Alterd Tin - Valentine
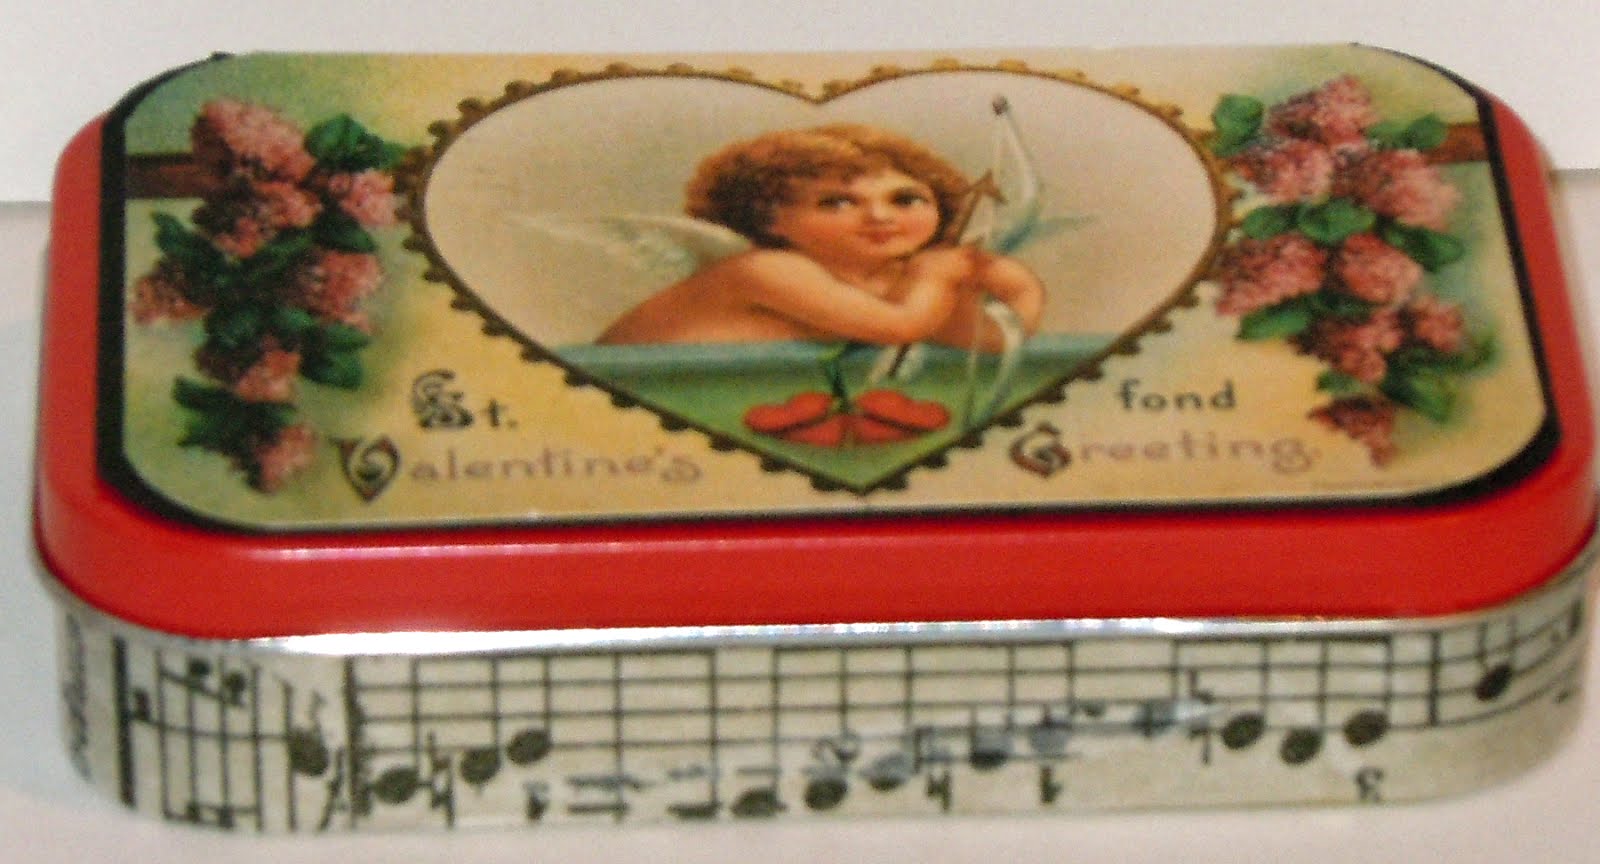
I always give my sweetie a couple of tin of Altoids During Valentines. This year I used a Crafty Secrets Valentine Image for the top and Tissue Tape for the sides. I matted the image onto black card stock then attached it to the top tin.
Thanks for stopping by.
Recipe:
Digital Image: Crafty Secrets
Altoids Tin
Adhesive
Tim Holtz Tissue Tape
Thanks for stopping by.
Recipe:
Digital Image: Crafty Secrets
Altoids Tin
Adhesive
Tim Holtz Tissue Tape
Labels:
12 Days of Valentine's,
3-D,
Altered,
Crafty Secrets,
Valentine's Day
Friday, December 16, 2011
Valentine
I have more Valentine cards to share with you. I didn't put the stamp set away and came up with a couple more cards using scraps.
Thanks for stopping by.
2 cards for OWH
Card Recipe:
Card #1:
Card Base 5 1/2 x 8 1/2 scored at 4 1/4
White: 5 1/4 x 4
Pattern Paper: 5 x 3 3/4
Black: 4 1/4 x 3
Pattern Paper: 4 x 2 1/2
White:3 3/4 x 2 1/4
Card #2:
Card Base: 5 1/2 x 8 1/2 scored at 4 1/4
White: 5 1/4 x 4
Pattern Paper: 5 x 3 3/4
Blue: 4 1/4 x 2 3/4
Pattern Paper: 4 x 2 1/2
White: 3 3/4 x 2 1/4
Recipe:
Paper: Unknown scraps from my stash.
Stamp: Stampin' Up - Valentines Defined
Ink: Stampin' Up - Real Red, Melon Mambo
Punch: Fiskars Heart Misc: Adhesive, 1/4" wide organdy ribbon
Monday, November 28, 2011
Sketch 134
Sketch #134 is up at Unscripted Sketches and here is my take on it. These sketches are a great way to use up some scraps and I have a couple more cards for Operation Write Home, hence the Valentine theme.
It's pretty close to the sketch, flipped on its side and I added a couple more layers. Instead of the three accent pieces I used the "love" stamp and a couple of punches.
I finished off the inside with a scrap of the background paper matted on black card stock.
Then I decided to use the flamingo stamp in the set. I kept the sketch on its side and moved the thee accent pieces into one again with the tab punch and put it on the inside of the border instead of the outside.
The pink heart on the above "love" is started off as a clear acrylic heart, I just used my Melon Mambo ink to give it a little color. I punched the pink background and layered it onto blue cardstock to finish off the inside.
Thanks for stopping by.
2 Cards for OWH
Card Recipe:
Card #1:
Card Base: 5 1/2 x 8 1/2 scored at 4 1/4
Pattern Paper: 5 1/4 x 4
Black: 2 3/4 x 2 1/4
Pink: 2 1/2 x 2 1/4
White: 2 1/4 x 2 1/4
Band: Black 1 1/4 x 5 1/4 (after it's been punched)
Pink: 1 1/8" x 5 1/4 (after it's been punched)
White: 3/4 x 5 1/4
Card #2:
Card Base: 5 1/2 x 8 1/2 scored at 4 1/4
Pattern Paper: 5 1/4 x 4
Blue: 2 1/4 x 2 1/4
Pink: 2 x 2 1/4 ( I cut then embossed)
White: 1 3/4 x 2 1/4
Band: Blue -1 1/8" x 5 1/2 ( after it's been punched)
Pink: 3/4 x 5 1/2 (I cut then embossed)
Recipe:
Paper: Unknown scraps from my stash
Stamp: Stampin' Up - Valentines Defined
Ink: Stampin Up - Real Red, Melon Mambo
Punch: Stampin; Up Pinking Hearts Border, Round Tab, Modern Label, Decorative Label, Designer Label; Martha Stewart - Arch Lattice
Embossing Folder: Cuttlebug - Textile
Misc.: adhesive, pop up dots, clear heart rhinestone, 1/4" wide organdy ribbon
Sunday, February 13, 2011
Valentine Gift Heart Bag
I used the Heart Bag from Tags Bags Boxes and More cartridge to make this little bag. I cut mine so that I could get two out of a sheet of 12x12 paper. If you use double sided cardstock you will have a white inside. Since I was using a heart baggie I didn't care if the inside was white.
I ran a piece of acetate through my cuttlebug to give it some texture before I glued it onto the bag. I did tie my handles together with a piece of yarn doubled up.
Thanks for stopping by. I just realized that my picture doesn't show the acetate window.
I ran a piece of acetate through my cuttlebug to give it some texture before I glued it onto the bag. I did tie my handles together with a piece of yarn doubled up. Thanks for stopping by. I just realized that my picture doesn't show the acetate window.
Click here for the cut file.
Recipe:
Paper: Transparency or Acetate for window, Pattern Paper - unknown
Cricut Embossing Folder: D'vine Swirl
Cricut Cartridge: Tags Bags Boxes and More
Misc: yarn, redline tape or score tape.
Friday, February 11, 2011
Valentine Pillow Box
The pillow boxes make great little packages to put assorted Valentine treats into. This one is made from the Wedding cartridge and I cut them out at 5" so that I could fit 4 on a 12x12 piece of paper.

I fill mine up before I decorate the outside of my box. I added a piece of binding around the middle, stamped on a tag and inked it with Vintage photo, added a heart, a couple of branches.
Thanks for stopping by.
Click here for the cut file - the pillow boxes only.
Recipe:
Paper: Cardstock - DCWV; Pattern Paper - Tajmahal Stack
Cricut Cartridges: Wedding and Tags, Bags Boxes and More for the tag
Ink: Versamark - Red,
Stamp: Inkadinkado - Heartful of Love
Punches: Paper Shapers - Folk Heart; Martha Stewart - branch
Misc: adhesive, crochet thread

I fill mine up before I decorate the outside of my box. I added a piece of binding around the middle, stamped on a tag and inked it with Vintage photo, added a heart, a couple of branches.
Thanks for stopping by.
Click here for the cut file - the pillow boxes only.
Recipe:
Paper: Cardstock - DCWV; Pattern Paper - Tajmahal Stack
Cricut Cartridges: Wedding and Tags, Bags Boxes and More for the tag
Ink: Versamark - Red,
Stamp: Inkadinkado - Heartful of Love
Punches: Paper Shapers - Folk Heart; Martha Stewart - branch
Misc: adhesive, crochet thread
Thursday, February 10, 2011
One Sheet Valentine Box
I like to make this quick little box for the guy's treats. You use need one sheet of 8 1/2 x 11 cardstock, pattern paper or what ever you want to decorate it with and a piece of ribbon or yarn.

Click here for the Splitcoast stampers tutorial.
Thanks for stopping by.

Click here for the Splitcoast stampers tutorial.
Thanks for stopping by.
Recipe:
Paper: DCWV cardstock; Pattern Paper - Seasons Paper Pad
Misc: hole punch, adhesive and yarn
Tuesday, February 8, 2011
Valentine Topper

I made a few bag toppers for my guys and here is one with the Valentine Subway or Word Art. Once again I printed onto photo paper, I have lots of 4x6 photo paper and I wanted the glossy look and this way I don't have to measure and cut.

Score and fold the 4x6 word art in half and glue a piece of red to the inside front. Center your sandwich baggie and staple. You could also punch a couple of holes and tie with yarn or ribbon, but my cookies are large and heavy so I wanted the extra support.
Thanks for stopping by.
Click here for the Subway or Word Art File sized to 4x6.
Recipe:
Sandwich size zip lock bag, accent paper - I used a scrap of red, photo paper, adhesive and stapler.
Labels:
12 Days of Valentine's,
Valentine's Day,
Word Art
Sunday, February 6, 2011
Valentine Subway Art
I keep seeing around the Internet a lot of Valentine Subway or Word Art. I haven't made anything lately with Adobe Photoshop and thought that this is the perfect file to start off with.

My frame is a 4x6 and I sized the word art down to give me a white border all around the words when I placed it in the frame. I also printed mine on picture glossy photo paper but you could use any paper.
Thanks for stopping by.
Click here for the file.
Recipe:
Frame, glossy photo paper.

My frame is a 4x6 and I sized the word art down to give me a white border all around the words when I placed it in the frame. I also printed mine on picture glossy photo paper but you could use any paper.
Thanks for stopping by.
Click here for the file.
Recipe:
Frame, glossy photo paper.
Labels:
12 Days of Valentine's,
Altered Art,
Valentine's Day,
Word Art
Friday, February 4, 2011
12 Day's of Valentine's Lollipop Heart Card
I used Doodlecharms to make the heart shaped card then tied my heart shaped lollipop to the front with some yarn. This one makes up really quick.

I cut the pattern paper from American Crafts Metropolitan and glued it to the scalloped heart shape then punched the holes to tie the lollipop onto the card. My sentiment is written on the back of the card for the guys.
Thanks for stopping by.
Click here for the cut file
Recipe:
Paper: DCWV cardstock, Pattern paper - American Crafts - Metropolitan
Cricut Cartridge: Doodlecharms
Misc: adhesive, hole punch, yarn, lollipop

I cut the pattern paper from American Crafts Metropolitan and glued it to the scalloped heart shape then punched the holes to tie the lollipop onto the card. My sentiment is written on the back of the card for the guys.
Thanks for stopping by.
Click here for the cut file
Recipe:
Paper: DCWV cardstock, Pattern paper - American Crafts - Metropolitan
Cricut Cartridge: Doodlecharms
Misc: adhesive, hole punch, yarn, lollipop
Friday, January 28, 2011
12 Days of Valeninte's -You're Sweet
Every year I do a 12 Days of Valentines for my guys with the last Valentine on February 14th. It's nothing extravagant, just a handmade valentine and a little something like chocolate kisses, lollipops, heart shaped cookies.
For Day One I have a You're Sweet Valentine and heart shaped lollipops. I used my Cricut to cut my heart shape out of chipboard (cereal box) then hot glued my lace onto the chipboard.
Glue one red heart on top to sandwich the lace between the chipboard and red heart. Glue pattern paper heart on top.
I used alphabet stickers or chipboard to spell out You're Sweet and then used stickles to make the swirls. After the stickles were dry I punched two holes with my crop-a-dile, tied two heart shaped lollipops on with yarn.
For Day One I have a You're Sweet Valentine and heart shaped lollipops. I used my Cricut to cut my heart shape out of chipboard (cereal box) then hot glued my lace onto the chipboard.
Glue one red heart on top to sandwich the lace between the chipboard and red heart. Glue pattern paper heart on top.
I used alphabet stickers or chipboard to spell out You're Sweet and then used stickles to make the swirls. After the stickles were dry I punched two holes with my crop-a-dile, tied two heart shaped lollipops on with yarn.Recipe:
Paper: DCWV - red cardstock, Luxury Stack - pattern paper, Chipboard (I used a cereal box)
Stickers: Alphabet Stickers- Red ones Unknown; Chipboard Stickers - Cosmo Cricket "Iron Port"
Cricut Cartridge: George
Ink: Versa Magic - Red
Misc: Adhesive, hot glue gun, stickles, lace, gold stickles, yarn, crop-a-dile
Saturday, January 22, 2011
Heart Love card
This is the card I made for my Swap Group. For the Month of January we were to do a Love or Valentine card.

I stamped the script and embossed with clear embossing power on the tan cardstock, then I stamped the red heart. The doily is cut in half and glued on, then the ribbon is added and the Love ticket is slipped behind the ribbon.
Thanks for stopping by.
Recipe:
Paper: Cardstock - Kraft, tan, white
Ink: Stampin Up - Soft Suede, Rose Red
Stamp: Making Memories - Love foam stamps
Punch: Ticket corner punch.
Misc: Lace Doily, Tim Holtz's Adage Ticket, ribbon, adhesive, clear embossing powder

I stamped the script and embossed with clear embossing power on the tan cardstock, then I stamped the red heart. The doily is cut in half and glued on, then the ribbon is added and the Love ticket is slipped behind the ribbon.
Thanks for stopping by.
Recipe:
Paper: Cardstock - Kraft, tan, white
Ink: Stampin Up - Soft Suede, Rose Red
Stamp: Making Memories - Love foam stamps
Punch: Ticket corner punch.
Misc: Lace Doily, Tim Holtz's Adage Ticket, ribbon, adhesive, clear embossing powder
Subscribe to:
Posts (Atom)