Showing posts with label 3-D. Show all posts

Thursday, September 19, 2013

Ballerina Altered Frame

I picked up a wooden frame to make this Ballerina Dress frame for a little girl.  I started by painting the frame front and back. 
  

While it was drying I punched from vellum 6 large and 6 small petals using the Build a Blossom Punch. I inked them then started gluing them together to get the bottom of the dress. I used the tab punch for the bodice and inked the edges.


I added a row of pearls around the neckline, rhinestones on the large petals and a ribbon around the waist.


To finish I added a scrap of lace and a row of pearls to top it off. 

Thanks for stopping by.


Recipe:
Card stock: Vellum
Ink: Martha Stewart - Sea Lavender, Ocean
Paint:Acyclic Paint - Razzle Berry
Ribbon and Lace:  scrap of lace for frame
Punch: Stampin' Up -  Build a Blossom Punch, Tab Punch,
Pearls and Rhinestones - Recollection; unknown string of pearls
Misc:  Adhesive, foam tape, Zots, pop up dots, Blue painters tape,  foam paint brush

Tuesday, July 23, 2013

Sassy Studio Sock Hop and Paper Craft Planet's Birthday

The Paper Craft Planet's Progressive challenge this month is to use Sassy Studio's Sock Hop image and a Happy Birthday Theme.


I decided to make a small heart gift box for the backdrop of my image.  Using the Heart Box template I traced and cut out all of the pieces of the box, then cut patterned papers to fit the sides, lid and bottom. I forgot how long it takes to hand cut all the elements out instead of using my Cricut.


Next I printed out my Sassy Studio image and colored her in. I thought she need some definition so I glued her to a piece of black cardstock and cut her out again. She now stands out better against the box.


For my box top I pulled out my jar of premade flowers and selected a few that went with the colors on the box. A few bead and scraps of ribbon tucked around and my lid is finished.


I wrapped the sentiment around a toothpick, added a bead to the top and my Happy Birthday Flag is complete.

Thanks for stopping by.

Recipe:
Paper: Recollections - white and black; October Afternoon - Strawberry Jam (polka dot); Unknown: Crate Paper (blue pattern paper on top of box); Basic Grey (side stripe around the box)
Ink: Distress Ink - Vintage Photo; Stazon - Jet Black
Stamps: Close to My Heart - Say it in style
Box Template: Personal Stamp Exchange - Heart Box Template
Colored Pencils: Generals Kimberly - 703 Blue, 710 Pink, 770 French Blue; Steadtler - Peach, Light Blue, Light Brown, Medium Brown, and White
Misc.: Handmade flowers, beads, scraps of ribbon, adhesive, pencil, toothpick and scissors

Saturday, July 13, 2013

Sailor Honey

This is my last post for the Sassy Studio Progressive challenge at Paper Craft Planet.


I made my another Post it Note Holder.  If you missed the prior posts click here for Army Honey and here for Air Force Honey.
Thanks for stopping by.

Recipe:
Card stock: Recollections - White and black; Unknown pattern paper
Colored Pencils: Steadtler - peach, white, sky blue and gray, : General Kimberly - 713 Yellow, 703  Blue, 710 Pink
Punch: Stampin' Up - Corner Rounder and Ticket punches
Misc.: Adhesive and magnetic

Thursday, July 4, 2013

Air Force Honey

Here is part two for the Sassy Studio Challenge at Paper Craft Planet.


 I resized her in Photo Shop and colored her in with colored pencils.


To make the Post It Note Holder I cut the black card stock at 3 5/8" x 8 1/2" then scored at 2", 2 3/8", 5 1/2" and 5 7/8".

Thanks for stopping by.

Recipe:
Card stock: Recollections - White and black; Unknown pattern paper
Colored Pencils: Steadtler - red, white, peach, yellow, blue, bright yellow, : General Kimberly - 711 Lemon Yellow, 713 Yellow, 703  Blue, 718 Carmine
Punch: Stampin' Up - Corner Rounder and Ticket punches
Misc.: Adhesive and magnetic

Army Honey

This month the Paper Craft Planet Challenge this month is to use Army Honey, then Air Force Honey and finally Sailor Honey digital images on a project. I making Post it Note Holders as my projects.

First up is Army Honey.


Once again I used a bunch of colored pencils to color in my image. I resized her in photo shop to 2" inches wide which makes the length about 3 5/8".  This is the perfect size for my Post It Note Holders.
 
 
I've added a magnet to the side as a closure.


Recipe:
Card stock: Recollections - White and black; Unknown pattern paper
Colored Pencils: Steadtler - red, tan, brown, peach, white, light brown, medium brown, olive: General Kimberly - 704 brown, 707 Green, 761 Sea Green, 714 Light Green, 717 Yellow Green; Derwent - Sepia 53, Gold 3, Copper Beach 61
Punch: Stampin' Up - Corner Rounder and Ticket punches
Misc.: Adhesive and magnetic

Saturday, June 22, 2013

4th of July Wreath

This is a super simple wreath.

I picked up the following supplies from the Dollar Tree: One wreath form, 2 sprays of white flowers, one spray of red (these were in the wedding section).  I used from stash - 3 flags, blue wired ribbon, wire cutters and hot glue gun.

Separate the flowers and glue onto the wreath.  Hot glue the flags in place and make a large loopy bow out of the wired ribbon and glue on.  Hang on Door.  This probably took me a total of 10 minutes from start to finish and cost was $4.00 for supplies from the Dollar Store.

Thanks for stopping by.

Friday, March 8, 2013

Spring Wreath

I picked up these green daisy last year when they were on sale hoping to find a wreath form that I wanted them on. I finally found one I liked, but it had a bunch of succulents and fern leaves on it when I brought it home.  The succulents I would probably never use so they were donated and the fern leaves when into my stash.  


 The wreath form reminds me of a garden gate so I placed the flowers going up one side of it.  It's going to look great on my front door. 

 
I know this isn't a scrapbook project but it is something that I had started - buying the flowers- and never finished so I'm counting it as a Finish It Fridays project.   

Thanks for stopping by

Recipe:
Flowers: Green daisy flowers and a branch of flowered gems.
Ribbon: Celebrate It 1 1/2" light green sheer, dark green sheer; 1 1/2" wired edge ribbon green tones
Misc.: needle nose pliers, wire cutters, florist wire, hot glue

Friday, February 1, 2013

Petal Punch Card Treat Holder and Finish It Fridays

For my guys I always do the 12 days of Valentine gift, it's just a little something to remind them how much they mean to me.  It takes just a couple of minutes to make them. 


Now I just need to add the mini candy bars and I'm ready.  I'll be stopping at the store today to pick up my goodies that will going into my treat holders.

Since I had to look up the instruction on line I'm adding this to my Punch and Die Cut Journal.


I've missed the last couple of Finish It Fridays so I dug in my file and found a couple scraps of paper that included the instructions using the Stampin' Up Lattice die and making an ornament that I wanted to try. Here is my page for the journal that I will be using to make them.  It does take a little bit of time, scoring, folding and gluing each piece but I think it is worth it.    


Thanks for stopping by.

Recipe for Petal Punch Card Treat Holders:
Paper: Stampin' Up - Love Letters
Punch: Stampin' Up - Petal Punch Card,
Misc.: Adhesive,  Mini Candy Bars

Recipe for Lattice Die Ornament:
Punch: Stampin' Up - 2 1/2" Circle Punch
Die: Stampin' Up - Lattice Die

Thursday, January 10, 2013

Alterd Tin - Valentine

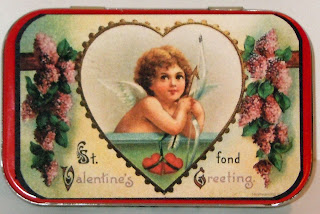
I always give my sweetie a couple of tin of Altoids During Valentines.  This year I used a Crafty Secrets Valentine Image for the top and Tissue Tape for the sides.   I matted the image onto black card stock then attached it to the top tin.


Thanks for stopping by.

Recipe:
Digital Image: Crafty Secrets
Altoids Tin
Adhesive
Tim Holtz Tissue Tape

Sunday, December 30, 2012

Calendar for 2013

I stopped by the Prima blog and saw the tutorial of Drew making a calendar out of a Mixed Media Journal Covers.  It's absolutely gorgeous!  I have no Journal covers so I made my calendar out of chipboard covered with card stock, a couple of jumbo eyelets and here is my version.    I made my version so that I can hang them up instead of setting on the desk. 


Thanks for stopping by.

Recipe:
Paper: Card stock: DCWV- The Linen Closet Stack, AC Pattern Paper - Amplified; Chipboard.
Ribbon: Stampin' Up - 1/2" Seam binding Crumb Cake; Simplicity Beaded Fringe
Flowers: Various silk and Prima Flowers; Wilton's Rose Petals
Misc.: adhesive, score tape, Stampin' Up - Jumbo eyelets, crop-a-dile.

Monday, December 3, 2012

Christmas Wine Glass Shades

Here's the wine glass shade I made for a couple of Christmas Baskets. 

Recollections - Bright and Jolly
Trim: Celebrate It Holiday Noel 6mm (the white and silver beaded), Simplicity Beaded Fringe
Misc.: Adhesive, hot glue gun, Wine Glasses and Flameless Tea Light Candles

Monday, October 29, 2012

Witche's Shoes

I made the ladies at work a couple of Witches Shoes in non-Halloween colors. 


Thanks for stopping by.

Disclosure: I am not affiliated with any of the products mentioned.

Entered in the Bitten by The Bug 2 Challenge

Recipe:
Paper: Recollections - White;
Outside Shoe - October Afternoon - Cherry Hill "Recipe Box"
Inside Shoe - My Mind's Eye - Deena's Penny Lane

Outside Shoe Green Argyle -Basic Grey - Lemonade "Tee Time"
Inside Shoe - Fancy Pants - Wishful Thinking "Corsage"

Ribbon: Stampin' Up - 1/2" Rose Red seam binging; Unknown - mini pearls on a string
Glitter: Martha Stewart - tourmaline and rubelite
Cricut: A Child's Year cut at 2 7/8"
Punch: Martha Stewart - Spider Web Border Punch
Misc.: adhesive and hot glue

Thursday, October 18, 2012

Teapot - Challenge #38

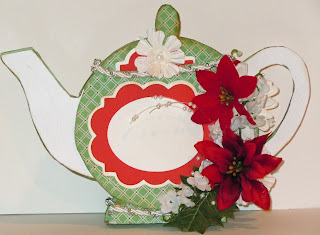
The challenge this week at My Scrap Room is to make a Teapot with a tag and photo frame.


 I used Elegant Edges to cut my photo mat and the "tea bag" tags.  I had to use foam tape to attach my teapot pieces together because my trim was thick.


I did not add a photo mat to the back of the tea pot. I did add some leftover rhinestones to the side.

Thanks for stopping by.

Recipe:
Paper: DCWV Holiday Collection - The Christmas Stack; Recollotions - White and red cardstock
Ribbon -  Celebrate it - Holiday
Ink: Distress Ink - Vintage Photo
Cricut: Elegant Edges
Misc.: Score Board, Various Silk flowers, rhinestones, pearls adhesive, score tape, glue gun, foam tape.

Saturday, October 13, 2012

Altered Picture Frame

Miss Sophie is turning three this year and I decided to alter a picture frame for her.  I picked this one up from Michael's. I left the easel on the back that way they can decide to have it hanging or standing.


I started off by trimming the paper to fit each 4 x 6 window.

 
I used a chipboard tree that I covered with green cardstock on both sides and inked the edges.  The chipboard truck is also covered on both sides and inked.   The pink cardstock inside the frame is embossed .

 
I cut a the butterfly out of the pink cardstock and a piece of vellum.  The pink card stock is inked around the edges and the vellum is embossed.  I added a layer of rhinestone for the body of the butterfly. The ribbon is wrapped around the glass and the butterfly is attached to side of frame.


I covered both sides of the Chipboard letter "S" and inked the edges in green.  I made the ribbon rose  and glued it to the center of the "S".  The rhinestones were added from the center of the "S" out to the edges.


I added a bunch of flowers and buttons to the side of this frame.  I tucked in a couple of blue pom poms left over from a piece of trim.  Then I added the chipboard blue butterfly on top of a couple of buttons to make it a little bit higher.   To finish it off I add a couple of rhinestone swirls.


Thanks for stopping by.

Recipe:
Paper: Cardstock - Stampin' Up -Vellum; Prima - Fairy Flora Collection "Garden Party"; DCWV - pink and green.
Embossing Folder: Stampin' Up - Elegant Line
Die: Stampin' Up - Beautiful Butterflies
Ribbon: 5/8" offray Ribbon, Orange ribbon for flower
Misc.: {Most of the embellishments are left overs from a Scrapbook Heaven Kit} Chipboard letter S, adhesive, pop up dots, hot glue, rhinestones, buttons, flowers, chipboard tree

Saturday, September 22, 2012

Witch's Shoe - Challenge #34

Gina's weekly challenge at My Scrap Room is to make a witch's shoe using a paper shoe pattern from Skip To My Lou.org along with a few other requirements. 

 We were only required to make one, but these are going to be for the girls at the office so I made a few. 
 
The witches are cut with my Cricut at 2 7/8" from A Child's Year cartridge.  I used two per shoe, glittered the outside and hot glued them to the top of the spider web.


I can only get one outside shoe template on a piece of 12 x 12 paper, but I can get two inside shoe templates on a piece of 12x12 paper
 
 
Thanks for looking and stopping by.
 
Recipe:
Template from Skip To My Lou.org
 
Paper: Recollections - Black; Doodlebug Designs, Inc. - Beetle black dot-grid;  Kaiser Scrapbook  To Have & To Hold - Everlasting.
Cricut:  A Child's Year
Punch:  Martha Stewart - Spider Web
Misc.: adhesive, glue gun, pearls on a string, lace, seam binding, buttons, glitter, scissors


Monday, September 17, 2012

One Eagle's Wings frame

I made this for hubby's birthday.  (Remeber you can click on the photo for a close up.)
Both of the ovals are on bouble sided paper with the edges inked with distress ink.  I stamped the saying in black ink and cut it out.  I cut the oval out of the brown cardstock then embossed it.


I stamped the eagle twice onto water color paper then embossed with black embossing powder.  I colored both eagle and waited for them to dry.  I used golden rod stickles on the body and crystal ice on the head.  There are several layers of foam tape and pop up dots holding the eagle to the frame.


I dyed my beige ribbon with several colors of distress ink.  After it was dry I glued it to the frame along with a piece of organza, the pine branch and a couple of pine cones. 


I left the hardware on the intact so that the frame can be hung on the wall or stand on a shelf.
 
 
Thanks for stopping by.

Disclosure: I am not affiliated with any of the products mentioned.
Recipe:
Paper: Water Color Paper for the eagle; DCWV - The Heirloom Stack; Recollections - brown
Water Color Pencils: Staedler - Brown, medium brown, yellow, light brown, white;
General's Kimberly - 704 brown,, 717 yellow orche, 719 terra cotta, 708 orange, 715 black.
Stamps: Our Daily Bread - On Ealge's Wings
Ink: VersaMagic - Midnight Black; Clear Resist; Distress Ink - Vintage Photo, Peeled Paint, Shabby Shutters, Forest, Moss, Tumbled Glass
Embossing Folder - Tim Holtz Alteration's Texture Fade - Book Cover #1
Stickles - Golden Rod, Crystal Ice
Misc.: adhesive, pop up dots, foam tape, hot glue gun, pine branch, pine cones, ribbon, organza

Thursday, September 13, 2012

One must have . . .

Splitcoaststampers has the flat backed treat box as this weeks tutorial and I thought I would give it a try.  I used the Lattice die from Stampin' Up behind my front. I keep a bunch of them pre-cut so that I can add them quickly to a project. I wrapped some seam binding around the lattice die and added a side bow.


I'm using a digital image by Dearie Dolls instead of stamping for the front of my card.  I have the image on pop up dots for some additional dimension.


I added a silk sunflower to the top of the candy box.

 
I stamped my sentiment onto white cardstock and made it into a banner for the front of the box.  I added a button with thread to finish off the banner. 

Thanks for stopping by.

Disclosure: I am not affiliated with any of the products mentioned.

Recipe:
Paper: Cardstock: Recollections - brown and white; Pattern paper - unknown scraps
Stamp: Close to my Heart - Sentiments CC1014
Ink: VersaMagic - Midnight Black
Digital Image- Dearie Dolls
Dies: Stampin' Up - Lattice
Misc.: Flower, button, yellow seam binding, pop up dots, glue gun and score tape

Friday, November 11, 2011

Gingerbread Man Tag Day 5

I hope you are enjoying all the Gingerbread Man ideas.  Since the Gingerbread recipe card is a gift I needed  a tag to tie it all together.   Today's project is all made from scraps from my stash.  I cut my Gingerbread man out with my Cricut at 3" - be sure to hide the cookie so it does not cut and then you can have it to very right side of your mat. 


I used an embossing pad and then white embossing powder for my stamped sentiment, then fussy cut around it.  A little bit of ribbon, ric rac, and a couple of beads and buttons and my Gingerbread Man is finished.  I plan on adding him to the package.  After she opens the presents she can use it to decorate her tree next year or as bookmark in the recipe book.

Thanks for stopping by.  Tomorrow is my day as a Designer for the Card A Day Blog.  I hope you have been stopping by and getting lots of inspiration from my fellow Designers.

Recipe:
Paper: Unknown Cardstock - scrap of red
Stamp: Stampin' Up - Just Believe
Ink: Embossing pad
Cricut Cartridge: From My Kitchen
Ribbon: Unknown scrap of red and white ric rac.
Misc: adhesive, felt, tread, buttons, beads, white embossing powder, embossing buddy and a heat gun

Monday, November 7, 2011

Gingerbread Man Treat Jar - Day 1


The Card A Day Blog's theme this week is Christmas Food.   The first thing I thought of was Gingerbread Cookies and my card inspiration this week is on Saturday so I thought I would have a week of Gingerbread Man ideas.  For today I have a Gingerbread Man Treat Jar. 


The red cardstock is 2 1/4" with the punched border and the pattern paper is 1 5/8".  Over that I wrapped a sheer 7/8' ribbon.  I stamped my sentiment in red and then layered them onto another punched cardstock.   


I used the From my Kitchen cartridge to cut the gingerbread man out of felt and sewed on a couple of button's with light weight yarn and a couple of beads for his eyes.


Thanks for stopping by.

From My Kitchen - gingerbread man cut out at 3" with the shadow feature selected.

Recipe:
Paper: Cardstock -Unknown Scraps - red, brown, blue, white; Pattern Paper - K&I Memories scrapbook kit ( it is several years old)
Cricut Cartridge: From my Kitchen
Ink: Stampin' Up - Real Red
Stamps: Stampin' Up: Snow Swirled - "May the true spirit...", Hodgepodge Happiness - "just 4 you"
Punch: Stampin' Up - Decorative Label, Modern Label, Word Window; Unknown: -Christmas Ornament Border Punch.
Misc: felt, buttons, yarn, beads, thread, adhesive