Showing posts with label Christmas Cards. Show all posts

Saturday, December 21, 2019

Stamped Image Stacked Die Cutting Card for Counterfeit Kit Challenge

Hi everyone! Today I'm up on the Counterfeit Kit Challenge Blog with another Christmas Card. This time the technique is -Stamped Image with Stacked Die Cutting. This technique adds some bulk to my card as I am also using fun foam behind my layers and it's a card that I would hand deliver.


To start I stamped my card onto white cardstock - I didn't know I was going to use the Watercolor Pencils otherwise I would have stamped onto watercolor paper. I tend to stamp a lot of images onto white cardstock then go back and make some cards. I don't always know what technique or how I'm going to color the card when I'm stamping.


I have a small set of 12 Prismacolor Watercolor Pencils that I used to color my card. I colored all of them to start with then used a paint brush to spread the color out over the image. I did use the heat gun between the colors so they would not become muddy.


I layered three of the stitched dies onto image. I started with the smallest die then the biggest and finally the middle size. I used washi tape to hold the dies in place, just be sure to stick it to your clothing first to loose a bit of the stickiness.


Now it's time for my card base. Today I'm using white cardstock with a light green snowflake pattern paper. I ran my pieces through my Xyron, then starting with the largest image piece I added it my card front. The next piece is the middle piece which I added one layer of fun foam to the backside. I use my trimmer to cut the fun foam straight. It doesn't cut all the way through, but you can fold and tear it nicely. For the smallest image I used two layers of fun foam.


Now that the layer of fun foam are built I attach the middle piece and then the smallest piece to the card front. Here is a side view of the layers on the card .


I like to add a writing mat on the inside of the card with a piece of the pattern paper from the front of the card. 


I used a couple of snowflake stamps, Versa Mark ink, and gold embossing power to finish off my envelope. I like to finish off the envelope at the same time. If I don't have a use for the card immediately then my card and envelope are to go when I need them.


Thanks for stopping by today. Don't forget the we have something up everyday on the Counterfeit Kit Challenge Blog every day this month and Lisa up tomorrow.

Recipe:
Paper: White Cardstock, Green Snowflake Paper  and an envelope
Stamps: Unity Stamp Company KOTM September {all kinds of holiday love}
Ink: Ranger Archival Ink - jet black and Versa Mark Ink
Dies: Lawn Fawn Stitched Rectangles Large and Small sets
Misc.; Adhesive, Anti Static pad, Cuttlebug, Embossing Powder - Recollections Gold, Fun Foam, Heat Gun, Paint brush, Prismacolor Watercolor pencils, Washi tape and  Xyron

Thursday, December 12, 2019

Fussy Cutting Card for Counterfeit Kit Challenge - Poinsettia Love

I'm up on the Counterfeit Kit Challenge Blog today with a Christmas card and my technique is fussy cutting. I love this Poinsettia stamp when I first saw it and new I had to make a card with it.


I started by stamping my image onto a scrap of white cardstock using my Misti. I new that I was going to use markers to color my image and that I wanted to re-stamp my image after coloring it. I have learned to mark my paper when I do this.

I have ruined many an image by not marking my paper somehow. If I am using a die cut to stamp on I will mark the back side of it. This really takes all the guess work out of it.


After coloring my image I placed it back into the Misti to re stamp it again. I then started fussy cutting my image out. I did not want any white showing so I used a black marker to color in my edges.
Now it is time to make my card. I used a piece of Kraft cardstock for my base, a piece of Christmas paper and a banner made out of a blue scrap for my card front. I did tear one of the edges on the Christmas paper. 
I like to add to the inside of my cards a mat for writing and a piece of the pattern paper that was used on the card front. I have gotten into the habit of also dressing up my envelopes with a stamped image and then heat embosses it. 


It's a little thing but it is such a nice touch. 

Thanks for stopping by today. Don't forget that we have something up on the Counterfeit Kit Challenge Blog every day this month, so please hop on over and check it out. Tomorrow is Lisa  is back with a beautiful card.


Recipe:
Paper: DCWV - Holiday Collection "The Christmas Stack", Blue scrap cardstock, Kraft Cardstock, White scrap cardstock  and an envelope
Stamps: Unity Stamp Company - September 2019 KOTM {all kinds of holiday love}
Ink and Markers: Ranger Archival ink - jet black, Bic Marks It - various colors and Brushabes - black
Misc: Adhesive, Anti Static pad, Clear Embossing Powder, Heat Gun, and Misti

Tuesday, December 4, 2018

Christmas Cards

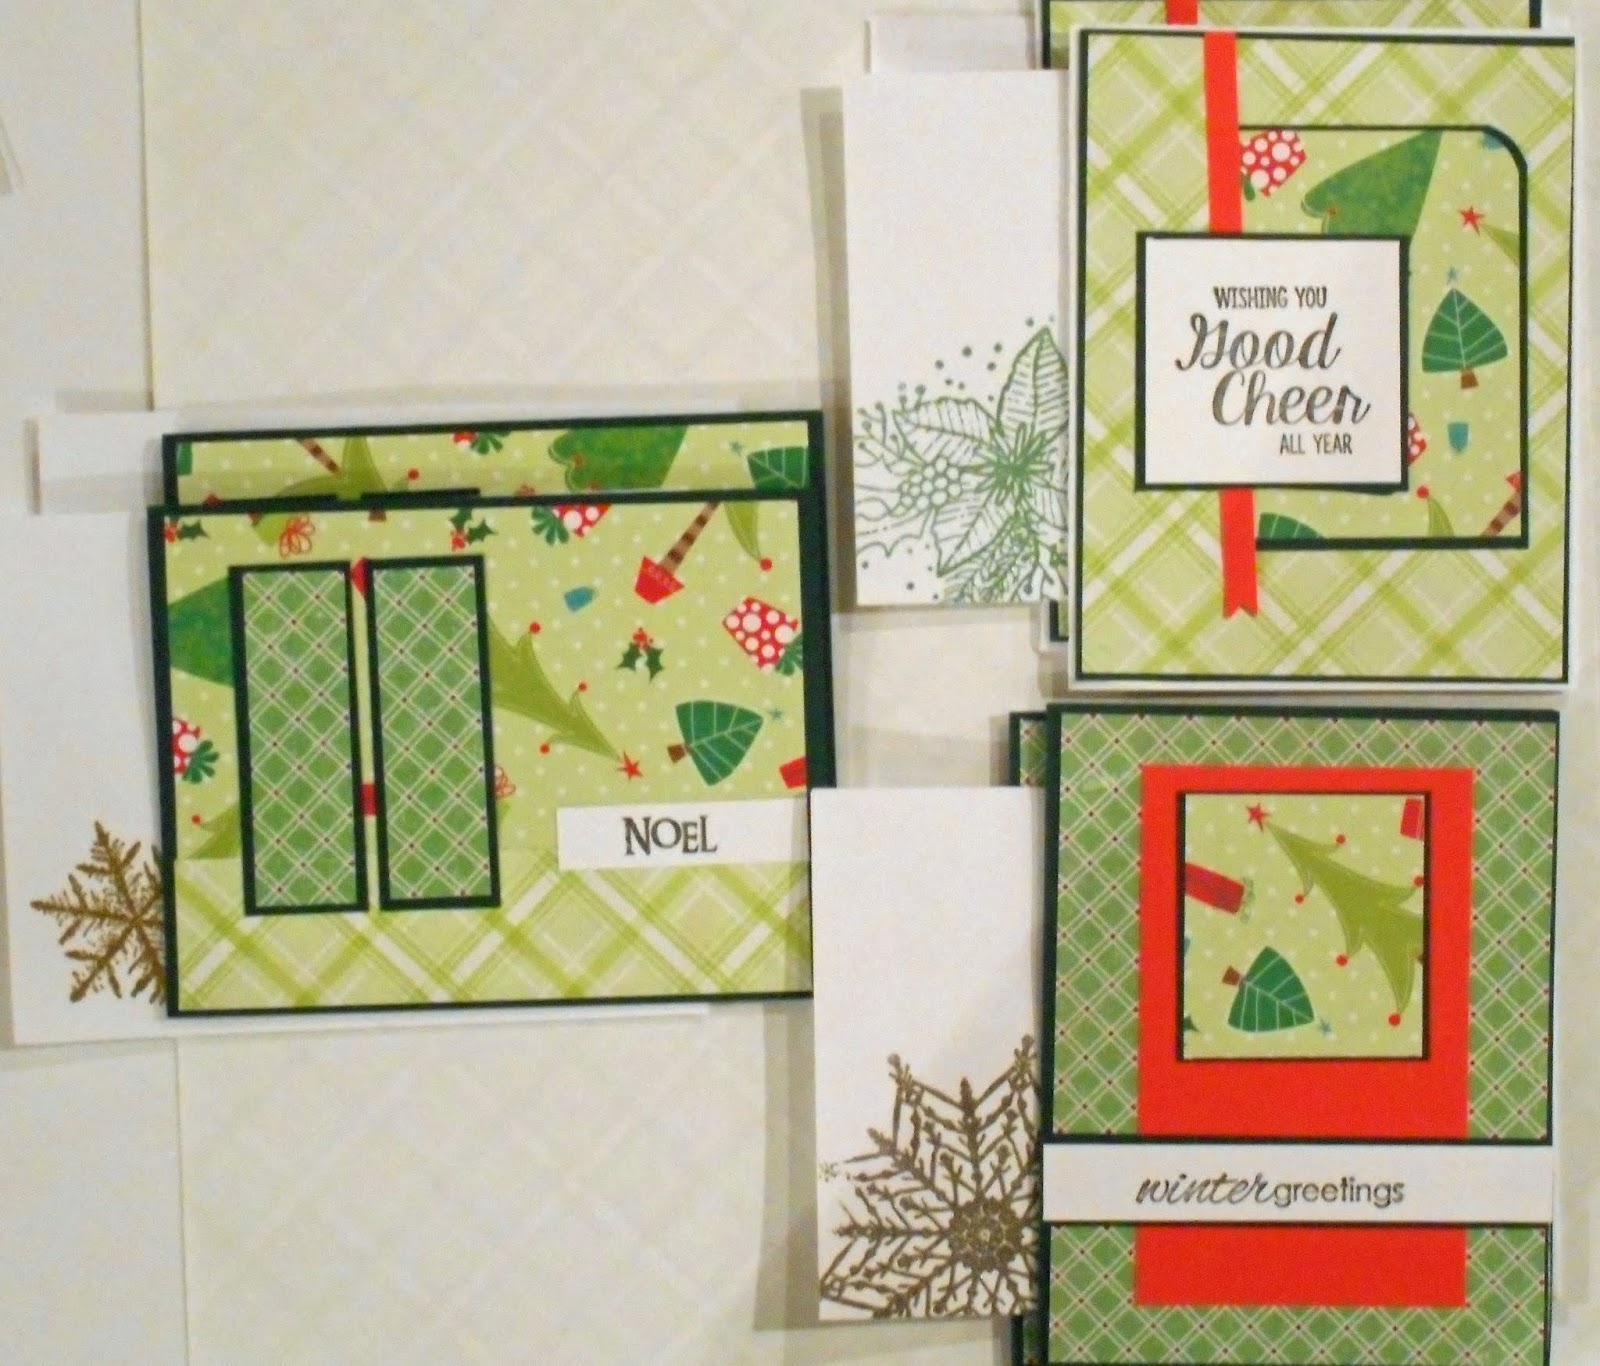
I make Christmas Cards all year long that way they are ready for donations to different charities. Today I made 10 Christmas cards using 3 12x12 Christmas Patterned Papers. I find that when I'm making a bunch of cards sketches help me whip them out. I tend to make 2 to 4 cards per sketch. 

The first two papers are from Recollections Bright and Jolly 12x12 Christmas Stack and the last one I think is DCWV - Holiday Collection The Christmas Stack.  I pulled green, white and red cardstock. 


I made two cards for each of the following 3 sketches.

The first card uses an Operation Write Home sketch  #27 and rotated.


The second card uses an Operation Write Home sketch. One of the nice things about their sketches is that the dimensions are already on the sketches. Operation Write Home Sketch #72


The third card uses Moho Monday Sketch #168


The fourth card is using one of my favorite dies. 

I only made one card of each of the next two sketched

I used another Operation Write Home Sketch #154


My last card uses Mojo Monday Sketch #238


I've gotten in the habit of stamping and then embossing on my envelopes. Here are my cards with envelopes.
and the last 4 sets

Here's a few posts from earlier this year for cards and the sketches I used.
Christmas Cards from January 29 2018  - 10 cards made
Christmas Cards from January 10, 2018 - 6 cards made no sketches used.
may the Joys of the season be yours - 2 cards

Thanks for stopping by.


Recipe:
Papers: Recollections Bright and Jolly 12x12 Christmas Stack and I think is DCWV - Holiday Collection The Christmas Stack; Cardstock - red, white green
Embossing Folder: Cuttlebug "Snowflakes"
Stamps: Close to my Heart "Say it in Style"; Unity Stamp Company - October 2018 KOTM {all winter long}, October 2017 KOTM { conspiracy of love}, October 2016 KOTM {holiday hugs}
Ink: Gina K - amaigam ink
Dies: My Favorite Things - Quilt Stamp

Monday, January 29, 2018

Christmas Cards

I'm trying to use up a few left overs from my January Counterfeit Kit - Holiday Joy so I've made 10 Christmas cards. I pulled up a few sketches and made two card for each sketch but I'm only showing you one of the cards. I embossed on all the envelopes in various embossing powders.

Cards # 1 and 2: I used A Freshly Made Sketch #317 for this card:


Cards # 3 and 4: Another Freshly Made Sketches #318


Cards # 5 and 6 uses Sketch #366 from My Favorite Things:


Cards #7 and 8 used sketch Mojo Monday #480


Cards # 9 and 10 is sketch #56 from Reverse Confetti


I'm adding these to my box for Operation Christmas Card. I still have a few more pieces from my January Counterfeit Kit - Holiday Joy and I'm undecided if I can pound out a few more cards or retire my kit.

Thanks for stopping by.

Operation Christmas Card - 10

Christy's Beautiful Life: #30DSCBL2

Sketch #1: Christmas Ornaments
Sketch #2: Oh Christmas Tree
Sketch #3 - Merry Christmas Tree
Sketch #4: Iron Monuments
Sketch #6: Snowflake Layout

 100 Pattern Paper Challenge: 5 sheets

January Counterfeit Kit - Holiday Joy
14 - 12x12 Layouts
 5 -  8 1/2x11 Layouts
 2 -  12x12 Project Life
       8 1/2x 11 Project Life
  1 - Planner Pages
18 - Cards
  8 - Tags

Recipe:
January Counterfeit Kit - Holiday Joy
Paper: 8x8 Assorted Paper by Pressed Petals; Various Cardstock
Punches: Stampin' Up - Ornament Punch, Mini circle punch, McGill - Alpine Snowflake; XCut Large - Icy Snowflake; Crop-A-Dile 1/2" corner rounder; Martha Steward - Scalloped Circle; Recollections 1 1/2" Circle
Stamps: Unity Stamp Company KOTM - October 2017 {conspiracy of love} snowflake and tree stamp; September 2015 {our hearts and yours} Christmas lights and Merry Christmas Bulb; October 2014 {love and joy for the holidays} bird on branch; October 2013 {Oh Christmas Tree} Merry Christmas and 3 trees; My Sentiment Stamps - True Meaning Tags "Joy to the World"; Close to my Heart - Say it in Style "Merry Christmas"
Ink: Ranger - Jet Black; Versa Mark
Die: Stitched Circles
Misc.: Adhesive, Cuttlebug, Embossing powders,  Xyron and Zots

Wednesday, January 10, 2018

Christmas Cards

I received a few cards after Christmas so I needed to make a few more cards to either mail or drop off. I pulled out Unity Stamp KOTM October 2016 {holiday hugs}  stamp set and the 8x8 Pressed Petal paper pack to make some Christmas Cards.

Card #1: Holiday Hugs on white cardstock:

I stamped, embossed with black, then colored in my image. I used the largest Labels 36 die to cut the bottom edge of the card. The envelope is stamped and embossed with blue ink.


Card #2 Holiday Hugs on kraft cardstock:

I did the same process above except I changed out my paper and used silver embossing powder on the envelope.


Card #3 Silver Bells on White cardstock:

I stamped, embossed, colored and cut out the panel. I added some of the glitter enamel dots that were in my kit.


Card #4 Silver Bells on Kraft cardstock:

I did the same process as above and used the Silver glimmer paper for my card base. I'm not quite sure why the embossed snowflakes on the envelope look silver sometimes and at others a goldish color.


Cards #5 and 6 on White Cardstock:

This was the last set of cards that I made. I stamped, embossed, fussy cut my image, colored in the "joy" banner on the bulb then added to a vellum banner behind it. I wanted the background behind the image to be just a little bit subtler.


I added twine around the top of the banner to finish off the card. The envelope is stamped with the snowflake trio stamp and the large snowflake stamp. I heat embossed with blue.

Here is both cards - I forgot to stamp one on the Kraft cardstock so both are on white.


Thanks for stopping by.

January Counterfeit Kit - Holiday Joy
7 - 12x12 Layouts
 4 - 8 1/2x11 Layouts
     12x12 Project Life
     8 1/2x11 Project Life
1 - Planner Pages
6 - Cards
8 - Tags

Recipe:
January Counterfeit Kit - Holiday Joy
Paper: Pressed Petals - Assorted paper pack; Recollections cardstock: Black, Kraft, Silver glimmer and White; Vellum
Ink: Distress Ink - black soot; VersaMark ink
Colored Pencils: - Derwent - French Grey; Staedtler - Grey, Olive; General's -  Carmine
Marker: Bic Sharpie - Rambunctious Red
Labels: Spellbinders Nestabilities - Labels 36
Stamps: Unknown small snowflake; Unity Stamps KOTM October 2016 {holiday hugs}
Misc.: Adhesive, Cuttlebug machine, Embossing powder - black, blue and silver, Enamel Dots, Heat Gun and Powder tool.

Monday, August 28, 2017

Christmas Cards

I made up a few more Christmas cards for Operation Christmas Card. For cards 3-6 I stamped the coffee cup, colored it in and die cut it out. After I had the top put together I remembered I had some of the bar brads so I added one to the bottom right corner.


I used the same sentiment that I had on cards 3-6 for the inside since I still had it on my Misti.


I stamped and embossed on the envelopes using the Christmas Tree postage stamp from the  October 2013 {Oh Christmas Tree}KOTM


Cards 7-8 are using the left over cardstock from the previous 6 cards and the pattern paper from cards 1-3.


Once again the sentiment is the same as before.


This time the envelopes are stamped with an old Inkadinkado snowman stamp.


100 Pattern Paper Challenge: August use your Cardstock
8 - Cards

Previous Cards:
Cards: 1-3

Recipe:
Paper: DCWV - Holiday Collection "The Christmas Stack" and Recollection - Bright and Jolly Paper Pad Recollections Cardstock: Blue, Black and White
Dies: Spellbinders Nestablilities - Large circles; Die-namics - Zig Zag Stitched Circles
Stamps: Unity Stamp Co KOTM - September 2015 {Our Hearts to Your} - Coffee Cup and sentiment and October 2013 {Oh Christmas Tree} - Tree postage stamp; Inkadinkado - snowman stamp
Ink: Color Box - Black; Distress Ink: Evergreen bough, broken china,
Misc.: Adhesive, Brads, Clear Embossing Powder, Colored Pencils, Crop-a- dile, Misti, and Score Tape

Wednesday, August 23, 2017

Christmas Cards - first three

I know it's only August but I saw a post for Operation Christmas Card on the Unity Show and Tell Facebook page, so I figured I could make a few cards to send their way. I need to have my cards boxed up and sent by October so that she gets them in plenty of time to send them out. The August Challenge at the 100 Pattern Paper Challenge Facebook group is to use cardstock. Like Tina, I have a stack of 8 1/2 x 11 cardstock and my scrapbook pages for my youngest are 8 1/2 x 11 but will I really use some of the odd colors on his layouts, probably not.

I started by pulling one sheet of paper from the 12x12 paper pack - DCWV - Holiday Collection "The Christmas Stack"

 and the Recollection - Bright and Jolly Paper Pad.


 I have a bunch of 8 1/2"11 cardstock that I can use for my bases.

So here is my first three Christmas Cards using the DCWV Holiday Collection. 

 
I used the pattern paper as the focal point on the front, wrapped a little bit of embroidery yarn around the edge and added a scallop border behind.


I stamped my sentiment onto white cardstock and added a border of pattern paper at the top.


I stamped the Christmas Bulb and clear embossed it on the envelop of each card.


Here's my first three cards ready to go.

Thanks for stopping by.

100 Pattern Paper Challenge: August use your Cardstock
3 - Cards

Paper:  DCWV - Holiday Collection "The Christmas Stack" and Recollection - Bright and Jolly Paper Pad. Recollections Cardstock - green, white, blue and black.
Ink: Distress Ink: broken china; Ranger Archival Ink - Jet Black
Stamps: Unity Kit of the Month: October 2013 Oh Christmas Tree - Christmas Bulb; September 2015 Our Hearts To Yours - Sentiment
Punch: Stampin' Up - Scallop border
Misc.: adhesive, clear embossing powder, embroidery yarn and Misti