Showing posts with label Project Life. Show all posts

Tuesday, March 6, 2018

CKC March Mini Kit Reveal - Here's The Story

Today on the Counterfeit Kit Challenge Blog is the Mini Kit reveal. I signed up for the Mini Kit this month to challenge myself to make a smaller kit and use it up right away.

Our inspirational kit this month is a kit Susan made "Little Bits of Happy"


I love the kit Susan put together. The oranges, yellows, greens and turquoise, stars and hearts, a little cloud, a few journaling cards, tags and of course the labels.

Here is my Mini Kit for March - Here's the Story.


Now I normally start with my 12x12 pages and then work on my youngest but this time I started with his. I have included in my kit papers from a 4 1/2" x 6 1/2" paper pad, a partial sheet of 12x12 paper for journaling, black washi tape, alphabet stickers, project life cards, die cuts a couple of doilies and sequins.

I usually make a much larger kit and document what ever photos I want through out the month.  This time I am documenting a trip DH and I took to Minot, North Dakota to spend a long weekend with my youngest. Since he moved there he comes home for Thanksgiving and we bring Christmas to him. So we get to see him twice a year. I do send lots of care packages to him through out the rest of the year. And yes I decorate the outside of the package and send to his office.

Pages 1 and 2 use 2 - 4x6, 2 - 4x3 and 2 - 2 x4 pockets.


I used a piece of acetate to place my title on along with a couple of different alphabet stickers.  I sprinkled around some of the enamel dots and added the punched hearts throughout the pictures.
I thought the die cut that says "Today Your Story Begins..." was perfect for this story. The problem is that you see white cardstock on the opposite side. To start I covered the backside with some gold colored cardstock.

Page 2:
I have lots of pictures of the Scandinavian Heritage Park we walked through. I finally added a doily to cover up the back of the die cut and a few embellishments. I was going to make a sequin pocket but liked this better.


I packed a few scrapbooking supplies and some crochet to do on the way. The guys had scheduled a golfing day and I was going to scrap.  When we got to Doug's he had his Ninja Turtles towels hanging in his bathroom. It so made me smile and I had to snap a picture.  The guys loved the Turtles when they first came out.


Page 3 and 4 I switched it up a bit with 4 - 4x4's and 2 - 4x3 pockets

 
I used a couple of the labels from my kit and the wood veneers, then remembered I had the enamel dots in the bright colors so added a few starts to my journaling.   I keep a little container with left overs from other projects and that is where I found the stamped saying "Love believes all thing, hopes all things, endures all things." along with the tag, punched flower, stamped feather and punched heart.
 

The last page had some more of the elements from the kit and a few more pictures from the Scandinavian Heritage Park. The bottom of the page is a picture of Izzy ready for nap as we head home. The journaling reads " Headed home and Izzy needs a nap. It's a lot of work visiting." I still have to finish my 12x12 pages and will link them up on the CKC blog.

Thanks for stopping by and be sure to stop by the Counterfeit Kit Challenge Blog and link up your projects here. You can also post at the Counterfeit Kit Challenge Facebook Community or on Instagram.

Recipe:
CKC Mini Kit March - Here's The Story
Paper: partial sheet of 12x12 paper from Me & My Big Ideas in the back; Assorted pattern paper, 4 1/2 x 6 1/2, from The Paper Studio "Murphy's Square and Ninth Street;
Alphabets:  Recollection Clear Alphabet Stickers, Unknown Black Alphabet; Basic Grey - Lemonade alphabet stickers;
Die Cuts from My Mind's Eye - "Everyone has a story to tell"
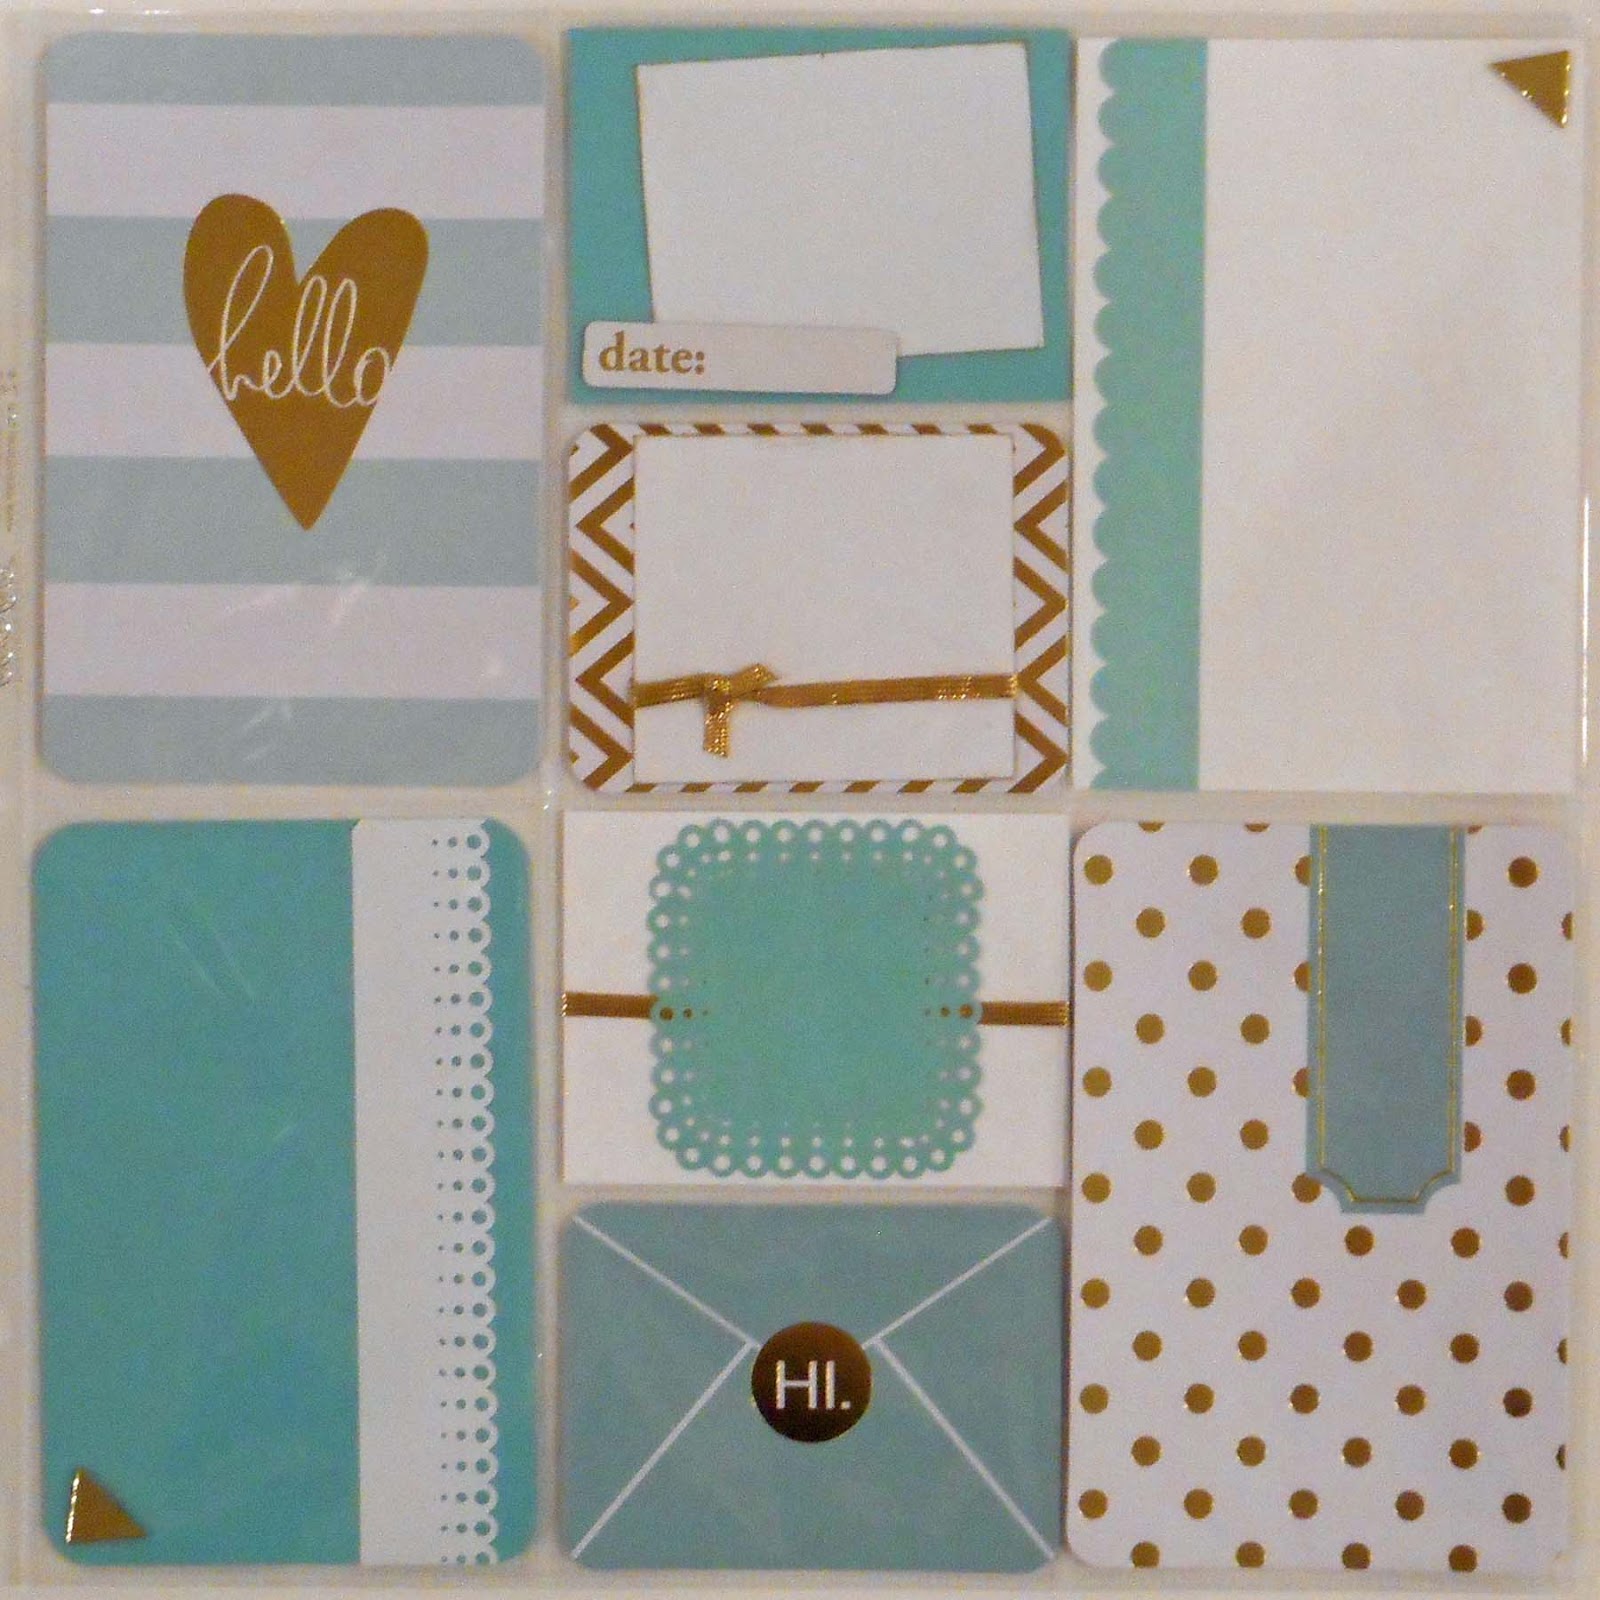
Project Life Cards: My Min's Eye - "Everyone has a story to tell"; Becky Higgins - "Hi Sunshine"
Misc.: Adhesive, DIY Labels, enamel dots,  Heart Punch, Sequins, Washi Tape, wood veneers and zots.


Tuesday, January 23, 2018

Snowflake Layout

I used Christy's Beautiful Life 30 Days of Sketch's 2 Sketch #6 for this layout. I had a piece of unknown Christmas paper in my kit with Christmas words on it. It wasn't a 12x12 piece of paper so I layered it onto a piece of brown cardstock to get a 12x12 piece.


The doily is cut apart and layered behind the photo mat, I stamped both sizes of the snowflakes onto pattern paper, fussy cut them ad layered on top of the doily


 I added little pieces of the doily at the bottom of the photo along with some of the ribbon.


I also made a couple of project life pages for them, since they split Christmas between us. I kept the pages simple so that they can add pictures and journaling later. I think my favorite if the other half of the doily on the 4x6 card. 

I keep the bits and pieces as sI make my layouts to use onto Project life pages. After I'm done with my Kit then I can get rid of the those  bit.


Thanks for stopping by.

Christy's Beautiful Life: #30DSCBL2

Sketch #1: Christmas Ornaments
Sketch #2: Oh Christmas Tree
Sketch #3 - Merry Christmas Tree
Sketch #4: Iron Monuments

100 Pattern Paper Challenge: 3 sheets

January Counterfeit Kit - Holiday Joy
10 - 12x12 Layouts
 5 - 8 1/2x11 Layouts
 2 - 12x12 Project Life
     8 1/2x 11 Project Life
1 - Planner Pages
8 - Cards
8 - Tags

Recipe:

January Counterfeit Kit - Holiday Joy
Paper: Unknown Christmas word paper and polka dot paper; me & my Big ideas value pack; Provo Craft Slab III; Craft Smith - white and tan cardstock; 8x8 pattern paper Pressed Petals - Assorted papers;  Recollections: green and white cardstock and DCWV - Wreath Garland paper pad
Die Cuts: Pinkfresh studio - gold foiled die cuts;
Project Life Cards: Becky Higgins - Christmas Wishes; the Paper Studio - Christmas and Snap- Cozy Christmas.
Stamp: Scrapbook and Cards Today - Snowflakes
Ink: Distress Ink -broken china,  mowed lawn, and worn lipstick
Misc.: Adhesive, Labels, Paper Doily Ribbon, , and Zots

Monday, July 31, 2017

I used the Glorious Garden Counterfeit Kit for these layouts.  I had two sheets each of circle and woodgrain paper so I used a sheet of each to make a double page layout in 12x12 and 8 1/2x 11 for the guys. All of the papers have been inked in the gathered twigs distress ink.


I made a couple of embellishment clusters for this layout. I cut the sentiment from the Home Basics paper pad, used a photo frame die cut leftover from another project and added a punched border and label.

 
I kept the 4x6 photo mats on the 8 1/2"x11" layout, just shrunk the paper size down and moved the element cluster to the other side.


I made a sheet of different words using different fonts. This embellishment cluster used "good stuff" along with more of the punched borders, a couple of pennants and twine.


Instead of 4 4x4 photo spots I have a 4x6 and a 2x4 for each row.

 
I had a little bit of paper scraps left over so I used them on a project life page that can be sandwiched in between the two layouts


. I kept the pages fairly simple using the paper as borders, pennants and punching borders.

April Counterfeit Kit - Glorious Garden

4 - 12x12 Layouts
2- 8 1/2 x 11 Layouts
2 - Project Life pages.
 7 - Cards

Recipe:
Counterfeit Kit - April's Glorious Garden
 Paper: Colorbox - Mint Julep; Kraft, Green and White Cardstock; Recollections - Home Basics; DCWV - The Everyday Paper Stack and The Timeless Texture Stack;
Distress Ink - gathered twigs
Me and My Big Ideas - the happy planner
Punch: Stampin' Up - Decorative Punch, Sprial Border
Die:
Twine, pop up dots,
Printables: A Vegas Girl - 3 label punch

Wednesday, July 19, 2017

Such a Lovely Day

I had some left overs from a few DCWV paper stacks and combined them into this layout and project life page.
 
I hand cut out several of the banners and hearts for this layout. There was a lot of fussy cutting on this page for the elements. I finally just cut all of them out and put then in a IRIS container so they are ready for other layouts.


I added the "Such a Lovely Day" to the bottom of white cardstock , a white photo mat to another and a heart border to a third and another banner to a fourth. The rest are papers scraps from the


Thanks for stopping by
Recipe:
DCWV: Sky's the Limit, Sunny Afternoon and Sweet Tangerine Stack, White Cardstock
Adhesive and embroidery yarn.

Tuesday, February 23, 2016

Counterfeit Kit Challenge Blog Hop

Today is the February Counterfeit Kit Challenge Blog Hop. You should have arrived from.Kelly's blog, if you are just joining the blog hop you can go to Counterfeit Kit Challenge to start at the beginning of the hop. (I do have the hop participants at the bottom of this post).

This month, we could choose to share any project that was made with our Counterfeit Kit Challenge kit which we have not shared on our blog yet. Or we could share a project that was made from one of the three challenges during the month. The three challenges this month are:

Today I'm sharing the pages I made from my Hello Lovely Kit that I have not  yet shared.  I'm using Page Set #1. I started off by making a 12x12 layout for my oldest. I trimmed the top and bottom of the pages down a smidgen then used washi tape to bring a little bit more gold into the mix. 

The heart frame are cut from a sheet of the Amy Tangerine Stitched papers. I thought they made great little accents. Then I did a project life spread for him.

 
I made similar pages for my youngest. I have no idea who made the alphabet stickers, but I had enough to make the same title for both pages.


and the project life spread.
 
 
For my layout I used a old picture from Mom and Dad.  I had found the deer die cut so I had to use it as it is the perfect color for this set of papers.  .  
 
 
The picture is one from Mom and Dad. It didn't have anything written on the back so I don't know when it was taken. I have a little bit of this paper set left and another one that I will go back and scrap the pictures of the south pasture of the ranch for the guys.
 
Here is the full blog hop.
 
Thanks for stopping by.

February Counterfeit Kit - Hello Lovely
8 - 12x12 Layouts
3 - 8 1/2x11 Layouts
5 - Project Life Pages

Recipe:
February Counterfeit Kit - Hello Lovely
Papers: 2 papers from Amy Tangerine -Stitched and Me and My Big Ideas, unknown scraps of blue and aqua; Unknown stars stickers, a couple of my pre die cut shapes, a couple of Project Life cards, and some buttons from My Mind's Eye - Cut and Paste

Friday, February 19, 2016

Don't quit your daydream

I'm still using the Page Set #6 for my layout from my Counterfeit Kit - Hello Lovely with another set of a 12x12 page and the back side of the Aren't You Lovely pocket page.


I used the Striped  paper and distress and inked all the edges I have piece of vellum that everything is on to up - I just wanted a little bit of softer spot for the picture.
Since I misted doilies for the Aren't You Lovely page I did another one for this set of layouts. I just have them peeking out a couple of places. I received a new punch for Christmas and there really is not time like the present to use it.


I used the Sketches in Thyme Project Life Style Sketch #14 for my pocket page.
 I know I'm new to making the Pocket pages and it really does take me forever, but I have them so I need to use them and hopefully it will get easier.


I kept it really simple with the last of the gold trim and a couple of banners with DIY Enamel dots.


Here is the whole page. I use the branding strip for the top card and another flower. I pulled a couple more of the cut a parts to use and spread them about the pockets.

I thought I would show what I have to use from Page Kit #6 after making the 2 - 12x12 pages and the 2 - 12x12 pocket pages.


I have not done the is 8 1/2x11 pages or pocket pages for my youngest. I added to my original kit White Cardstock, 1 - 12x12 pager from The Paper Studio - Tattered and Worn Stack, 2 - 8 1/2x11 papers from DCWV - The Everyday Essentials Stack, 2 - 12x12 DCWV - Timeless Texture Stack, 2 - Amy Tangerine - Stitched grey papers and scraps of grey cardstock.  I've been getting 8 - 10 pages out a page kit. I added gold trim and gold buttons for embellishments.

Thanks for stopping by.

February Counterfeit Kit - Hello Lovely
6 - 12x12 Layouts
3 - Project Life Pages

Entered into: Sketches in Thyme Project Life Style

Recipe:
Papers:  Craft Smith - Gray cardstock and Amy Tangerine - Stitched; Silk flowers, die cut, ribbon, butterfly; acetate shapes, various die cuts, buttons, and some pre - made flowers, and the emboss and die cut tags.
Added to Kit:  gold trim and buttons, DIY Mist for doilies light grey cardstock scrap and Amy Tangerine - Stitched Grey paper and vellum, pop up dots.
Punch: Martha Stewart - Scallop 3 dot

Thursday, February 18, 2016

Aren't You Lovely

February has been a really busy month for us, I'm just starting to play with my Counterfeit Kit - Hello Lovely. I haven't even had a change to check out what is going on the Counterfeit Kit Challenge blog until today and they are getting ready for their monthly Blog Hop on the 24th. Today's layout uses Page Set #6 for my layout from my Counterfeit Kit - Hello Lovely.


Here is the 12x12 page and the pocket page.


I pulled out the two flowers I had made for a swap a couple of year ago and since they had gold in them I added a piece of gold trim and buttons. I made a mist so that I could mist the doilies to match the red in the hearts. Everything is inked with black ink


For the pocket page I used some the Amery Tangerine - Stitched cut a parts to fill the pockets. I just had to add the Aren't you lovely" heart it went so well with my dark grey cardstock.


Since one of my goals this year to do Project Life pages along with my regular scrapping,  I keep checking the Sketches in Thyme Project Life Style blog to get ideas. Here is there Week 15 Sketch


For my card I used another cut a part from Amy Tangerine, a little bit scraps for a banner and a couple of DIY Enamel Dots.


Thanks for stopping by.

February Counterfeit Kit - Hello Lovely
6 - 12x12 Layouts
3 - Project Life Pages

Entered into: Sketches in Thyme Project Life Style

Recipe:
Papers:  Craft Smith - Gray cardstock and Amy Tangerine - Stitched; Silk flowers, die cut, ribbon, butterfly; acetate shapes, various die cuts, buttons, and some pre - made flowers, and the emboss and die cut tags.
Added to Kit:  gold trim and buttons, DIY Mist for doilies light grey cardstock scrap and Amy Tangerine - Stitched Grey paper.
Punch: Stampin' Up - 2 1/2" Circle

Thursday, January 28, 2016

Remember This

Here's another layout using some of the scraps from my Fresh Start January Counterfeit Kit.


It really is straight but I could not get a pictured of it being straight.  My oldest had given me the Tim Holts Feather Duo die and embossing folder for Christmas. I love the way it turned out on this page.

I needed to fill the backside of the pocket page from Live Each Moment so I matched it up with this Remember This layout.


 I stamped and hand cut a few feathers on a couple of different papers. I then added a couple of the die cut feathers to the 4x6 journal cards. 


The two pages together. The stamped feathers go so nicely with the die cuts. Both of these pages are made from scraps from the Fresh Start Kit except for the kraft cardstock.

Thanks for stopping by.

January 2016 Counterfeit Kit - Fresh Start
9 - 12x12 Layouts
5 - 8 1/2x11 Layouts
1- Card and Tag
5 - Project Life Inserts

Recipe:
January Counterfeit Kit - Fresh Start:
Paper: DCWV - Heirloom Stack; Recollections cardstock - white and Kraft; unknown tan
Ink: Ranger - Color box - chestnut
Stamps: Unity KOTM - December 2015 {crazy, tragic, magic life}
Punch: Corner Rounder
Die and Embossing Folder: Tim Holts - Feather Duo
 Misc.:  Adhesive, Embroidery yarn - off white, Foam Tape, Pearls- brown, Pop up dots, scissors, Sharpie - Brown and Zots

Wednesday, January 27, 2016

Live Each Moment

I pulled a few already cut pieces from my Fresh Start Counterfeit Kit to make another layout for my youngest. Since I had just participated in the Counterfeit Kit Challenge Blog hop I also pulled out a couple of stamps for this layout (click the link and check it out).


I stamped the large camera on a piece of the Heirloom Stack, cut it out and placed it next to the two small photo mats. The cluster at the top uses more of the scrap pieces. I was trying to make this into a two page spread but didn't have enough scraps so I stopped by the Sketches in Thyme Project Life Style blog to get some inspiration for another pocket page. January Week 4 Sketch # 12 is what I decided to use for this set of pages.(Yes, that means I have more layouts I've completed than I've shared).
I think it takes me longer to do a pocket page than and actual layout.


I used a 2" circle punch and another wood veneer camera, rhinestone, stapled the circle, added my stamped sentiment and rounded the corners.


Here is the full Project Life spread. From the top left: The top row is 4x3 cards. I stamped the noted onto a piece of tan cardstock and added another hand cut banner with a couple of rhinestones. The middle row has 2x2 cards. I added a few hand cut banners, rhinestones, DIY enamel dots and another wood veneer camera. The second pocket has another stamped camera in the pocket with a rhinestone. The bottom row is 4x6 cards. I backed the one on the right with tan cardstock, stapled the banner on the left side, added the sticker on a punched circle to make it stand out and couple of DIY enamel dots. The left card had the stamped image of the polaroid and the banners at the top.


Here is both pages together.

Thanks for stopping by.

January 2016 Counterfeit Kit - Fresh Start
9 - 12x12 Layouts
4 - 8 1/2x11 Layouts
1- Card and Tag
4 - Project Life Inserts

Recipe:
January Counterfeit Kit - Fresh Start:
Paper: DCWV - Heirloom Stack; Recollections cardstock - off white; unknown tan
Ink: Ranger - Jet Black; Color box - chestnut
Stamps: Unity KOTM - May 2012 {Love in an Instant}- live each moment, large camera and polaroid, July 2015 { Halo Dirty} - small camera; Fiskars - Noted
Punch: Corner Rounder; EK Success - 2 Point Flag; Marvy - 1" circle; Recollections - 2" circle punch
Stickers: Ruby Rock-it - Sentiment stickers - Life Documented
Misc.:  Adhesive, DIY enamel dots, Pop up dots, Rhinestones, scissors, Tim Holtz - mini stapler,  wood veneers, and Zots

Monday, January 25, 2016

Project Life - January

I did a couple of Project Life layouts with my January Counterfeit Kit Fresh Start. I will be incorporating the Holiday Edition Mini Kit cards for the month of January.  I sorted the Holiday Edition cards into the separate holidays then put all the January ones aside for scrapping.

My youngest is still using the 8 1/2" x 11" albums so I ordered a few different sheet protectors for him (well actually for me to use).  I started with the 4 -4x4 and 2 - 4x3 sheet protector for this layout..

Red and black colors from the DCWV - Heirloom Stack worked well with the January Project Life cards. I cut out the ticket in the top left and added a bit of yarn to it. Top right is a piece of the crossword paper with a felt flower and banner added.

My oldest has a 12x12 album and I selected the one with 4 - 4x6's and 4 - 2x3's. I used the 4x6 card and a couple of the wood veener people on the card. The clock that was a left over from the Heirloom stack is all by itself. I added a bit of journal paper and yarn to the black and tan project life card.


When I have layouts that I'm making for all three of us I try to add a couple of the same elements to each of the pages. I made sure to make a polaroid for each of their layouts and to put the year on it.  I used black instead of the normal white as I wanted it to pop. Both of their layouts have the wooden veneer people.

 For my January Project life spread I used the same page configuration as my oldest and used the left over cards on it for just a few of things happening in my January 2016.


I cut the doily and added the January acetate to it along with the wood veneer people and the year. The next 4x6 card is Izzy getting caught on Dale's Desk looking for something good. She got stuck up there and had to have help down. When she jumped up she moved the chair back far enough she couldn't get down. The next row has a few 2x3 cards of Izzy and cold paws, birthday flowers and the movie we saw. The bottom row has one of the pictures I took of the Gold Country Referees - I took over 700 photos of the Ref's that day. The last one is of our open house at work.

Thanks for stopping by.

January 2016 Counterfeit Kit - Fresh Start
9 - 12x12 Layouts
3 - 8 1/2x11 Layouts
1- Card and Tag
3 - Project Life Inserts

Recipe:
January Counterfeit Kit - Fresh Start: DCWV - Heirloom Stack; Recollections cardstock; black, red and white; unknown tan
Ink: Ranger - Jet Black
Stamps: Becky Higgins - Project Life; Heidi Swapp - roller date stamp
Alphabets: Recollections - Clear Alphabet; Cosmo Cricket - Tiny type; Doodle Bug - Teensy type; Unknown red
Labels: 7 gypsies - Frames and Tags; Tim Holtz idea-ology Vial Labels; Printable labels
Punch: Corner Rounder; Stampin' Up - Spiral border
Die: QuicKutz - Antique Doily
Project Life Cards: Holiday Edition mini kit
Misc.: Acetate January (unknown) Adhesive, DIY enamel dots,  K&I Memories - Heartfelt blossoms,  wood veneers, yarn - various reds and Zots

Tuesday, December 15, 2015

Grand Canyon Adventure - Challenge #3


The September Challenge #3 at the Counterfeit Kit Blog is to combine the sketches to make one.
I made a Project Life spread to go along with "The Trees" layout which can be found here.
For the project life sketches I combined the label card of sketch 1 and the caption card of sketck 2 and both sketches are rotates.


For sketch 1 I punched a piece of acetate and vellum using the photo label punch.  I used Recollections Alphabet stickers that are clear to spell out "we were here". I used the gold pen to outline the vellum label and when they were dry I adhered to the picture.


For sketch 2 I spelled out Grand Canyon on the 4x6 paper and then use a strip of white cardstock and the Recollection stickers spelled out Adventure and cut it into a flag shape..  I used a stapler to attach the flag. To bring some of the elements over from the prior page I used the DIY Washi tape and enamel dots.


I used the round alphabet for the "Duck on a Rock" which is on the photo.

Recipe:
September Counterfeit Kit:
Paper: DCWV - Tattered and Worn Stack;  Cardstock: White and Brown; Acetate and Vellum
Punch: EK Success - Photo Labels
Alphabet Stickers: Recollections - Clear (Adventure); Pink Paislee - Whimsies Chocolate (Duck on a Rock); Basic Grey - Recess Nanoset  (Canyon), Kissing Booth (Grand)
Misc.: Adhesive, DIY Enamel Dots, DIY Washi Tape, Gold Calligraphy Pen