Showing posts with label Scrap Pile. Show all posts

Thursday, January 23, 2020

Christmas Ornaments

I always make or buy a Christmas ornament for my guys each year for their Christmas trees. I pulled out my January Counterfeit Kit - Snowman Kisses for these layouts.

I wasn't planning on using the Merry Christmas paper that was in the Paper Studio pack, but it worked for my annual Christmas Tree Ornament page. I only have two of these 12x12 papers but I had the sticker sheet that had the same Santa Clause on the sticker sheet. I figured I could make the 8 1/2 x 11 using that, green cardstock and the red and white strip paper for my youngest son's layout.


I love the way this turned out. I trimmed the red and white stripe paper then made my border on the green cardstock added the stickers and it is similar to the 12x12 paper.

Now for my oldest son's layout. I again used scraps of Christmas paper that was included in my Counterfeit Kit to make the banners. They are scraps so they do not go all the way behind the photo's.


For the second layout, the 12x12 sheet I'm using for my grandson. He was born the 22nd of December and I wasn't planning on buying an ornament for him for 2019, but he came to us early. I found this adorable mailbox for him.


I normally make a similar page for my scrapbook of their ornaments. I have not at this time so there will be one more to come. I have some of the red and white stripe paper left on of course scraps and alpha stickers but no more Santa stickers. It will be similar but not necessarily the same as these pages.

Thanks for stopping by.

Counterfeit Kit Challenge - CKC January 2020 - Snowman Kisses
12 - 12x12 Layouts
1 - 12x12 Pocket Page
3 - 8 1/2 x 11 Layouts
1 - 8 1/2 x 11 Pocket Page
10 - Cards


Recipe: CKC January 2020 - Snowman Kisses
Paper: The Paper Studio Merry Christmas paper and Red and White Strip paper, Green and White Cardstock, Christmas Paper Scraps
Stickers: The Paper Studio - Santa Claus and Christmas Tree
Alphabet StickersL The Paper Studio (white) and Doodle Bug (Red) page sets; Jillibean Soup - Mini alpha
Misc.: Adhesive, foam tape.

Thursday, January 16, 2020

Ho Ho Ho and Merry and Bright

Using my January Counterfeit Kit - CKC Snowman Kisses I finished the set of pages for my oldest. I have 2 12x12 layouts.

Ho Ho Ho Layout:
I started with the Bella Blvd "Gifts Galore" paper cutting it down then layering a on top.  this paper has the cutest Christmas icons on it. This is on top of a DCWV - The Holiday Stack green polka dot paper and red cardstock.


The Ho Ho Ho was actually a tag, so used foam tape behind it and used the red yarn to wrap it a round the bottom layers. I added a "love" sticker on the journaling mat and sprinkled sequins around the page. . The red and white strip is another sticker that I just cut to fit behind the papers


Merry and Bright:
I started with the Holly and Berries paper layering it onto the same green polka dot paper from DCWV - The Holiday Stack. The red Christmas Gifts paper is the back side of the Bella BLVD "Gifts Galore" paper. I brought in the red and white strip paper for my photo mats. The "Merry and Bright" project life card is one I had printed off and was in my stack of cards. I added a snowman from the sticker pack. then sprinkled the snowflakes and sequins around the page.


Thanks for stopping by.

Counterfeit Kit Challenge - CKC January 2020 Snowman Kisses.

5 - 12x12 Layouts
1 - 12x12 Pocket Pages
2 - 8 1/2 x 11 Layouts
1 - 8 1/2 x 11 Pocket Pages
Cards

Recipe: Counterfeit Kit Challenge - CKC January 2020 - Snowman Kisses
Paper: Bella BLVD -Christmas Wishes "Gifts Galore", DCWV - The Holiday Stack, The Paper Studio - Holly and Berry paper, White and Red and silver/green Cardstock and various scraps from Christmas paper.
Punches: Photo Corner Punch, Snowflake punch
Stickers: K and I Memories - Celebrate Life,  Doodle Bug Paper Pack and The Paper Studio Paper Pack,
Ink: Distress Ink - peeled paint
Adhesive,  Gold Star, Foam Tape Embroidery Yarn - Red, Sequins, and Zots

Thursday, January 9, 2020

You

I'm using the Scrap Our Stash Challenge - What's My Challenge - "Bingo" for today's layout.

I went straight down the list - Washi Tape, Layered Sticker, Sequin, 4 Patterned Paper, and Banner.

I started by trimming down the "Trees for Sale" paper then adding the background paper to it. I created a base from white card stock for my photos rest on as my paper is quite busy with all the trees and added the washi border to the top and bottom of it. The rest is just layering the pieces of pattern paper onto the white mat, even the green border behind white cardstock was from my Christmas paper scraps.


I pulled the red label, the photo corner and the hot chocolate circle from the sticker sheet I included in my kit. I fussy cut the smaller banners at the top of the layout.


I punch the red and white snowflake and pulled the gold snowflake sticker from my Christmas stash. It went perfectly with the gold sequins I included in my kit.


I used a punch for the banners at the bottom of the page layered with the snowflake and hot coco sticker.


For my layout I used the piece of the "Trees for Sale" paper to start my layout. I matted it onto white cardstock and layered the pieces from there. The gold snowflake is cut in half, the red one is tucked to the side and towards the bottom. I used a white one at the top with the banners, a red sticker and a sequin in the center. I sprinkled the gold sequins through the layout.

Enetered into Scrap Our Stash Challenge - What's My Challenge "Bingo"

Counterfeit Kit Challenge - CKC January 2020 - Snowman Kisses
3 - 12x12 Layouts
2 - 8 1/2 x 11 Layout
2 - 8 1/2 x 11 Pocket Page
8 - Cards

Recipe:
Counterfeit Kit Challenge Blog - CKC January 2020 Snowman Kisses
Paper: Bella BLVD - Christmas Wishes "Trees for Sale", DCWV - The Basics Stack; Scraps from my Christmas stash; White cardstock
Punch: EK Success - 2 Point Flag
Stickers: K and I Memories - Celebrate Life stickers
Die Cuts: Crate paper -Snow and Cocoa Gold Snowflakes
Misc.: Adhesive, Foam Adhesive, Sequins, and Zots

Sunday, July 23, 2017

Good Morning Sunshine

I'm starting with the DCWV Citrus Stack scraps from my June Counterfeit Kit - Mish Mash.


  I just layered them behind my photo. I then stamped the coffee cup and cozie to use as embellishments on the layout.


For the guy's layouts I colored a the Tim Holtz Bird Crazy birds to add to their layouts.

 
I used the glimmer mist for some splatters then added the patter papers.


Thanks for stopping by.

June  Counterfeit Kit - Mish Mash
2 - 12x12 Layouts
1 - 8 1/2 x 11 Layouts

Recipe:
June Counterfeit Kit - Scraps from the DCWV Citrus Stack; Recollection Alphabet, DIY Foam letters, printable labels; Papertrey Ink - Heart 2 Heart stamp and die set, Tim Holt'z Bird Crazy birds, pop up dots and embroidery yarn
Added to Kit: Glimmer Mist - Peach Delight; Heidi Swap color Shine -  hot Pink and Butter; DIY - blue

Tuesday, August 16, 2016

Word Art Wednesday and Mojo Monday Card

I used my August Counterfeit Kit Page set two to make a card, well it was some of the scraps from Mini Album I made a couple of days ago. I know I have one of each of the full sheets left and a lot of the punch outs but I want to use them on 12"x12" and 8 1/2" x 11" layouts for the guys.


Todays card used the Digital word art from Word Art Wednesday and the Mojo Monday Sketch 461.


I had a couple of strips of the orange paper from cutting my album page so I used that to make my circle.  Since I included the orange and yellow cardstock in the kit I used that for the matting the word art and pop up with foam tape. The blue strip is another piece from the album page.


I finished the inside of the card of by double matting white and yellow cardstock with another piece of the orange pattern paper.


Thanks for stopping by.

Entered into Challenges:
Word Art Wednesday - Anything Goes Challenge Weeks #242- #243
Mojo Monday Sketch 461


August Counterfeit Kit:
Cards: 1
DIY Mini Album - in progress
Mini Album - 6x6

Recipe:
August 2016 Counterfeit Kit:
Paper:  Deja View - fresh print Mango: Cardstock - Orange, White and Yellow.
Digital Image: Word Art Wednesday
Misc.: Adhesive and foam tape
Added to Kit: Dies: Small Stitched 4 Bar Rectangles, Spellbinders Nestabilities Dies 7

Friday, April 11, 2014

Chick Card

I've had this little piece of chick ribbon in my scrap ribbon jar forever.  I would work on a card and pull it out then wind up not using it and put it back.  Well today is the day that I get to use it.  I pared it up with this chick stamp from Unity and a few pieces of left over paper.


I used the same technique on Wishing You Joy card to make the frame.
Thanks for stopping by.


1 card for OWH

Cutting Instructions:
Card Base: 5 1/2" x 8 1/2", scored at 4 1/4"
Background: 5 1/4 x 4"
Top Layer: 3 3/4" x 3"
Bottom Layer: 2 1/2" x 3"
Middle strip: 1/2" x 3 3/4" (adjust according to the ribbon size)

Recipe:
Paper: Recollection - Brown; everything else is from my scrap pile
Stamps: Unity Kit of the Month - March 2012 {from head to soul}
Embossing Folder: Stampin' Up - Designer Frame
Punch: Stampin' Up - Modern Label
Misc.: adhesive, scissors, scrap ribbon

Friday, February 14, 2014

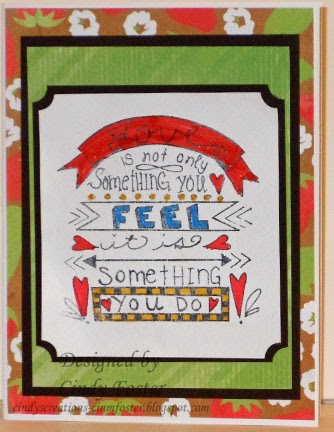
Love is not something you FEEL . . .

it is something You Do!


Just a quick card for Valentine's Day.

Recipe:
Paper: DCWV Summer Breeze Stack; Recollection cardstock - White and brown
Ink: Stazon - Jet Black
Markers: Stampin' Up - Poppy Parade, Crushed Curry; Marvy 1122 le Plume II - # 75 skyblue; unknown red
Punch: Stampin' Up - Corner Ticker
Misc.: clear embossing powder, adhesive

Friday, February 7, 2014

Deer Tags - Christmas Card Challenges

At the Christmas Card Challenges blog they have a tag challenge going on.  We can never have to may tags so I pulled out some of my scraps to create a few guy tags as I can never have to many guy tags.


I started by tracing around a shipping tag onto some cardstock and cutting it out.  I then pulled out some Christmas paper, distressed it, inked it and added to the front of my tag.  I used the Deer from the Birch Tree Accessories and die cut a few of them and inked the edges.

 
The "let it snow" is another Unity stamp and this was stamped then cut out. Keeping things consistent I inked around the edges with the distress ink.  I have them up a zot to add a little bit of dimension.  I used wet glue on this and they are buckling a little but a day under a book with have them flat.  To finish off the top I added some embroidery yarn.
 
Thanks for stopping by.

Recipe:
Paper: Recollections - Kraft and white, Bright and Jolly stack (white snowflake paper); DCWV - The Christmas Stack (stripe paper); Unknown tan and orange (deer)
Stamp: Unity Kit of the Month September 2013 {happiness has no limit}
Ink: Distress Ink - Vintage Photo; Versa Magic - Aegean Blue and Pearlescent Ivy
Die: Taylored Expressions - Birch Tree Accessories
Misc.: Adhesive, zots, distress tool, embroidery yarn, scissors, Cuttlebug

Friday, January 31, 2014

Grab life by the Handlebard

It's Friends With Flair Day at Unity Stamps.  After yesterday I'm ready for a little bit of warm weather and nice roads.  So I pulled out the June 2013 Kit of the Month as it had the perfect stamp. 


Thanks for stopping by.
 
Entered into Friends with Flair Challenge.
1 card for Operation Write Home
 
Cutting Instructions:
Card Base: 8 1/2" x 5 1/2", scored at 4 1/4"
Background: 4" x 5 1/2"
Brown: (top) 2"x2", (bottom) 2 1/2"x2 182"
Bike (stamped image): 2 5 /8"x 2 5/8"
Blue: 2 7/8" x 2 7/8"
Green: 1" x 4"
Sentiment banner: 1/2" x 3 1/8"


Recipe:
Paper: DCWV - Summer Dreams stack, kraft, blue and white cardstock
Stamp: Unity Kit of the Month June 2013 {love the little things}
Inks: Stazon - Jet Black; VersaMagic - Midnight Black
Misc.: Adhesive, clear embossing powder, scissors and zots

Saturday, January 25, 2014

MIssing You

Since I had my scrap pile out I decided to make another card based on yesterday's card.  This time I used a stamped Sentiment for the top of the card.

The cutting instructions are the same.  I just stamped my sentiment and inked the edges of all the pieces.


I added a border to the top and inked all the edges again.

Thanks for stopping by.

1 card for Operation Write Home

Cutting Instructions:
Card Base: 8 1/2" x 5 1/2", scored at 4 1/4"
White card base: 3 3/4" x 5 1/8".
Pattern paper Panels: 1 1/8" by 3 1/2"
Inside white: 4" x 5 1/4"

Recipe:
Paper: Recollections - white; Unknown Pattern Papers
Ink: Color Box
Stamp: Close to My Heart - From Me To You;
Ribbon: Stampin' Up - Rose Red 1/2" Seam Binding

Friday, January 24, 2014

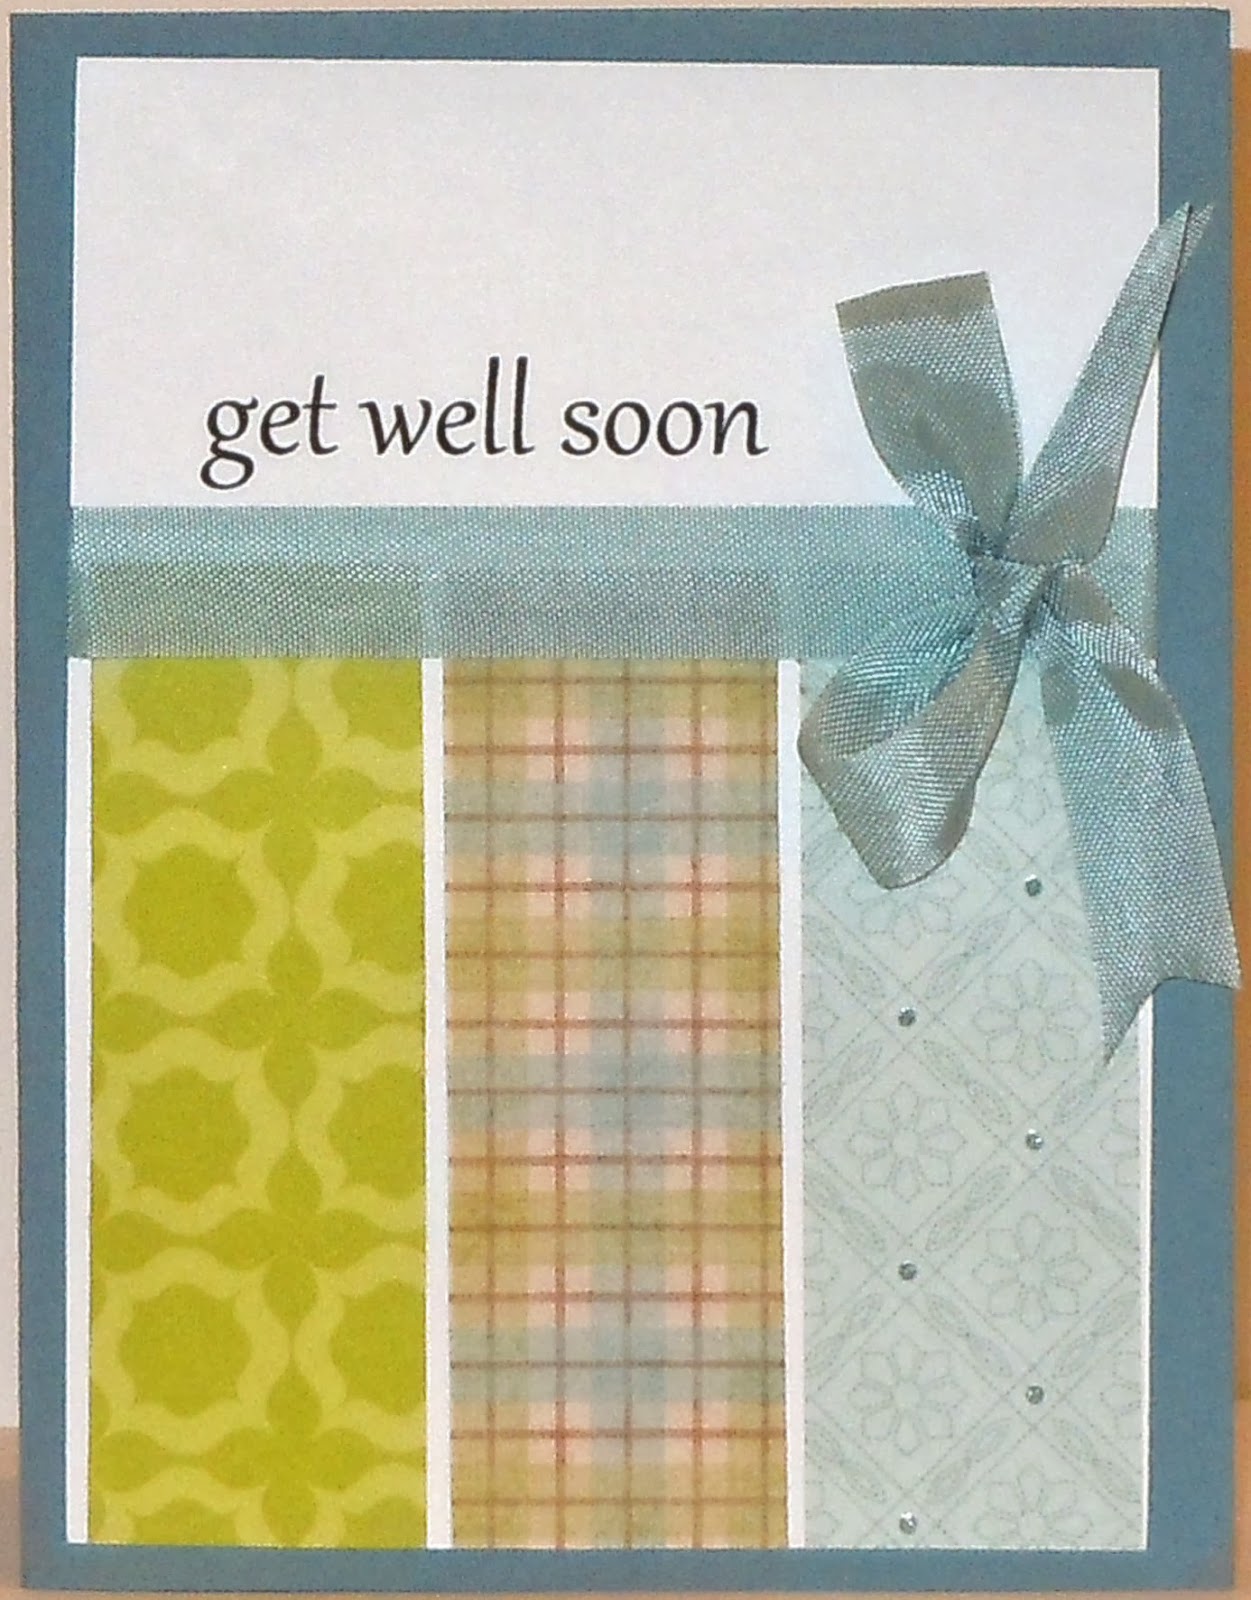
Get Well Soon

Today I'm the designer at Card A Day Blog and our weekly theme is "Get Well Soon".


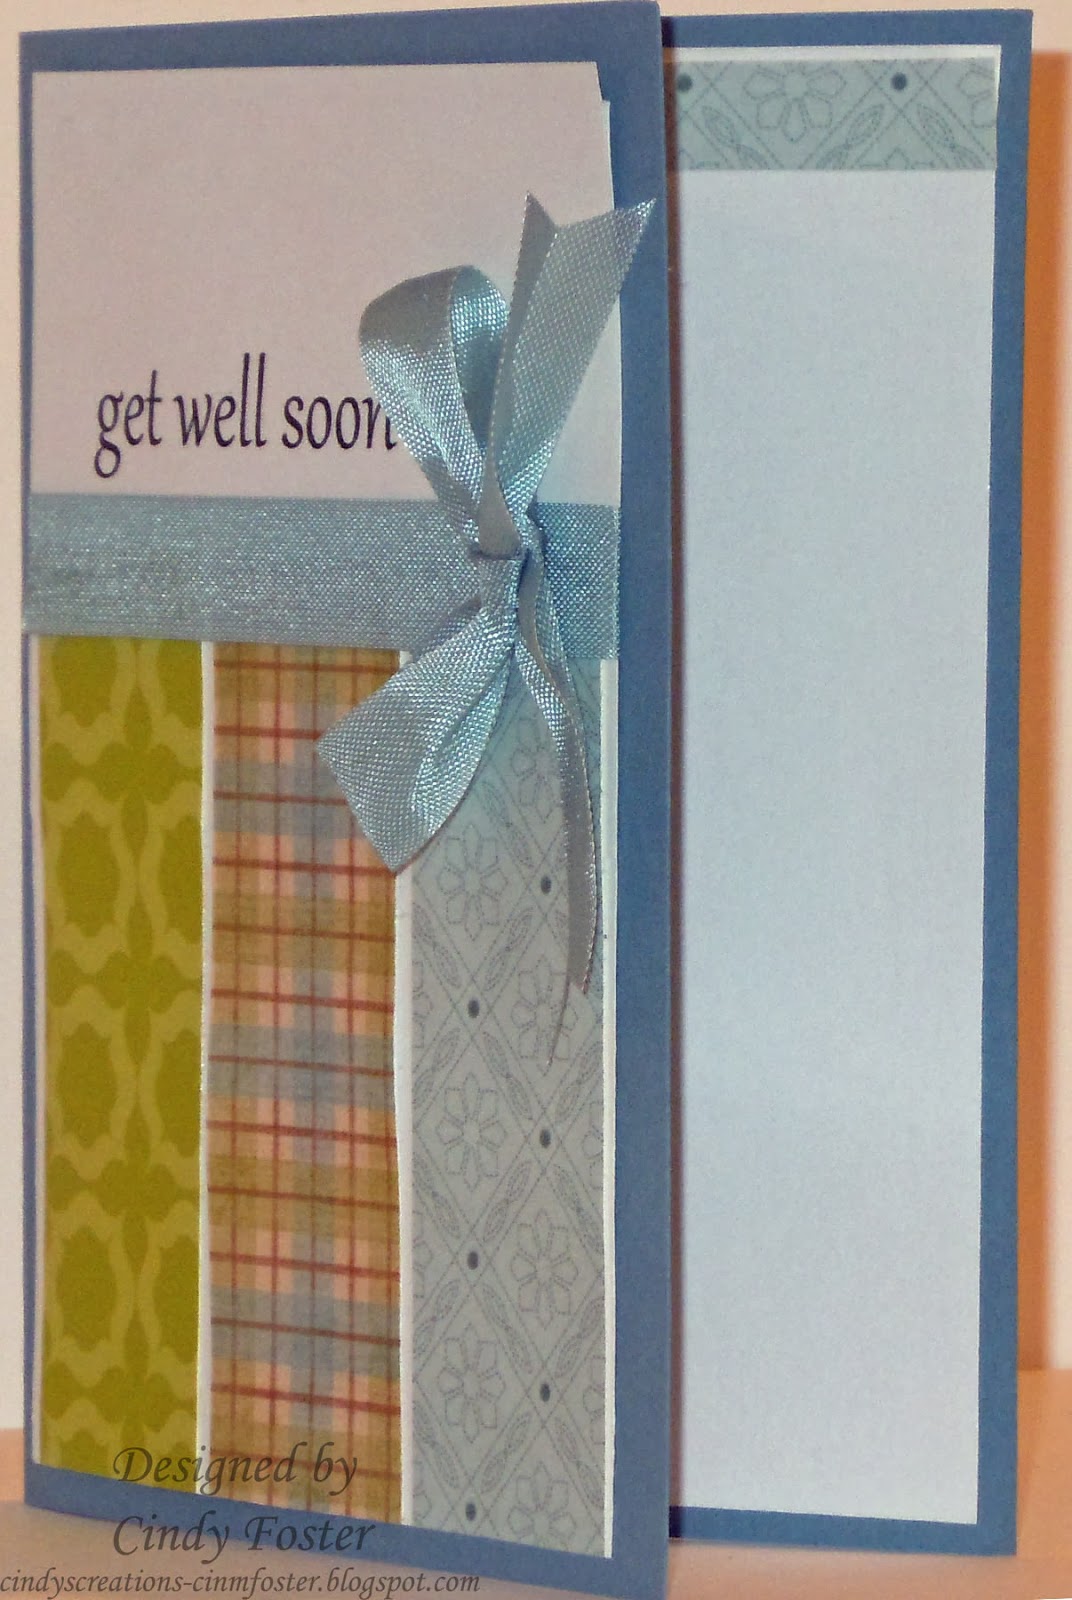
I normally use a Cricut cut for the "Get well soon" sentiment but today I used my computer.  I printed out the sentiment onto plain paper until I got the size and position I wanted.  I then printed it onto white cardstock.  My pattern paper panels are each cut at 1 1/8" by 3 1/2" and are layered on the bottom of the white cardstock with white showing between the panels.  I added the ribbon then glued everything to the card, made the bow and added it.


For the inside I added a small strip to the top of the card leaving a little bit of white cardstock showing through. No I did not ink any of my pieces and realized that after I had the card put together. 

Tomorrow Debi Barber is the designer so be sure to stop in and see what she had to inspire you. Thanks for stopping by.

Cutting Instructions:
Card Base: 8 1/2" x 5 1/2", scored at 4 1/4"
White card base: 3 3/4" x 5 1/8".
Pattern paper Panels: 1 1/8" by 3 1/2"
Inside white: 4" x 5 1/4"

Recipe:
Cardstock: Recollections - white and blue cardstock; Unknown scraps of pattern paper.
Ribbon: Stampin' Up - 1/2" Seam Binding - Baja Breeze
Font: Gabriola at 36

Wednesday, January 22, 2014

Thank You

Well I had a little bit of the pattern paper left in the prior post so I made another card.


I used the flowers and leaves to stamp on the pattern paper and cut it down to size. I stamped the sentiment then added the embroidery yarn and attached everything to the card base. The little pink flowers didn't turn out so well but I really like it on the inside of the card.


For the inside I stamped the flower and leaved off of the mat and added the strip across the top. I inked all the edges in the green since there was so much white on the card.


Thanks for stopping by.

Counterfeit Kit Challenge - January
5- 12x12 layouts
2 - 8 1/2 x 11 layouts
3 - Cards
1 - 12x12 re-done November Counterfeit Kit Layout

Cutting Instructions:
Card Base: 8 1/2" x 5 1/2", scored at 4 1/4"
White Background paper and inside mat: 5 1/4" x 4"
 Pattern Paper:3 1/2" x 4"

Recipe:
Paper: DCWV - white cardstock and Summer Dreams stack
Ink: Colorbox Ink
Stamp: Close to My Heart - From Me To You.
Ribbon: Added to Kit - embroidery yarn
Misc.: Adhesive

Missing You

Challenge #3 at the Counterfeit Kit Challenge is stamping on Pattern Paper.  So I started with the pattern paper and cut it down to size then stamped the heart three times across the top.  I started in the middle of the paper then stamped on either side.  I used scissors to cut the top of the paper away and inked the edges.


For the inside I inked the edges and added a strip of the pattern paper at the top.

 
Thanks for stopping by.

1 card for Operation Write Home
 
5- 12x12 layouts
2 - 8 1/2 x 11 layouts
2 - Cards
1 - 12x12 re-done November Counterfeit Kit Layout

Cutting Instructions:
Card Base: 8 1/2" x 5 1/2", scored at 4 1/4"
White Background paper: 5 1/4" x 4"
 Pattern Paper: 5" x 3 3/4"

Recipe:
Paper: DCWV - white, Summer Dreams Stack; Unknown - green
Ink: Colorbox - Scarlet
Stamps: Unity Kit of the Month - November 2013 {Strength and Joy}; CTMH - From Me To You
Misc.: Adhesive and scissors

Wednesday, January 15, 2014

Feeding the Chickens

Here's another Dearie Dolls Digital Image.  He's such a sweetheart in his bib overalls.  I kept this card pretty simple.  I don't know about you but I am never sure what size I need to make the digital images when I print them off, so this one is a little bit bigger.
 
I just added a yellow punched border on the left side for some more contrast.

 
I finished off the inside with some more punching and a strip of the pattern paper on the right side.
 
Thanks for stopping by.

1 card for Operation Write Home

Recipe:
Paper: Recollections- brown; Unknown pattern paper
Digital Stamp: Mary Ellen's Dearie Dolls Digi Stamps
Punch: Stampin' Up  - Scallop Trim and
Misc.: water color pencils and adhesive

Tuesday, January 14, 2014

Feeding the Birds

Hi everyone, thanks for stopping by.  Well we got another 4" of snow this morning and I thought that this image was perfect for today's snowy start.


This is another Dearie Dolls Digi stamp that I colored a while ago and am just getting to making the cards.  These are perfect images to include in my Operation Write Home box.

Thanks for stopping by.

Recipe:
Paper: Recollections- brown; Unknown pattern paper
Digital Stamp: Mary Ellen's Dearie Dolls Digi Stamps
Punch: Stampin' Up  - Spiral Border
Misc.: water color pencils and adhesive

Friday, January 10, 2014

Be Mine

Today I'm using another of Unity's December Kit of the Month Stamps and some more scraps from the DCWV - Summer Dreams Stack. Since the December kit was a lot of Valentine stamps I think it went really well with this paper pack. I have cutting instructions below. So this is a CASE card from Shilo at Paper meets glue, she is one of Unity's Designers. I just loved the way her card turned out and had to recreate one.


 I stamped the image onto white cardstock and colored it in with a few markers. I used the Fiskars cutter and template to cut out the image.  I then hand cut another oval in gray just to make it pop a little.  I added a few different layers and a doily to finish off the background.  A button and ribbon finish off the front of the card.


 Thanks for stopping by.

Entered into Friends with Flair Challenge.
1  card for OWH

Cutting Instructions:
White cardstock: 8 1/2" x 5 1/2", scored at 4 1/4"
Diagonal Stripe: 5 1/4" x 4"
Pink and white flower: 1/2" x 4, cut two

Recipe:
Paper: Cardstock: Scraps from DCWV - Summer Dream Stack, White and gray
Stamp: Unity Kit of the Month December 2013 {Happy love Day}, Doily cut in half
Ink: Stazon - Jet Black
Markers: Stampin' Write Markers - Blushing Bride, Melon Mambo, Bermuda Bay, Per Pizzazz; Marvy 1122 le Plume II - #74 Aquamarine
Ribbon: Stampin' Up - 1/2 Pear Pizzazz Seam Binding
Die Cut - Fiskars Oval 2 .25 x 3"
Misc.: Doily, red button, white embroidery yarn, scissors, adhesive, and zots

Friday, December 6, 2013

Christmas Tags

For December the Counterfeit Kit Challenge is doing things a little bit differently.  Instead of the Counterfeit Kit's they are doing a December Daily, where there is going to different inspiration each day in December. On December 3rd it's Christmas Tags.  I like to make up some general one for the guys to use. 


I started with the Santa Suite and stamped in red ink onto white cardstock then trimmed it out with scissors and punched the black cardstock as a base. 


I made a mini tag and added a strip of pattern paper then added my stamped and punched dec. 25.

For my last one I used the ornament stamp and punch.  I layered three of the stamped and punched ornament onto one punched out of scrap cardstock. Then layered everything onto the punched label.


So I made a total of 14 tags.
Santa Suit - 5 tags
dec. 25 - 5 tags
Christmas Ornament - 4 tags.

Thanks for stopping by.


Recipe:
Paper: Unknown cardstock and pattern papers as they are from my scrap pile.
Stamp: Stampin' Up - Tags til Christmas
Punch: Stampin' Up - Decorative Label, Tag Punch, Ornament Punch
Misc.: adhesive, embroidery yarn, embroidery thread

Monday, November 11, 2013

Veteran's Day

Today is Veteran's Day.  This is one of the many digital stamps I had downloaded and took with me to color on the trip to Austin.  I crocheted instead so I have been coloring these as time permits.
 
 
I don't normally use yellow as the base for a card, but I thought it went well with how I colored this one. It's a pretty simple card and everything is made out of what I had in my scrap pile.
 

I made the pinwheel out of 1 1/4" squares and added a button to the center of each one.

Thanks for stopping by.

1 card for OWH

Recipe:
Paper: Recollections- brown; Unknown pattern paper
Digital Stamp: Mary Ellen's Dearie Dolls Digi Stamps
Punch: Stampin' Up  - Scallop Trim
Misc.: water color pencils and adhesive, buttons

Wednesday, September 25, 2013

Dark Night Bat Wings

Hi everyone and thanks for joining me from the Card A Day Blog. This week’s theme is all about Halloween. I had this new stamp "Spooky dark night bat wings" from Unity Stamps that I wanted to use as a label on my jar, but I just couldn't get it to work.  So I used it as a tag instead and the bats inside my jar.  


 I started by stamping my jar onto white cardstock and cutting it out.  I then placed my bats inside my jar to get the placement, took my acrylic block and pressed them onto it, then inked my stamps.  While they were drying I punched the spider web in black cardstock (for the front of the card) and in the Frist Edition pattern paper (for the inside). I added my polka dot band to the spider web border and placed it on the card.  I then put the jar on the paper and once again placed the bats, pressed my acrylic block to them then inked them.  After I stamped all the bats I then started attaching everything to the card front.  


 For the inside of my card I use white cardstock for the memo section then added the First edition paper that I punched earlier to the back.  I also stamped another set of bats in the corner.


I was going to call it quits there but the jar looked like it need something to I added the neon ribbon around the top of it.  That neon ribbon is so old; my guys used it to make stuff out of pony beads, so I have no idea who made it. I also added stickles to the eyes of the bats.

Thanks for stopping by.

Cutting Instructions:
Card Base: 8 1/2" x 5 1/2", scored at 4 1/4"
Word Paper: 4" x 5 1/4"
Polka Dot Paper: 4" x 1 1/4"
Inside Card:  4 1/2" x 4"

Recipe:
Cardstock: Recollections - Black and white; DCWV - white; My Minds Eye - Day Dream Bugglegum Girl; Stampin' Up - Frist Edition
Stamps: Clear Stamps - Halloween Boogie (small and medium bats); Unity Stamps - Unity Kit of the Month - August 2012 {Colors of the Seasons}, August 2013 {cozy moments}
Ink: Stampin' Up - Basic Black and Basic Gray
Punch: Martha Stewart - Spider Web border
Ribbon: Stampin' Up - Cherry Cobber and Pear Pizzazz;
Stickles: Fruit Punch
Misc.: Adhesive, pop up dots, scissors, button, scrap of jute 

Monday, September 23, 2013

Pumpkin Girl

Hi everyone, thanks for stopping by.  I've got another fall/Thanksgiving card to share today.  I've used another Digital Image instead of a stamp today.

 
I added the blue paper on the left to tie into her shirt color, then punched a border to help highlight it a little more. I had just that little bit of red punched paper so I cut it into and added it to the bottom of the card.


Thanks for stopping by.

1 card for OWH

Recipe:
Cardstock: Recollections - orange, brown, red and white; Unknown Scrap of pattern paper
Punch: Stampin' Up - Scallop Trim and Eyelet Border
Digital Image: Mary Ellen's Dearie Dolls Digi Stamps.
Misc.: water color pencils, adhesive